Playback starts YouTube’s embedded player (privacy-enhanced mode).
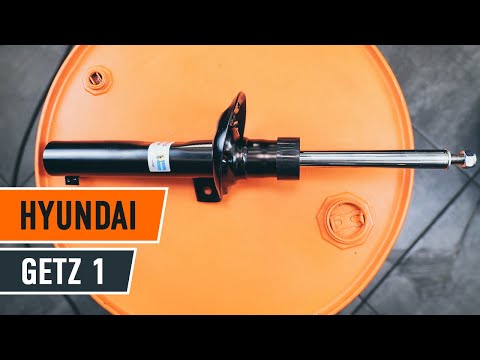
How to change front strut mount and shock absorbers HYUNDAI GETZ 1 TUTORIAL AUTODOC
Channelautodoc.co.ukDescription from the creator
How to change / change / install / replacement front strut mount / strut bearing and shock absorbers on HYUNDAI GETZ 1 TUTORIAL | AUTODOC
Top brands that produce strut mount and shock absorbers: BOSCH, STARK, SACHS, SKF, VAN WEZEL, VALEO, LuK, MAPCO, A.B.S., ATE.
📲 Buying via app is always cheaper than on the website!
❱❱ Install the AutoDoc App — interstitials.onelink.me/1036709825?pid=Youtube
On our website you will find a wide range of auto parts you are interested in: goo.gl/b8ZoPh
Strut mount: goo.gl/2JDb8L
Strut mount for HYUNDAI: goo.gl/2U1Kfq
Strut mount for HYUNDAI GETZ 1: goo.gl/UmefTE
Shock absorbers: goo.gl/sPSdcA
Shock absorbers for HYUNDAI: goo.gl/2DnDfx
Shock absorbers for HYUNDAI GETZ 1: goo.gl/ra8DhL
HYUNDAI Car parts: goo.gl/ZqQg6d
00:48 — Use a socket №14
01:07 — Use a socket №12
01:38 — Use a socket №17 and a open end wrench №17
03:19 — Use a phillips screwdriver
03:50 — Use a socket №12
04:41 — Use a special tool to take the spring out
05:12 — Use a socket №19
06:49 — Before installing new shock absorbers it is strongly recommended to pump them over for 3-5 times manually
Was this video helpful? Give it a thumbs-up and share it with your friends!
Have a look at other videos on our channel:
Have a look at other videos on our channel:
► LAND ROVER FREELANDER car repair — youtube.com/playlist?list=PLWep5LzT0sxla4Yr0ccu…
► How to replace front anti roll bar link on LAND ROVER FREELANDER TUTORIAL | AUTODOC — youtu.be/i8jCzvuN0yI
► How to replace front brake discs and brake pads Land Rover Freelander 1 Tutorial | Autodoc — youtu.be/5cyF7Fji63E
📢 AutoDoc in social media:
Facebook: facebook.com/autodoc.co.uk
Twitter: twitter.com/autodoc_berlin
YouTube: youtube.com/c/AutodocUk
Instagram: instagram.com/autodoc_autoparts
#autodoc #autodoctutorial
Disclaimer:
This video only contains tips and recommendations that could be helpful when carrying out car repairs or replacing parts. AUTODOC is not liable for any harm, injury or property damage incurred while carrying out repairs or replacements, that are a result of incorrect use or misinterpretation of the provided information. This video is for informational purposes only and does not guarantee achievement of a specific result. The user is personally liable for incorrect use of repair equipment, tools or car parts, in particular, when this use poses the risk of injury. AUTODOC strongly recommends being careful and adhering to the safety rules when doing any repair or replacement. Keep in mind that using low quality auto parts does not guarantee the proper level of road safety.
⚡ AUTODOC CLUB — club.autodoc.co.uk
Add your car to the AUTODOC CLUB garage and get personal recommendations on repair intervals — club.autodoc.co.uk/?to=/user/garage®-mod…
❱❱ Install the AUTODOC CLUB App — club.onelink.me/d2X8?pid=youtube-disc
About this tutorial
autodoc.co.uk published this 15:03 video tutorial on October 30, 2017. It has been watched 91,269 times on YouTube.
- Channel
- autodoc.co.uk
- Category
- Autos & Vehicles
- Duration
- 15:03
- Published
- October 30, 2017
- Views
- 91,269
- Likes
- 663
Tags
Share
This tutorial in other languages
- FRComment changer entretoise avant montage et amortisseurs HYUNDAI GETZ 1 TUTORIAL autodoc
- ESCómo cambiar montaje puntal delantero y amortiguadores Hyundai Getz 1 Tutorial AUTODOC
- PTComo mudar de montagem de braço dianteiro e amortecedores Hyundai Getz 1 TUTORIAL AutoDoc
- ITCome cambiare montare montante anteriore e ammortizzatori Hyundai Getz 1 TUTORIAL AutoDoc
- DEWie vordere Federbeinlager und Stoßdämpfer HYUNDAI GETZ 1 TUTORIAL AUTODOC sich ändern
- NLHoe te veranderen voorkant strut mount en schokdempers Hyundai Getz 1 TUTORIAL AutoDoc
- RUКак изменить передние стойки крепления и амортизаторы HYUNDAI GETZ 1 Учебное пособие AutoDoc
- PLJak zmienić mocowanie amortyzatora przód i amortyzatory HYUNDAI GETZ 1 TUTORIAL AutoDoc
- JAどのようにマウントフロントストラットを変更するとショックがHYUNDAI GETZ 1 TUTORIALのautodocの吸収体
- ARكيفية تغيير تبختر الجبهة جبل وامتصاص الصدمات HYUNDAI GETZ 1 TUTORIAL AUTODOC
- HIकैसे सामने अकड़ माउंट बदलने के लिए और आघात अवशोषक हुंडई गेट्ज 1 ट्यूटोरियल AUTODOC
- IDBagaimana mengubah strut depan mount dan shock peredam Hyundai Getz 1 TUTORIAL AUTODOC