Playback starts YouTube’s embedded player (privacy-enhanced mode).
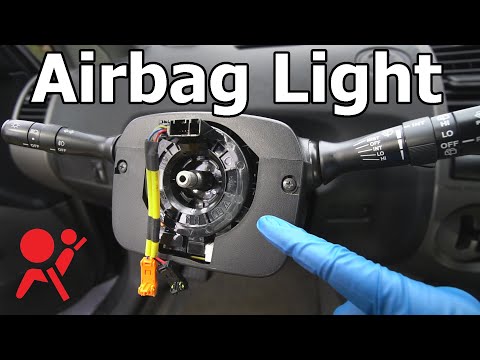
How to Replace a Clock Spring (airbag light & horn not working)
ChannelChrisFixIn brief
Fix a faulty clock spring to silence the airbag warning light and restore your horn and steering wheel controls—all without a mechanic. ChrisFix walks through removing the steering wheel and airbag safely, then replacing the spring using basic tools in under an hour. Ideal for DIYers tackling common car electrical issues.
Questions & answers
What tools are needed for this repair?
Steering wheel puller, torque wrench, ratchet, threadlocker, and the clock spring itself.
How do I know if my clock spring is faulty?
Check for airbag codes B1801/B1811 with an OBD2 scanner, or look for a non-working horn or unresponsive steering wheel buttons.
Description from the creator
Learn how to turn off your airbag light and fix a horn that doesn't work by replacing your clock spring. Replacing a clock spring is very simple, saves us over $600 and takes less than an hour. I will show you how to safely remove the airbag and steering wheel so you can replace the clockspring at home using common hand tools.
To figure out I had a bad clock spring, I used an obd2 scanner to scan the airbag light and got codes b1801 and b1811 which is an open squib circuit, which means the clock spring is bad. Another way to tell the clock spring is bad is the horn doesn't work and/or the steering wheel buttons don't work.
OBD2 Scanner (BlueDriver): amzn.to/2q5sC1Z
Service Manual for Torque Specs: haynes.com/en-us/
Steering wheel puller: amzn.to/2NUbofS
Torque Wrench: amzn.to/33B3dvA
Ratchet: amzn.to/2NzwZLt
Threadlocker: amzn.to/2p7qKW3
Clock spring: amzn.to/2p53acj
→ As an Amazon Associate I earn from qualifying purchases.
→ Become a ChrisFix Subscriber: youtube.com/subscription_center?add_user=paintb…
→ Instagram: instagram.com/chrisfixit
→ Facebook: facebook.com/chrisfix8
→ Website: ChrisFixed.com
→ My Channel Home Page: youtube.com/ChrisFix
**If the video was helpful, remember to give it a "thumbs up" and consider subscribing.**
Disclaimer:
Due to factors beyond the control of ChrisFix, I cannot guarantee against improper use or unauthorized modifications of this information. ChrisFix assumes no liability for property damage or injury incurred as a result of any of the information contained in this video. Use this information at your own risk. ChrisFix recommends safe practices when working on vehicles and or with tools seen or implied in this video. Due to factors beyond the control of ChrisFix, no information contained in this video shall create any expressed or implied warranty or guarantee of any particular result. Any injury, damage, or loss that may result from improper use of these tools, equipment, or from the information contained in this video is the sole responsibility of the user and not ChrisFix.
To figure out I had a bad clock spring, I used an obd2 scanner to scan the airbag light and got codes b1801 and b1811 which is an open squib circuit, which means the clock spring is bad. Another way to tell the clock spring is bad is the horn doesn't work and/or the steering wheel buttons don't work.
OBD2 Scanner (BlueDriver): amzn.to/2q5sC1Z
Service Manual for Torque Specs: haynes.com/en-us/
Steering wheel puller: amzn.to/2NUbofS
Torque Wrench: amzn.to/33B3dvA
Ratchet: amzn.to/2NzwZLt
Threadlocker: amzn.to/2p7qKW3
Clock spring: amzn.to/2p53acj
→ As an Amazon Associate I earn from qualifying purchases.
→ Become a ChrisFix Subscriber: youtube.com/subscription_center?add_user=paintb…
→ Instagram: instagram.com/chrisfixit
→ Facebook: facebook.com/chrisfix8
→ Website: ChrisFixed.com
→ My Channel Home Page: youtube.com/ChrisFix
**If the video was helpful, remember to give it a "thumbs up" and consider subscribing.**
Disclaimer:
Due to factors beyond the control of ChrisFix, I cannot guarantee against improper use or unauthorized modifications of this information. ChrisFix assumes no liability for property damage or injury incurred as a result of any of the information contained in this video. Use this information at your own risk. ChrisFix recommends safe practices when working on vehicles and or with tools seen or implied in this video. Due to factors beyond the control of ChrisFix, no information contained in this video shall create any expressed or implied warranty or guarantee of any particular result. Any injury, damage, or loss that may result from improper use of these tools, equipment, or from the information contained in this video is the sole responsibility of the user and not ChrisFix.
About this tutorial
ChrisFix published this 18:14 video tutorial on November 27, 2019. It has been watched 2,897,180 times on YouTube.
- Channel
- ChrisFix
- Category
- Autos & Vehicles
- Duration
- 18:14
- Published
- November 27, 2019
- Views
- 2,897,180
- Likes
- 64,669
Tags
Share
This tutorial in other languages
- FRComment remplacer un ressort Horloge (lumière du coussin gonflable et avertisseur sonore ne fonctionne pas)
- ESCómo reemplazar un muelle de reloj (luz del airbag y la bocina no funciona)
- PTComo substituir uma Primavera Clock (airbag luz & chifre não está funcionando)
- ITCome sostituire una molla a spirale (airbag luce e acustico non funziona)
- DEWie eine Wickelfeder ersetzen (Airbag Licht & Horn nicht funktioniert)
- NLHoe maak je een klokveer Vervang (airbag licht en hoorn werkt niet)
- RUКак заменить Часовая пружина (подушка свет и рога не работает)
- PLJak wymienić sprężyny zegarowej (poduszka powietrzna światła i klakson nie działa)
- JA時計春(エアバッグライト&ホーンが動作していない)の交換方法
- ARكيفية استبدال الربيع على مدار الساعة (الضوء وسادة هوائية وقرن لا يعمل)
- HIकैसे एक घड़ी वसंत बदलें (एयरबैग प्रकाश और सींग काम नहीं कर रहा)
- IDCara Mengganti Jam Musim Semi (airbag cahaya & horn tidak bekerja)