Playback starts YouTube’s embedded player (privacy-enhanced mode).
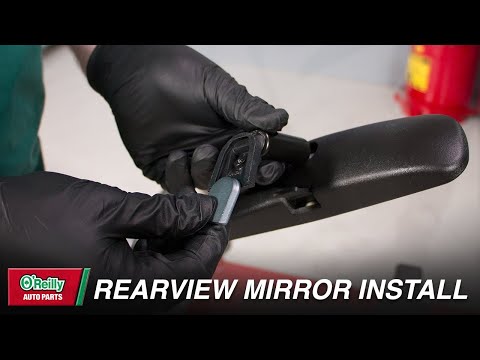
How To: Replace Your Vehicle's Rearview Mirror
ChannelO'Reilly Auto PartsChapters
Description from the creator
Replacing your vehicle's rearview mirror can be a quick and simple DIY job. Paying close attention to the included directions in the brand of adhesive you choose will ensure that when you replace your vehicle's rearview mirror, you don't run into too much trouble.
View the full job and shop supplies here:oreillyauto.com/how-to-hub/diy-rearview-mirror-…
Supplies Needed for This Job:
1. Safety Glasses: orly.cc/4e7cFKz
2. Gloves: orly.cc/3YKu3QZ
3. Rearview Mirror Adhesive: orly.cc/4hsGWG3
4. Rearview Mirror: orly.cc/3CxbkAa
5. Razor Blade: orly.cc/4grQBLL
6. Dashboard Duster: orly.cc/40NajMs
7. Glass Cleaner: orly.cc/3Et4zzU
8. Microfiber Towel: orly.cc/4hoGnx9
0:00 Welcome Back
0:38 Mark the Mirror Location
0:43 Detach the Mirror
0:48 Remove the Old Adhesive
1:15 Clean the Mounting Area
1:33 Attach the New Mount
2:13 Reattach the Mirror
Facebook: facebook.com/oreillyautoparts/
Instagram: instagram.com/oreillyautoparts/
Twitter: twitter.com/oreillyauto
Find your local O’Reilly Auto Parts: oreillyauto.com/locations
Discover Aztec 200 desert racing: bit.ly/4b3qMiu
Shop all your automotive needs: oreillyauto.com/
Subscribe and ring the notification bell! bit.ly/2bTyluF
On our channel we cover several different topics:
Automotive Product Overviews
Do It Yourself Automotive Repair
DIY Auto Maintenance
Simple Automotive Diagnostics
Automotive and Vehicle Education Videos
O’Reilly Auto Parts is an auto parts retailer that provides automotive aftermarket parts, tools, supplies, equipment, and accessories in the United States serving both the professional service providers and do-it-yourself customers. From our roots as a single store in 1957 to our current size of 5,219 locations (and growing), we've come a long way. We pride ourselves on offering well researched, and reliable automotive information on our channel.
#OReillyPowered #CarRepair
#CarMaintenance #TeamOReilly
Transcript:
Mark the outside of the windshield with a crayon to indicate exactly where the button was attached.
Detach the mounting button from the mirror bracket.
Scrape the inside windshield glass and the mounting button thoroughly with a new razor blade in order to remove all the old glue. Always scrape in a direction away from you.
Do It Right: Glass can be easily scratched, so keep the razor as close to parallel with the glass as possible. If the mirror is mounted in the dark strip at the top of the windshield, be especially careful.
Open the cleaner/activator towelette and clean the marked area on the inside of the windshield. Allow two minutes or wait until the area is completely dry. Do NOT touch the windshield after priming it with the towelette.
Look at the mounting button and be absolutely certain about how it should be oriented when you attach it to the windshield. The round end will be at the top, and the flat side should be against the glass. You'll have only one chance to attach it the right way. Open the glue and apply just one drop to the center of the button. Too much glue can run and cause problems.
Do It Right: It’s a good idea to use scissors to cut off a corner of the glue packet. This will allow you to control the amount and direction of the glue.
IMMEDIATELY apply the button to the windshield, making sure the correct side is up, and hold it firmly in place for sixty seconds. Most products, including the glue we used for this demonstration, will recommend waiting 15-30 minutes for the glue to set, but some professionals recommend 24 hours just to be certain the glue is completely dry before mounting the mirror to the button.
Do It Right: If the button is mounted incorrectly, it’s best to bond another button onto the original one rather than trying to remove it from the glass.
While the button is drying, clean off the crayon from the outside of the windshield. Refer to our DIY How to Clean Your Vehicle’s Windshield Inside and Out
Attach the mirror bracket to the mounting button.
View the full job and shop supplies here:oreillyauto.com/how-to-hub/diy-rearview-mirror-…
Supplies Needed for This Job:
1. Safety Glasses: orly.cc/4e7cFKz
2. Gloves: orly.cc/3YKu3QZ
3. Rearview Mirror Adhesive: orly.cc/4hsGWG3
4. Rearview Mirror: orly.cc/3CxbkAa
5. Razor Blade: orly.cc/4grQBLL
6. Dashboard Duster: orly.cc/40NajMs
7. Glass Cleaner: orly.cc/3Et4zzU
8. Microfiber Towel: orly.cc/4hoGnx9
0:00 Welcome Back
0:38 Mark the Mirror Location
0:43 Detach the Mirror
0:48 Remove the Old Adhesive
1:15 Clean the Mounting Area
1:33 Attach the New Mount
2:13 Reattach the Mirror
Facebook: facebook.com/oreillyautoparts/
Instagram: instagram.com/oreillyautoparts/
Twitter: twitter.com/oreillyauto
Find your local O’Reilly Auto Parts: oreillyauto.com/locations
Discover Aztec 200 desert racing: bit.ly/4b3qMiu
Shop all your automotive needs: oreillyauto.com/
Subscribe and ring the notification bell! bit.ly/2bTyluF
On our channel we cover several different topics:
Automotive Product Overviews
Do It Yourself Automotive Repair
DIY Auto Maintenance
Simple Automotive Diagnostics
Automotive and Vehicle Education Videos
O’Reilly Auto Parts is an auto parts retailer that provides automotive aftermarket parts, tools, supplies, equipment, and accessories in the United States serving both the professional service providers and do-it-yourself customers. From our roots as a single store in 1957 to our current size of 5,219 locations (and growing), we've come a long way. We pride ourselves on offering well researched, and reliable automotive information on our channel.
#OReillyPowered #CarRepair
#CarMaintenance #TeamOReilly
Transcript:
Mark the outside of the windshield with a crayon to indicate exactly where the button was attached.
Detach the mounting button from the mirror bracket.
Scrape the inside windshield glass and the mounting button thoroughly with a new razor blade in order to remove all the old glue. Always scrape in a direction away from you.
Do It Right: Glass can be easily scratched, so keep the razor as close to parallel with the glass as possible. If the mirror is mounted in the dark strip at the top of the windshield, be especially careful.
Open the cleaner/activator towelette and clean the marked area on the inside of the windshield. Allow two minutes or wait until the area is completely dry. Do NOT touch the windshield after priming it with the towelette.
Look at the mounting button and be absolutely certain about how it should be oriented when you attach it to the windshield. The round end will be at the top, and the flat side should be against the glass. You'll have only one chance to attach it the right way. Open the glue and apply just one drop to the center of the button. Too much glue can run and cause problems.
Do It Right: It’s a good idea to use scissors to cut off a corner of the glue packet. This will allow you to control the amount and direction of the glue.
IMMEDIATELY apply the button to the windshield, making sure the correct side is up, and hold it firmly in place for sixty seconds. Most products, including the glue we used for this demonstration, will recommend waiting 15-30 minutes for the glue to set, but some professionals recommend 24 hours just to be certain the glue is completely dry before mounting the mirror to the button.
Do It Right: If the button is mounted incorrectly, it’s best to bond another button onto the original one rather than trying to remove it from the glass.
While the button is drying, clean off the crayon from the outside of the windshield. Refer to our DIY How to Clean Your Vehicle’s Windshield Inside and Out
Attach the mirror bracket to the mounting button.
About this tutorial
O'Reilly Auto Parts published this 2:47 video tutorial on November 15, 2018. It has been watched 949,214 times on YouTube.
- Channel
- O'Reilly Auto Parts
- Category
- Autos & Vehicles
- Duration
- 2:47
- Published
- November 15, 2018
- Views
- 949,214
- Likes
- 3,821
Tags
Share
This tutorial in other languages
- FRComment faire pour remplacer Rearview Mirror de votre véhicule
- ESCómo: Reemplazar Espejo retrovisor de su Vehículo
- PTComo: Substituir espelho retrovisor do seu veículo
- ITCome: Sostituire specchio retrovisore del veicolo
- DEHow To: Ersetzen Rückspiegel des Ihr Fahrzeug
- NLHow To: Vervang uw voertuig achteruitkijkspiegel
- RUКак: Заменить зеркало заднего вида вашего автомобиля
- PLJak: Wymień swój pojazd w lusterku
- JA方法:あなたの車のバックミラーを交換してください
- ARكيفية: استبدال مرآة الرؤية الخلفية سيارتك
- HIकैसे: अपने वाहन के रियरव्यू मिरर बदलें
- IDCara: Ganti Kendaraan Anda untuk kaca spion