Playback starts YouTube’s embedded player (privacy-enhanced mode).
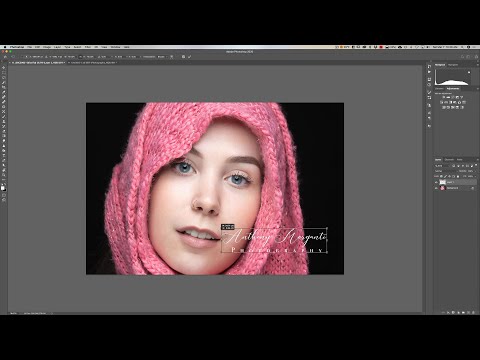
How to Create Your Own WATERMARK
ChannelAnthony MorgantiDescription from the creator
In this video I demonstrate how to create your own watermark. I do it in Photoshop but what I teach in the video is compatible with any application that supports Type and Layers. I begin by showing you where to source free fonts for both the Creative Cloud subscriber and those who are not. I demo how to install the fonts then we get down to creating the watermark. When the watermark is done, I demo how to create a brush to use in Photoshop and how to export PNG files for use in other applications.
Please follow me on Instagram:
instagram.com/anthonymorganti/
Get Free Fonts:
dafont.com
fontmeme.com/fonts/free-fonts-collection/
fontsquirrel.com
1001freefonts.com
Gear and Settings for Photo:
Nikon D850: amzn.to/2K498SZ
Nikon 70-200mm F2.8 VRii Lens: amzn.to/2WG1p5f
1/200, F11, iso: 64 at 180mm
Checkout my Recommended Gear List:
amazon.com/shop/anthonymorganti
If you're interested in Photoshop, Lightroom, Adobe Stock, and the Creative Cloud, you can find more info here:
bit.ly/2zwQ0nW
I use this software to record my screen:
telestream.pxf.io/DMrW2
Unsure of how to price your photography? Check the 2019 Guide to Pricing Your Photography:
amzn.to/2S1CiU7
All links above are my affiliate links. Please read my code of ethics statement for more info about my affiliations:
onlinephotographytraining.com/code-of-ethics/
THANK YOU for watching!
Please follow me on Instagram:
instagram.com/anthonymorganti/
Get Free Fonts:
dafont.com
fontmeme.com/fonts/free-fonts-collection/
fontsquirrel.com
1001freefonts.com
Gear and Settings for Photo:
Nikon D850: amzn.to/2K498SZ
Nikon 70-200mm F2.8 VRii Lens: amzn.to/2WG1p5f
1/200, F11, iso: 64 at 180mm
Checkout my Recommended Gear List:
amazon.com/shop/anthonymorganti
If you're interested in Photoshop, Lightroom, Adobe Stock, and the Creative Cloud, you can find more info here:
bit.ly/2zwQ0nW
I use this software to record my screen:
telestream.pxf.io/DMrW2
Unsure of how to price your photography? Check the 2019 Guide to Pricing Your Photography:
amzn.to/2S1CiU7
All links above are my affiliate links. Please read my code of ethics statement for more info about my affiliations:
onlinephotographytraining.com/code-of-ethics/
THANK YOU for watching!
About this tutorial
Anthony Morganti published this 22:21 video tutorial on March 14, 2020. It has been watched 36,473 times on YouTube.
- Channel
- Anthony Morganti
- Category
- Education
- Duration
- 22:21
- Published
- March 14, 2020
- Views
- 36,473
- Likes
- 810
Tags
Share
This tutorial in other languages
- FRComment créer votre propre FILIGRANE
- ESCómo crear su propio MARCA DE AGUA
- PTComo criar uma marca de água
- ITCome creare una filigrana
- DESo erstellen Sie Ihr eigenes Wasserzeichen
- NLHoe maak Uw eigen watermerk
- RUКак создать свой собственный ВОДЯНОЙ ЗНАК
- PLJak stworzyć swój własny znak wodny
- JA自分の透かしを作成する方法
- ARكيفية إنشاء العلامة المائية الخاصة بك
- HIअपनी खुद की वॉटरमार्क बनाने के लिए कैसे
- IDCara Membuat WATERMARK Sendiri