Playback starts YouTube’s embedded player (privacy-enhanced mode).
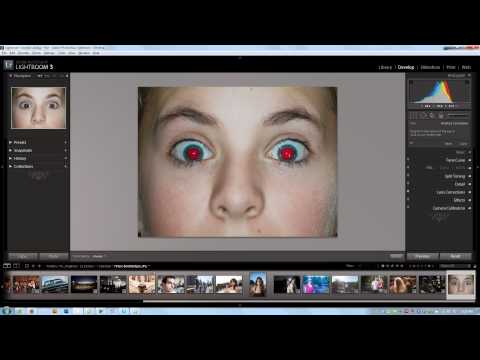
How to Fix Red Eye using the Red Eye Correction Tool - Lightroom 3 Video Tutorial
ChannelSLR Lounge | Photography TutorialsDescription from the creator
Full Article at - slrlounge.com/how-to-fix-red-eye-using-the-red-…
Lightroom is quite good when it comes to fixing red eye via the Red Eye Correction Tool. However, as you get more and more into photography, you should find that red eye reduction is rarely ever needed.
The reason being that red eye is actually created when you are shooting in low light with cameras that have flashes that are placed very close to the lens element. Because the pupil of our eyes are so wide open in low light settings, the light from the flash is entering the pupil and reflecting off of the blood in the blood vessels in the back of our eye. The reflected light comes out red and goes straight into the lens, and thus you have an image with red eye.
However, as you upgrade your camera to a DSLR and begin shooting with a hot shoe mounted flash, red eye rarely occurs because the light is no longer coming into the pupil at the exact same angle of the lens. As you begin bouncing your hot shoe flash, and then moving to off camera flash, you can pretty much kiss red eye completely bye bye. So, while it is important to know how to fix red eye, it may be a tool you rarely visit.
In this Lightroom video tutorial, we will teach you how to fix and remove red eye using Lightroom's Red Eye Removal Tool. It is a very simple process and we will be done in a jiffy, so sit back and enjoy!
Lightroom is quite good when it comes to fixing red eye via the Red Eye Correction Tool. However, as you get more and more into photography, you should find that red eye reduction is rarely ever needed.
The reason being that red eye is actually created when you are shooting in low light with cameras that have flashes that are placed very close to the lens element. Because the pupil of our eyes are so wide open in low light settings, the light from the flash is entering the pupil and reflecting off of the blood in the blood vessels in the back of our eye. The reflected light comes out red and goes straight into the lens, and thus you have an image with red eye.
However, as you upgrade your camera to a DSLR and begin shooting with a hot shoe mounted flash, red eye rarely occurs because the light is no longer coming into the pupil at the exact same angle of the lens. As you begin bouncing your hot shoe flash, and then moving to off camera flash, you can pretty much kiss red eye completely bye bye. So, while it is important to know how to fix red eye, it may be a tool you rarely visit.
In this Lightroom video tutorial, we will teach you how to fix and remove red eye using Lightroom's Red Eye Removal Tool. It is a very simple process and we will be done in a jiffy, so sit back and enjoy!
About this tutorial
SLR Lounge | Photography Tutorials published this 3:28 video tutorial on November 7, 2011. It has been watched 46,322 times on YouTube.
- Category
- Education
- Duration
- 3:28
- Published
- November 7, 2011
- Views
- 46,322
- Likes
- 115
Tags
Share
This tutorial in other languages
- FRComment réparer les yeux rouges à l'aide de la correction des yeux rouges Tool - Lightroom 3 Tutoriel vidéo
- ESCómo corregir ojos rojos usando la herramienta de corrección de ojos rojos - Lightroom 3 Video Tutorial
- PTComo corrigir olhos vermelhos usando a correção de olhos vermelhos Tool - Lightroom 3 Video Tutorial
- ITCome risolvere occhi rossi utilizzando la correzione dell'effetto occhi rossi Tool - Lightroom 3 Video Tutorial
- DEWie Fix Rote Augen Rote-Augen-Korrektur-Werkzeug mit - Lightroom 3 Video Tutorial
- NLHow To Fix Red Eye met behulp van de Rode-ogencorrectie Tool - Lightroom 3 Video Tutorial
- RUКак исправить красные глаза Коррекции красных глаз Инструмент - Lightroom 3 Видеоурок
- PLJak naprawić czerwonych oczu za pomocą Korekcja czerwonych oczu Tool - Lightroom 3 Video Tutorial
- JALightroomの3ビデオチュートリアル - 赤目補正ツールを使用して赤目を修正する方法
- ARكيفية إصلاح العين الحمراء باستخدام تصحيح العين الحمراء أداة - لايت 3 فيديو تعليمي
- HILightroom 3 वीडियो ट्यूटोरियल - रेड आई सुधार उपकरण का उपयोग कर लाल आँख को कैसे सुधारें
- IDCara Perbaiki Red Eye menggunakan Red Eye Correction Alat - Lightroom 3 Video Tutorial