Playback starts YouTube’s embedded player (privacy-enhanced mode).
Make Your Own Reflector DIY Tutorial
ChannelThe Slanted LensDescription from the creator
Reflectors are a great entry point into the world of lighting so today on The Slanted Lens, I am going to show you how to make one of your own. Let’s get started!
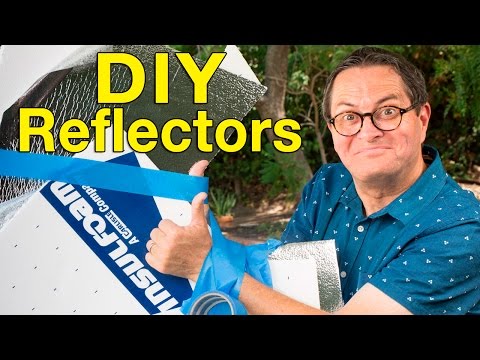
Bead foam reflectors have been used on photography and movie sets for years because they are cheap to make, easy to use and really effective. They are one of my favorite kinds of reflector because of the nice, soft light they give off. Just to make sure we are all on the same page here, bead foam is a type of styrofoam that looks like small foam beads pressed together – think cheap ice coolers.
I got a sheet of bead foam from Home Depot that measured 8'x4'x1' with shiny silver on one side and white on the other with some blue writing. This size is too large to work with or transport easily so the first thing I will do is cut the sheet in half to create two 4' square pieces. It would be difficult to remove the paper with the blue writing from the other side of the foam and while I could spray paint it, there is a quicker and cheaper way. The silver lining peels off the foam pretty easily to reveal clean, white foam. Leaving one of the squares with the silver lining intact, I peeled off the silver from the second square.
Now, I am going to put both squares together with the blue writing facing in and tape up the edges. You can add a spray adhesive here to stick the two pieces together better, but it isn’t necessary. You can use gaff of duct tape to tape the two pieces of foam together. It does not matter what color the tape is since it is just keeping the pieces together and preventing the bead foam from falling apart.
That’s it. Really, it is that simple to make a reflector. You can even skip the cutting and get sheets that are 4'x3' or 2'x3' if you prefer.
Now that you know how to make a reflector, it is time to learn how to use it properly. I have a new digital download available as part of the TSL Education Series that will teach you everything you need to know about reflectors – why to use them, what the different colors look like on a face, how to work with them alone, and 12 on-location setups to show you exactly how to use them. Go to theslantedlens.com/reflectors to find out more and get your copy today. Don’t wait!
Let me teach you how to start manipulating and shaping light and improve your photos and videos with one simple tool: a reflector. As always, keep those cameras rollin’ and keep on clickin’.
_______________
Subscribe to The Slanted Lens and get new videos every Thursday
youtube.com/subscription_center?add_user=TheSla…
Visit the webpage: theslantedlens.com
SCHEDULE
*New lessons and tutorials on the first and third Thursday of each month
*Trends from the Trenches on the second Thursday (bit.ly/1MEEVFB)
*Product Reviews on the fourth Thursday
Follow Jay P Morgan
Google Plus: bit.ly/1PAIIlC
facebook.com/theslantedlens1
twitter.com/theslantedlens
Bead foam reflectors have been used on photography and movie sets for years because they are cheap to make, easy to use and really effective. They are one of my favorite kinds of reflector because of the nice, soft light they give off. Just to make sure we are all on the same page here, bead foam is a type of styrofoam that looks like small foam beads pressed together – think cheap ice coolers.
I got a sheet of bead foam from Home Depot that measured 8'x4'x1' with shiny silver on one side and white on the other with some blue writing. This size is too large to work with or transport easily so the first thing I will do is cut the sheet in half to create two 4' square pieces. It would be difficult to remove the paper with the blue writing from the other side of the foam and while I could spray paint it, there is a quicker and cheaper way. The silver lining peels off the foam pretty easily to reveal clean, white foam. Leaving one of the squares with the silver lining intact, I peeled off the silver from the second square.
Now, I am going to put both squares together with the blue writing facing in and tape up the edges. You can add a spray adhesive here to stick the two pieces together better, but it isn’t necessary. You can use gaff of duct tape to tape the two pieces of foam together. It does not matter what color the tape is since it is just keeping the pieces together and preventing the bead foam from falling apart.
That’s it. Really, it is that simple to make a reflector. You can even skip the cutting and get sheets that are 4'x3' or 2'x3' if you prefer.
Now that you know how to make a reflector, it is time to learn how to use it properly. I have a new digital download available as part of the TSL Education Series that will teach you everything you need to know about reflectors – why to use them, what the different colors look like on a face, how to work with them alone, and 12 on-location setups to show you exactly how to use them. Go to theslantedlens.com/reflectors to find out more and get your copy today. Don’t wait!
Let me teach you how to start manipulating and shaping light and improve your photos and videos with one simple tool: a reflector. As always, keep those cameras rollin’ and keep on clickin’.
_______________
Subscribe to The Slanted Lens and get new videos every Thursday
youtube.com/subscription_center?add_user=TheSla…
Visit the webpage: theslantedlens.com
SCHEDULE
*New lessons and tutorials on the first and third Thursday of each month
*Trends from the Trenches on the second Thursday (bit.ly/1MEEVFB)
*Product Reviews on the fourth Thursday
Follow Jay P Morgan
Google Plus: bit.ly/1PAIIlC
facebook.com/theslantedlens1
twitter.com/theslantedlens
About this tutorial
The Slanted Lens published this 6:28 video tutorial on November 2, 2015. It has been watched 121,820 times on YouTube.
- Channel
- The Slanted Lens
- Category
- Education
- Duration
- 6:28
- Published
- November 2, 2015
- Views
- 121,820
- Likes
- 1,597
Share
This tutorial in other languages
- FRFaites votre propre réflecteur bricolage Tutorial
- ESHaga su propio reflector DIY Tutorial
- PTFaça o seu próprio refletor DIY Tutorial
- ITCrea il Tuo Riflettore fai da te Tutorial
- DEMachen Sie Ihren eigenen Reflektor DIY Tutorial
- NLMaak je eigen Reflector DIY Tutorial
- RUСделайте свой собственный отражатель DIY Учебник
- PLMake Your Own Reflektor DIY Tutorial
- JA自分のリフレクターDIYのチュートリアルを作ります
- ARجعل بنفسك DIY عاكس دروس
- HIअपनी खुद की परावर्तक DIY ट्यूटोरियल बनाओ
- IDMembuat Sendiri Reflector DIY Tutorial