Playback starts YouTube’s embedded player (privacy-enhanced mode).
How to enable wireless WLAN autoconfig service in your PC
ChannelĻέέ ħόήģDescription from the creator
Recorded with ScreenCastify (screencastify.com), the screen video recorder for Chrome
# What is WLAN autoconfig service??
WLAN AutoConfig service is built-in tool in Windows 7 that can be used to detect and connect to wireless network, of course you need to have wireless adapter installed on computer. This built-in wireless network connection tool is the same as what you use in Windows Vista, and is similar to wireless zero configuration tool in Windows XP. By default, this service is not enabled in a pc.....
# WLAN AutoConfig service not running...
If you do not activate this service, you need to use the other wireless utility which is provided by wireless adapter manufacturer in order to connect to wireless network. Personally I prefer to use this built-in wireless network connection tool as I don’t have to learn about different wireless utilities for different wireless adapters.
To start this service:
Three methods -
1) Services.msc
Step 1- Type services.msc on Search.
Step 2- Click Services when shows in Search.
Step 3- Right Click WLAN AutoConfig from the list of services listed. You may check the bottom of the list for it.
Step 4-
Click Start to run WLAN AutoConfig(WLANSVC Service)
Once you start WLAN AutoConfig(WLANSVC Service) on your computer, it will start discover available WiFi networks at your area.
2) CMD
CMD stands for Command Prompt....
There is a DOS command to activate this service. However, we must have administrative right to run this command because the DOS prompt must be run as administrator. Here we try command prompt method to run it on Windows computer (Vista and above) for a particular wireless interface.
Step 1- Run CMD as an administrator... (To run any program right click it and click on RUN AS ADMINISTRATOR..) Same for CMD....
Step 2- Type netsh and press enter.
Step 3- Type wlan and press enter.
Step 4- Start Wlansvc for a Wireless Interface.
This is the DOS Prompt command to start Wireless service on your Windows 8, 7 and Vista computer.
set autoconfig enabled=yes interface="Name of Wireless Network Connection"
Step 5-
Press enter after entering the command prompt command to start WLAN AutoConfig on your computer to finish the process.
Or
To start Wlansvc- net start Wlansvc
To stop Wlansvc- net stop Wlansvc
3) Registry Editor or Regedit
This method shows you how to change Startup type of WLAN AutoConfig from Registry Editor.
Step 1- Please go to Pearl button (Start) and click on the Search programs and files.
Step 2- Type regedit and press Enter.
Step 3- Confirm User Account Control pop-up.
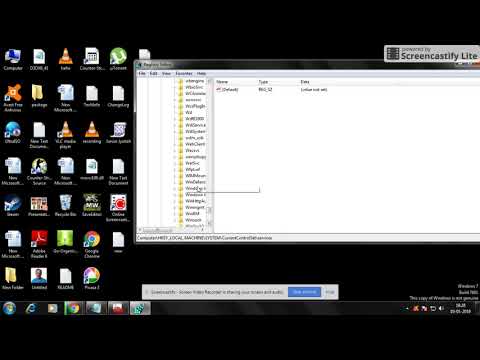
Step 4- Navigate to HKEY_LOCAL_MACHINE\SYSTEM\CurrentControlSet\services\Wlansvc and locate Start registry key.
Step 5- Double-click on Start and edit the value:
Change Startup type :
Automatic - 2
Manual - 3
Disabled - 4
Automatic (Delayed Start) - 2
Note: When you change to Automatic (Delayed Start) a new key DelayedAutostart is created with value 1.
When you change to Automatic from Automatic (Delayed Start), DelayedAutostart change value to 0.
# What is WLAN autoconfig service??
WLAN AutoConfig service is built-in tool in Windows 7 that can be used to detect and connect to wireless network, of course you need to have wireless adapter installed on computer. This built-in wireless network connection tool is the same as what you use in Windows Vista, and is similar to wireless zero configuration tool in Windows XP. By default, this service is not enabled in a pc.....
# WLAN AutoConfig service not running...
If you do not activate this service, you need to use the other wireless utility which is provided by wireless adapter manufacturer in order to connect to wireless network. Personally I prefer to use this built-in wireless network connection tool as I don’t have to learn about different wireless utilities for different wireless adapters.
To start this service:
Three methods -
1) Services.msc
Step 1- Type services.msc on Search.
Step 2- Click Services when shows in Search.
Step 3- Right Click WLAN AutoConfig from the list of services listed. You may check the bottom of the list for it.
Step 4-
Click Start to run WLAN AutoConfig(WLANSVC Service)
Once you start WLAN AutoConfig(WLANSVC Service) on your computer, it will start discover available WiFi networks at your area.
2) CMD
CMD stands for Command Prompt....
There is a DOS command to activate this service. However, we must have administrative right to run this command because the DOS prompt must be run as administrator. Here we try command prompt method to run it on Windows computer (Vista and above) for a particular wireless interface.
Step 1- Run CMD as an administrator... (To run any program right click it and click on RUN AS ADMINISTRATOR..) Same for CMD....
Step 2- Type netsh and press enter.
Step 3- Type wlan and press enter.
Step 4- Start Wlansvc for a Wireless Interface.
This is the DOS Prompt command to start Wireless service on your Windows 8, 7 and Vista computer.
set autoconfig enabled=yes interface="Name of Wireless Network Connection"
Step 5-
Press enter after entering the command prompt command to start WLAN AutoConfig on your computer to finish the process.
Or
To start Wlansvc- net start Wlansvc
To stop Wlansvc- net stop Wlansvc
3) Registry Editor or Regedit
This method shows you how to change Startup type of WLAN AutoConfig from Registry Editor.
Step 1- Please go to Pearl button (Start) and click on the Search programs and files.
Step 2- Type regedit and press Enter.
Step 3- Confirm User Account Control pop-up.
Step 4- Navigate to HKEY_LOCAL_MACHINE\SYSTEM\CurrentControlSet\services\Wlansvc and locate Start registry key.
Step 5- Double-click on Start and edit the value:
Change Startup type :
Automatic - 2
Manual - 3
Disabled - 4
Automatic (Delayed Start) - 2
Note: When you change to Automatic (Delayed Start) a new key DelayedAutostart is created with value 1.
When you change to Automatic from Automatic (Delayed Start), DelayedAutostart change value to 0.
About this tutorial
Ļέέ ħόήģ published this 7:47 video tutorial on November 15, 2018. It has been watched 66,754 times on YouTube.
Share
This tutorial in other languages
- FRComment activer le service sans fil WLAN autoconfig dans votre PC
- ESCómo activar el servicio de configuración automática de WLAN inalámbrica en su PC
- PTComo ativar o serviço autoconfig WLAN sem fio em seu PC
- ITCome abilitare il servizio Configurazione automatica WLAN wireless sul PC
- DEWie drahtlosen WLAN-Autokonfigurationsdienst in Ihrem PC zu ermöglichen,
- NLHoe maak je draadloze WLAN AutoConfig-service in uw pc in te schakelen
- RUКак включить беспроводную службу автонастройки WLAN в вашем ПК
- PLJak włączyć obsługę sieci bezprzewodowej WLAN autoconfig w komputerze
- JAどのようにあなたのPCでワイヤレスWLAN自動構成サービスを有効にします
- ARكيفية تمكين خدمة WLAN اللاسلكية التكوين التلقائي في جهاز الكمبيوتر الخاص بك
- HIकैसे अपने पीसी में वायरलेस WLAN autoconfig सेवा को सक्षम करने
- IDCara mengaktifkan layanan WLAN autoconfig nirkabel di PC Anda