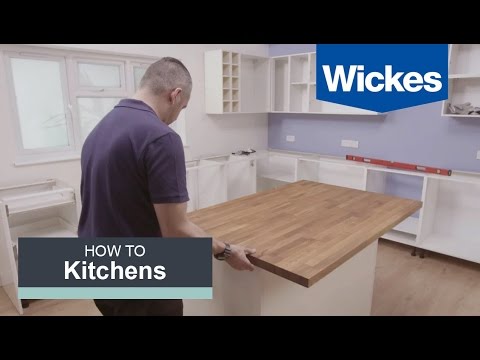
Playback starts YouTube’s embedded player (privacy-enhanced mode).
How to Build a Kitchen Island with Wickes
ChannelWickesDescription from the creator
Learn how to construct a functional kitchen island using two standard kitchen cabinets placed side-by-side and topped with a pre-cut worktop.
This simple project involves three main stages: constructing the cabinets and joining them, building the outer decorative shell, and finally, installing the plinth and worktop.
1. Work out the size and placement of your island.
2. Construct your kitchen cabinets (you can find instructions on how to build a kitchen cabinet here
3. Place the two cabinets where you want your kitchen island to be, making sure they're level using a spirit level.
4. Clamp the two cabinets together with a G clamp.
5. Remove the hinge plates and drill a hole underneath.
6. Screw through to the adjacent cabinet and replace the hinge plate.
7. At the back of the cabinets attach using screws through predrilled holes.
Now you'll need to construct the outer shell of your island using two base unit side panels and one breakfast bar back panel.
1. Work out where you'll attach your end panels to the floor by laying them out next to the cabinets.
2. Screw the L shaped brackets onto the end panel where the panel will meet the floor (screw 2 on each end panel for best support).
3. Clamp the side panels against the cabinets and place the back panel between - use duct tape to hold all three panels together.
4. Slide the cabinets out from the sides and back panels.
5. Using L shaped brackets attach all three panels to the floor, as well as, the two side panels to the back panel.
6. Slide the cabinet back between the side and back panels.
7. Attach the cabinets to the back panel using more L shaped brackets.
8. Attach the side panels to the cabinet by drilling through the cabinet from the inside using the predrilled holes.
9. Screw the cabinets to the side panels.
1. Place the correctly cut plinth in front of the cabinet feet.
2. Mark the centre point of the feet on the board.
3. Screw the brackets centrally to the mark and roughly halfway up the plinth.
4. Slide in the clip.
5. Clip the plinth onto the legs.
How to fit the worktop:
1. Place your work surface onto the cabinets and work out exactly how you want it to sit.
2. Using L shaped brackets, drill and attach the worktop to the cabinets, use support brackets on the overhang for extra support.
3. Finally, attach doors to your cabinets.
Watch more videos from our kitchen installation & joinery playlist and learn how to fit a worktop, hang wall cabinets, or build a kitchen island!
youtu.be/lc6qaIDzeOg
youtu.com/o-oLz0qiRB8
youtu.be/ivCG11oyDww
youtu.be/YjmnohxLfr8
youtu.be/7lBqerajXZs
For more information and advice on how to improve and maintain your kitchen visit our Ideas and Advice Section here: spklr.io/6004Bcwlo
Browse our Kitchen how-to-guides and learn how to install cabinets and worktops, fix leaking taps and sinks and more: spklr.io/6008BiizM
Subscribe to the Wickes YouTube channel here: youtube.com/user/wickesvideo
For more tips and general advice on how to do it yourself from Wickes, you can visit:
Wickes Website: wickes.co.uk/
Wickes Instagram: instagram.com/wickes/
Wickes Facebook: facebook.com/Wickes.co.uk
Wickes Twitter: twitter.com/Wickes
Wickes Pinterest channel: uk.pinterest.com/wickes/
This simple project involves three main stages: constructing the cabinets and joining them, building the outer decorative shell, and finally, installing the plinth and worktop.
1. Work out the size and placement of your island.
2. Construct your kitchen cabinets (you can find instructions on how to build a kitchen cabinet here
3. Place the two cabinets where you want your kitchen island to be, making sure they're level using a spirit level.
4. Clamp the two cabinets together with a G clamp.
5. Remove the hinge plates and drill a hole underneath.
6. Screw through to the adjacent cabinet and replace the hinge plate.
7. At the back of the cabinets attach using screws through predrilled holes.
Now you'll need to construct the outer shell of your island using two base unit side panels and one breakfast bar back panel.
1. Work out where you'll attach your end panels to the floor by laying them out next to the cabinets.
2. Screw the L shaped brackets onto the end panel where the panel will meet the floor (screw 2 on each end panel for best support).
3. Clamp the side panels against the cabinets and place the back panel between - use duct tape to hold all three panels together.
4. Slide the cabinets out from the sides and back panels.
5. Using L shaped brackets attach all three panels to the floor, as well as, the two side panels to the back panel.
6. Slide the cabinet back between the side and back panels.
7. Attach the cabinets to the back panel using more L shaped brackets.
8. Attach the side panels to the cabinet by drilling through the cabinet from the inside using the predrilled holes.
9. Screw the cabinets to the side panels.
1. Place the correctly cut plinth in front of the cabinet feet.
2. Mark the centre point of the feet on the board.
3. Screw the brackets centrally to the mark and roughly halfway up the plinth.
4. Slide in the clip.
5. Clip the plinth onto the legs.
How to fit the worktop:
1. Place your work surface onto the cabinets and work out exactly how you want it to sit.
2. Using L shaped brackets, drill and attach the worktop to the cabinets, use support brackets on the overhang for extra support.
3. Finally, attach doors to your cabinets.
Watch more videos from our kitchen installation & joinery playlist and learn how to fit a worktop, hang wall cabinets, or build a kitchen island!
youtu.be/lc6qaIDzeOg
youtu.com/o-oLz0qiRB8
youtu.be/ivCG11oyDww
youtu.be/YjmnohxLfr8
youtu.be/7lBqerajXZs
For more information and advice on how to improve and maintain your kitchen visit our Ideas and Advice Section here: spklr.io/6004Bcwlo
Browse our Kitchen how-to-guides and learn how to install cabinets and worktops, fix leaking taps and sinks and more: spklr.io/6008BiizM
Subscribe to the Wickes YouTube channel here: youtube.com/user/wickesvideo
For more tips and general advice on how to do it yourself from Wickes, you can visit:
Wickes Website: wickes.co.uk/
Wickes Instagram: instagram.com/wickes/
Wickes Facebook: facebook.com/Wickes.co.uk
Wickes Twitter: twitter.com/Wickes
Wickes Pinterest channel: uk.pinterest.com/wickes/
About this tutorial
Wickes published this 5:10 video tutorial on November 9, 2016. It has been watched 494,859 times on YouTube.
- Channel
- Wickes
- Category
- Howto & Style
- Duration
- 5:10
- Published
- November 9, 2016
- Views
- 494,859
- Likes
- 2,135
Share
This tutorial in other languages
- FRComment construire une île de cuisine avec Wickes
- ESCómo construir una isla de cocina con Wickes
- PTComo construir uma ilha de cozinha com Wickes
- ITCome costruire una cucina isola con Wickes
- DEWie baue ich eine Kücheninsel mit Wickes
- NLHoe maak je een keuken eiland met Wickes
- RUКак построить остров кухни с Wickes
- PLJak zbudować wyspę kuchni z Wickes
- JAウィックスとキッチンアイランドを構築する方法
- ARكيفية بناء جزيرة مطبخ مع مدينة ويكز
- HIकैसे Wickes के साथ एक रसोई द्वीप का निर्माण करने के लिए
- IDCara Buat Pulau Dapur dengan Wickes