Playback starts YouTube’s embedded player (privacy-enhanced mode).
How to Build a Wine Rack
ChannelRon HazeltonDescription from the creator
ronhazelton.com
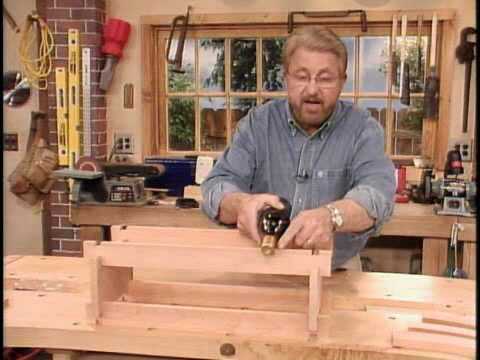
Home improvement expert Ron Hazelton shows how to build a wine rack, a perfect woodworking project for wine connoisseurs.
Transcript:
Whether you're a wine connoisseur, just like an occasional glass with dinner or want to learn some new woodworking techniques, you're going to love this next project. We're going to make a wine rack.
Now what I like about this particular design is that it's expandable, modular, simple and yet, as you'll see, quite elegant. We're going to make it out of one of my favorite woods, cherry.
So let's head to the table saw and start cutting. I'm cutting several pieces of wood to two basic sizes, these six inch by 12 inch pieces will serve as end panels, while narrower three inch by 24 inch cross rails will hold the bottles themselves. With all the wood cut to size, I'm about to cut several notches or dados. I'll put four in each end panel and four in each cross rail. These dado's will actually lock the cross rails and end panels together. To do this, I'm installing a dado set on the table saw. This consists of several cutters or chippers sandwiched between two saw blades. I've made a couple of other additions too. I've added what's called an auxiliary fence, just a piece of wood onto my miter gauge. There's some sandpaper glued to the front here to keep the wood from slipping and I've clamped this stop block on right here. Now that allows me to put the piece of wood in exactly where I want it so that that dado is going to be cut precisely one inch from the end and each time I put a piece of wood in here I'll simply slide it down into contact with that block and make our cut. Now one other thing we're going to do here to keep my fingers away from that blade, I'm going to clamp the wood on like that and I can hold this further back.
First, I cut dados in all the cross rails and then in all the end panels. So this is how the wine rack works, these cross rails just interlock with the end pieces like this and we can keep stacking them up or put one section next to another. Obviously one thing missing here though and that is that we have to have some way to support the wine bottles. So we're going to have to cut out some partial circles or arches, a smaller one for the neck and a larger one for the base of the bottle and we'll do that over here on the drill press.
We're going to cut out these arches with a hole saw. I've clamped a fence to the drill press right here. Cut a hole away using the saw itself so that I can position these right up against the edge like this, hold them in place, we'll just turn this on. I select hole saws that are slightly larger than the diameter of the bottleneck and body. First, I make the arches that will support the lower portion or body of the wine bottles. Then I switch to a smaller hole saw to cut semi circles that will accommodate the bottle necks. Finally, I use a drum sander installed on the drill press to smooth the edges.
An orbital sander is the best tool for smoothing the flat surfaces.
Finally, to bring out the natural beauty of the cherry, I apply a couple of coats of tongue oil. I have applied this oil quite liberally and after it's been sitting for just a few minutes, I want to wipe off the excess with a clean cloth. You never want to let this dry on the surface, otherwise you can end up with something that's a little bit sticky.
Well believe it or not here's our wine rack, large enough to hold 15 bottles of wine. It kind of goes together like a set of Lincoln logs. Take a look.
This rack will cradle a regular wine bottle just about perfectly, but it can also accommodate champagne bottles. So what you've got is something that's every bit as practical as it is good looking.
Home improvement expert Ron Hazelton shows how to build a wine rack, a perfect woodworking project for wine connoisseurs.
Transcript:
Whether you're a wine connoisseur, just like an occasional glass with dinner or want to learn some new woodworking techniques, you're going to love this next project. We're going to make a wine rack.
Now what I like about this particular design is that it's expandable, modular, simple and yet, as you'll see, quite elegant. We're going to make it out of one of my favorite woods, cherry.
So let's head to the table saw and start cutting. I'm cutting several pieces of wood to two basic sizes, these six inch by 12 inch pieces will serve as end panels, while narrower three inch by 24 inch cross rails will hold the bottles themselves. With all the wood cut to size, I'm about to cut several notches or dados. I'll put four in each end panel and four in each cross rail. These dado's will actually lock the cross rails and end panels together. To do this, I'm installing a dado set on the table saw. This consists of several cutters or chippers sandwiched between two saw blades. I've made a couple of other additions too. I've added what's called an auxiliary fence, just a piece of wood onto my miter gauge. There's some sandpaper glued to the front here to keep the wood from slipping and I've clamped this stop block on right here. Now that allows me to put the piece of wood in exactly where I want it so that that dado is going to be cut precisely one inch from the end and each time I put a piece of wood in here I'll simply slide it down into contact with that block and make our cut. Now one other thing we're going to do here to keep my fingers away from that blade, I'm going to clamp the wood on like that and I can hold this further back.
First, I cut dados in all the cross rails and then in all the end panels. So this is how the wine rack works, these cross rails just interlock with the end pieces like this and we can keep stacking them up or put one section next to another. Obviously one thing missing here though and that is that we have to have some way to support the wine bottles. So we're going to have to cut out some partial circles or arches, a smaller one for the neck and a larger one for the base of the bottle and we'll do that over here on the drill press.
We're going to cut out these arches with a hole saw. I've clamped a fence to the drill press right here. Cut a hole away using the saw itself so that I can position these right up against the edge like this, hold them in place, we'll just turn this on. I select hole saws that are slightly larger than the diameter of the bottleneck and body. First, I make the arches that will support the lower portion or body of the wine bottles. Then I switch to a smaller hole saw to cut semi circles that will accommodate the bottle necks. Finally, I use a drum sander installed on the drill press to smooth the edges.
An orbital sander is the best tool for smoothing the flat surfaces.
Finally, to bring out the natural beauty of the cherry, I apply a couple of coats of tongue oil. I have applied this oil quite liberally and after it's been sitting for just a few minutes, I want to wipe off the excess with a clean cloth. You never want to let this dry on the surface, otherwise you can end up with something that's a little bit sticky.
Well believe it or not here's our wine rack, large enough to hold 15 bottles of wine. It kind of goes together like a set of Lincoln logs. Take a look.
This rack will cradle a regular wine bottle just about perfectly, but it can also accommodate champagne bottles. So what you've got is something that's every bit as practical as it is good looking.
About this tutorial
Ron Hazelton published this 4:09 video tutorial on November 9, 2010. It has been watched 316,704 times on YouTube.
- Channel
- Ron Hazelton
- Category
- Howto & Style
- Duration
- 4:09
- Published
- November 9, 2010
- Views
- 316,704
- Likes
- 924
Tags
Share
This tutorial in other languages
- FRComment construire un rack de vin
- ESCómo construir un estante del vino
- PTComo construir uma cremalheira do vinho
- ITCome costruire una cremagliera del vino
- DEWie baue ich eine Wine Rack
- NLHoe een Wijnrek Build
- RUКак построить винный шкаф
- PLJak zbudować stojak na wino
- JAワインラックを構築する方法
- ARكيفية بناء النبيذ الرف
- HIएक शराब रैक का निर्माण कैसे
- IDCara Buat Wine Rack