Playback starts YouTube’s embedded player (privacy-enhanced mode).
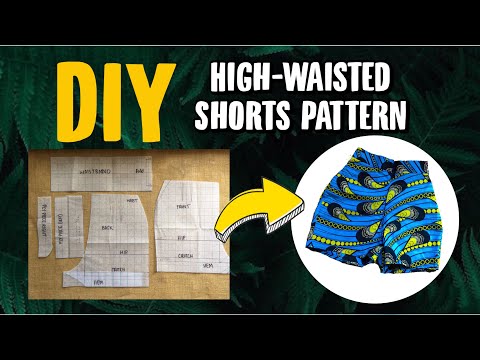
How To Draft A Pattern For High-Waisted Shorts #PatternDrafting | @quaintbawse
ChannelThe Quaint PursuitDescription from the creator
#SewQuaint #PatternDrafting #PatternMaking #HighWaistedShorts
In this video I teach you how to draft a pattern for a high waisted shorts. You can watch the video for a visual and audio guide but if you need extra guidance read the instructions listed below. If you have any questions you can send me a direct message on Instagram @quaintbawse and I’ll assist you the best way I can.
🧚🏽 You can get the PDF sewing pattern here: sewquaint.com/collections/sewing-patterns
It's an instant download with sizes XS - XL.
Tools Needed:
🧵 Pattern Paper
🧵 Ruler
🧵 French Curve
🧵 Tape Measure
🧵 Pen & Pencil
🧵 Sharpener & Eraser
🧵 Marker
🧵 Measurements
Measurements Needed:
📍Waist Circumference
📍 Hip Circumference
📍 Hip Depth
📍 Crotch Depth
📍 Thigh Circumference
📍 Length of Shorts
Steps:
1. Draw a T in the centre of your pattern paper. The vertical line represents length and the horizontal line represents width.
2. On the vertical line measure and mark the length of your shorts and square out from both sides of the line. This is now your thigh line.
3. Mark your hip arc (hip circumference / 4) on both sides of the horizontal line. This is now your waistline.
4. Measure and mark your hip depth and crotch depth from the top of the vertical line. Square out on both sides of the line. These are now your hip line and crotch line.
5. Measure and mark your hip arc on the hip line and crotch line on both sides.
6. Connect the waist, hip and crotch line using two vertical lines on both sides. The right side of your pattern will be the front of the shorts and the left side of the pattern will be the back of the shorts.
7. Measure your front hip line and divide it by 4. Extend the front crotch line by that much. This is your front inseam.
8. Measure the back hip line and divide it by 2. Extend the back crotch line by that much. This is your back inseam.
9. Extend the thigh line on both sides to meet the respective crotch lines.
10. Front dart:
- Divide your front waist line and hip line into two halves. Mark and draw a line connecting them. The front dart should be 3” long. Measure and mark that from the waist line. - The front dart should be 1/2” wide so measure and mark 1/4” on both sides of this vertical line. - Draw your dart legs from the two marks on the waistline to the end of the dart.
11. To minimize the waist line to fit your waist, measure the remaining length (that is your front waist line minus the dart) and divide it by two. Measure and mark this from your inseam and outseam.
12. Use a ruler to draw a straight line from the waistline to the hip line, then use a French curve to add the inseam curve to the crotch.
13. Use a ruler to connect the crotch line to the thigh line.
14. Use a French curve to draw a curve that will blend with your hip line on the outseam.
15. Back dart:
Divide your back waist line and hip line into two halves. Mark and draw a line connecting them. The back dart should be 4” long. Measure and mark that from the waist line. - The back dart should be 1” wide so measure and mark 1/2” on both sides of this vertical line. - Draw your dart legs from the two marks on the waistline to the end of the dart.
16. To minimize the waist line to fit your waist, measure the remaining length (that is your back waist line minus the dart) and divide it by two. Measure and mark this from your inseam and outseam.
17. Use a ruler to draw a straight line from the waistline to the hip line, then use a French curve to add the inseam curve to the crotch.
18. Use a ruler to connect the crotch line to the thigh line.
19. Use a French curve to draw a curve that will blend with your hip line on the outseam.
20. Measure and mark 1/2” seam allowances all the way around your front and back shorts pattern before cutting.
21. You can cut out these patterns and retrace them on fresh pattern paper so you can have allowance all around or you can indicate on your pattern that 1/2” needs to be add to the outseam when cutting from fabric.
22. Lower your front inseam by 1/2” and raise your back inseam by 1/2”. This is to compensate for your booty at the back of your pants and flat at the front of your pants.
23. Waistband: Draw a rectangle the length of your waist / 2 + 1/2” for seam allowance. The width of this rectangle should be 5”. Draw a fold symbol on your pattern which indicates that this part of the pattern should be placed on a fold.
24. Fly extension: Fly piece A - Draw a rectangle 9” long and 4” wide. This piece will be folded in half vertically once it’s cut from the fabric. Fly piece B - Draw a rectangle 9” long and 2” wide. Use a French curve to add a J shape to the bottom.
25. Cut your pattern from the pattern paper.
And that’s it!
Connect with me on:
🧶 Instagram — instagram.com/sewquaint/
🧶 TikTok — vm.tiktok.com/TTPdUrEdfm/
🧶Instagram - instagram.com/quaintbags/
In this video I teach you how to draft a pattern for a high waisted shorts. You can watch the video for a visual and audio guide but if you need extra guidance read the instructions listed below. If you have any questions you can send me a direct message on Instagram @quaintbawse and I’ll assist you the best way I can.
🧚🏽 You can get the PDF sewing pattern here: sewquaint.com/collections/sewing-patterns
It's an instant download with sizes XS - XL.
Tools Needed:
🧵 Pattern Paper
🧵 Ruler
🧵 French Curve
🧵 Tape Measure
🧵 Pen & Pencil
🧵 Sharpener & Eraser
🧵 Marker
🧵 Measurements
Measurements Needed:
📍Waist Circumference
📍 Hip Circumference
📍 Hip Depth
📍 Crotch Depth
📍 Thigh Circumference
📍 Length of Shorts
Steps:
1. Draw a T in the centre of your pattern paper. The vertical line represents length and the horizontal line represents width.
2. On the vertical line measure and mark the length of your shorts and square out from both sides of the line. This is now your thigh line.
3. Mark your hip arc (hip circumference / 4) on both sides of the horizontal line. This is now your waistline.
4. Measure and mark your hip depth and crotch depth from the top of the vertical line. Square out on both sides of the line. These are now your hip line and crotch line.
5. Measure and mark your hip arc on the hip line and crotch line on both sides.
6. Connect the waist, hip and crotch line using two vertical lines on both sides. The right side of your pattern will be the front of the shorts and the left side of the pattern will be the back of the shorts.
7. Measure your front hip line and divide it by 4. Extend the front crotch line by that much. This is your front inseam.
8. Measure the back hip line and divide it by 2. Extend the back crotch line by that much. This is your back inseam.
9. Extend the thigh line on both sides to meet the respective crotch lines.
10. Front dart:
- Divide your front waist line and hip line into two halves. Mark and draw a line connecting them. The front dart should be 3” long. Measure and mark that from the waist line. - The front dart should be 1/2” wide so measure and mark 1/4” on both sides of this vertical line. - Draw your dart legs from the two marks on the waistline to the end of the dart.
11. To minimize the waist line to fit your waist, measure the remaining length (that is your front waist line minus the dart) and divide it by two. Measure and mark this from your inseam and outseam.
12. Use a ruler to draw a straight line from the waistline to the hip line, then use a French curve to add the inseam curve to the crotch.
13. Use a ruler to connect the crotch line to the thigh line.
14. Use a French curve to draw a curve that will blend with your hip line on the outseam.
15. Back dart:
Divide your back waist line and hip line into two halves. Mark and draw a line connecting them. The back dart should be 4” long. Measure and mark that from the waist line. - The back dart should be 1” wide so measure and mark 1/2” on both sides of this vertical line. - Draw your dart legs from the two marks on the waistline to the end of the dart.
16. To minimize the waist line to fit your waist, measure the remaining length (that is your back waist line minus the dart) and divide it by two. Measure and mark this from your inseam and outseam.
17. Use a ruler to draw a straight line from the waistline to the hip line, then use a French curve to add the inseam curve to the crotch.
18. Use a ruler to connect the crotch line to the thigh line.
19. Use a French curve to draw a curve that will blend with your hip line on the outseam.
20. Measure and mark 1/2” seam allowances all the way around your front and back shorts pattern before cutting.
21. You can cut out these patterns and retrace them on fresh pattern paper so you can have allowance all around or you can indicate on your pattern that 1/2” needs to be add to the outseam when cutting from fabric.
22. Lower your front inseam by 1/2” and raise your back inseam by 1/2”. This is to compensate for your booty at the back of your pants and flat at the front of your pants.
23. Waistband: Draw a rectangle the length of your waist / 2 + 1/2” for seam allowance. The width of this rectangle should be 5”. Draw a fold symbol on your pattern which indicates that this part of the pattern should be placed on a fold.
24. Fly extension: Fly piece A - Draw a rectangle 9” long and 4” wide. This piece will be folded in half vertically once it’s cut from the fabric. Fly piece B - Draw a rectangle 9” long and 2” wide. Use a French curve to add a J shape to the bottom.
25. Cut your pattern from the pattern paper.
And that’s it!
Connect with me on:
🧶 Instagram — instagram.com/sewquaint/
🧶 TikTok — vm.tiktok.com/TTPdUrEdfm/
🧶Instagram - instagram.com/quaintbags/
About this tutorial
The Quaint Pursuit published this 12:28 video tutorial on April 4, 2020. It has been watched 67,574 times on YouTube.
- Channel
- The Quaint Pursuit
- Category
- Howto & Style
- Duration
- 12:28
- Published
- April 4, 2020
- Views
- 67,574
- Likes
- 1,737
Tags
Share
This tutorial in other languages
- FRComment rédiger un modèle pour taille haute Short #PatternDrafting | @quaintbawse
- ESCómo proyecto de un patrón Para Pantalones cortos de talle alto #PatternDrafting | @quaintbawse
- PTComo elaborar um padrão para alta Waisted Shorts #PatternDrafting | @quaintbawse
- ITCome al progetto di un modello per la vita alta Shorts #PatternDrafting | @quaintbawse
- DEWie man ein Muster für hoch taillierte Shorts #PatternDrafting Entwurf | @quaintbawse
- NLHoe maak je een patroon voor hoge taille shorts #PatternDrafting Ontwerp | @quaintbawse
- RUКак осадка шаблона для высокой талии шорт #PatternDrafting | @quaintbawse
- PLJak sporządzić wzorzec dla wysokim stanem Spodenki #PatternDrafting | @quaintbawse
- JAハイウエストショーツ#PatternDraftingのパターンを起草する方法| @quaintbawse
- ARكيفية صياغة خطة لعالية مخصر السراويل #PatternDrafting | quaintbawse
- HIकैसे उच्च waisted शॉर्ट्स #PatternDrafting के लिए एक पैटर्न का मसौदा तैयार करने | @quaintbawse
- IDCara Draft Sebuah Pola Untuk High-waisted Shorts #PatternDrafting | @quaintbawse