Playback starts YouTube’s embedded player (privacy-enhanced mode).
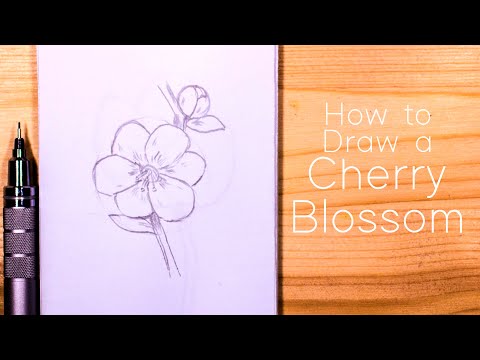
How to Draw Cherry Blossom (Sakura) : Step by Step for Beginners
ChannelJey RamDescription from the creator
✍️ Draw better today! Use this tutorial: jeyram.org/how-to-draw-a-cherry-blossom-step-by…
🖼️🥹 Draw Cute Characters and Expressions in a few simple lessons!: jeyram.art/cayutie
✏️ Learn to Draw in 4 Easy Lessons: jeyram.org/beginners
🎨 Make Real Artistic Progress with these Courses: jeyram.art/
I feel passionate about sharing my joy for drawing with anyone that wants to learn so I have designed these tutorials to be very beginner-friendly. I started drawing at a later age so I know it is a learnable skill.
Plus learning how to draw flowers is great for bullet journals and small gifts, people just love it when you give them a card with a hand-drawn floral arrangement on it. There is just something irreplaceable to a handmade item that looks beautiful.
I have created a 20 page Printable Workbook (PDF) that will teach you how to draw different floral arrangements. I wanted to create something that could really speed up someone's learning and actually get them drawing. I poured tons of time into it to make it as useful as possible to someone who wants to capture the elegance and beauty of flowers, I would looove it if you grabbed your copy and drew with me some more! Get it here: jeyram.org/shop/floral-drawing-workbook-printab…
Check out more simple step by step flower drawing instructions here: jeyram.org/flowers
Thank you for letting me share my love for drawing with you ♡
°✧ Text Instructions ✧°
Step 1. Guideline Circle
Yaay lets draw some cherry blossoms :D start with a large circle, this circle will be the guideline for the outer edge of the flower. The size of this circle defines the size of the flower.
Step 2. Bud Circle
Add a smaller circle towards the top right of the first circle, make sure that there is space between the two circles and that they dont touch. We will be using this smaller circle to draw a budding cherry blossom.
Step 3. Core Circle
Return to the large circle and add a small circle towards the center of the guideline circle. This will be the core of the flower.
Step 4. Small Line
Draw a small line from the top center of the core that is angled to the left.
Step 5. Second Line
Add a line of similar length but this time to the right side of the core.
Unfortunately, I can't fit the entire instructions in the description so check out the rest here: jeyram.org/how-to-draw-a-cherry-blossom-step-by…
🖼️🥹 Draw Cute Characters and Expressions in a few simple lessons!: jeyram.art/cayutie
✏️ Learn to Draw in 4 Easy Lessons: jeyram.org/beginners
🎨 Make Real Artistic Progress with these Courses: jeyram.art/
I feel passionate about sharing my joy for drawing with anyone that wants to learn so I have designed these tutorials to be very beginner-friendly. I started drawing at a later age so I know it is a learnable skill.
Plus learning how to draw flowers is great for bullet journals and small gifts, people just love it when you give them a card with a hand-drawn floral arrangement on it. There is just something irreplaceable to a handmade item that looks beautiful.
I have created a 20 page Printable Workbook (PDF) that will teach you how to draw different floral arrangements. I wanted to create something that could really speed up someone's learning and actually get them drawing. I poured tons of time into it to make it as useful as possible to someone who wants to capture the elegance and beauty of flowers, I would looove it if you grabbed your copy and drew with me some more! Get it here: jeyram.org/shop/floral-drawing-workbook-printab…
Check out more simple step by step flower drawing instructions here: jeyram.org/flowers
Thank you for letting me share my love for drawing with you ♡
°✧ Text Instructions ✧°
Step 1. Guideline Circle
Yaay lets draw some cherry blossoms :D start with a large circle, this circle will be the guideline for the outer edge of the flower. The size of this circle defines the size of the flower.
Step 2. Bud Circle
Add a smaller circle towards the top right of the first circle, make sure that there is space between the two circles and that they dont touch. We will be using this smaller circle to draw a budding cherry blossom.
Step 3. Core Circle
Return to the large circle and add a small circle towards the center of the guideline circle. This will be the core of the flower.
Step 4. Small Line
Draw a small line from the top center of the core that is angled to the left.
Step 5. Second Line
Add a line of similar length but this time to the right side of the core.
Unfortunately, I can't fit the entire instructions in the description so check out the rest here: jeyram.org/how-to-draw-a-cherry-blossom-step-by…
About this tutorial
Jey Ram published this 5:06 video tutorial on November 11, 2019. It has been watched 78,775 times on YouTube.
- Channel
- Jey Ram
- Category
- Howto & Style
- Duration
- 5:06
- Published
- November 11, 2019
- Views
- 78,775
- Likes
- 1,001
Share
This tutorial in other languages
- FRComment dessiner Cherry Blossom (Sakura): étape par étape pour les débutants
- ESCómo dibujar la flor de cerezo (Sakura): Paso a paso para principiantes
- PTComo desenhar flor de cerejeira (Sakura): Passo a Passo para Iniciantes
- ITCome disegnare Cherry Blossom (Sakura): passo dopo passo per principianti
- DEWie zeichnet man Kirschblüte (Sakura): Schritt für Schritt für Anfänger
- NLHoe te tekenen Cherry Blossom (Sakura): Stap voor stap voor beginners
- RUКак рисовать Cherry Blossom (Sakura): шаг за шагом для начинающих
- PLJak narysować Cherry Blossom (Sakura) krok po kroku dla początkujących
- JA初心者のためのステップバイステップ:桜(さくら)を描画する方法
- ARكيفية رسم زهرة الكرز (ساكورا): خطوة خطوة للمبتدئين
- HIशुरुआती चरण दर चरण: चेरी ब्लॉसम (Sakura) ड्रा कैसे
- IDBagaimana Menggambar Cherry Blossom (Sakura): Langkah demi langkah untuk Pemula