Playback starts YouTube’s embedded player (privacy-enhanced mode).
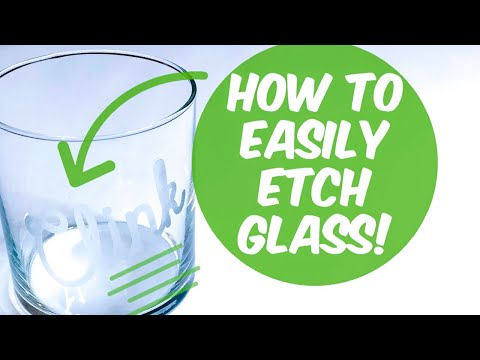
HOW TO ETCH GLASS EASILY USING YOUR CRICUT & ETCHING CREAM | CRAFTMAS DAY 5!
ChannelLauren LaskiDescription from the creator
The Craft Scraps Social Media:
**Follow me on Instagram - @thecraft_scraps
**Subscribe to my Youtube Channel for more tutorials - youtube.com/channel/UCLQmXfG9McbtLO7k6A2_nvA
**Like me on Facebook - facebook.com/thecraftscraps
*******************************************
SHOP:
**Shop Auntie Tay Materials (TRANSFER TAPE, VINYL, ETC.) - Use code “thecraftscraps” for 10% off your order! shopauntietay.com/
**Shop my Amazon Favorites (CRICUT TOOLS, SEALERS, PRODUCTS, ETC.)- amazon.com/shop/thecraft_scraps
*JOIN MAKERS GONNA LEARN makersgonnalearn.com/join
~ USE MY CODE “LAUREN10” TO GET $40 OFF YOUR YEARLY MEMBERSHIP FROM MAKERS GONNA LEARN! BECOME A MEMBER OF MAKERS GONNA LEARN AND GET ACCESS TO TUTORIALS, SVGs, FONTS, CUT FILES, AND SO MUCH MORE!
*I DO RECEIVE A SMALL COMMISSION ON MY CODES TO SUPPORT THE CHANNEL - THANK YOU!*
MATERIALS NEEDED
-Cricut machine
-Etching Cream - amazon.com/dp/B001BE3UM4/?ref=idea_lv_dp_ov_d&a…
815 Oramask Stencil Film OR Removable Vinyl
-Transfer Tape - don’t forget to use my code “thecraftscraps” for 10% off! shopauntietay.com/collections/transfer-tape/pro…
-Glass of some sort
-Q tips
1) Open Design Space
2) Make a new project/canvas - click “shapes” to create a rectangle or square (this is to make the stencil)
3) Insert your image or make a text box and arrange your text
4) Once you have the image/text how you want it, size the image appropriate for your sign size (if you have script or cursive text, you might need to ungroup it and move the letters together then WELD)
5) Once your text is how you want it, move the text ON TOP OF the square or rectangle shape (this will be your stencil)
6) Highlight both the shape and your text and click SLICE - this is creating your stencil
7) Move away the sliced layer of the stencil - you will be left with a shape with your text cut out of it aka a stencil
8) Once you have it sized how you want, click MAKE IT
9) Select your cut settings – for the Oramask 813 Stencil film, I used Vinyl + more pressure
10) Put your stencil film onto the mat – I used the light grip blue mat
11) Once the film is on your mat, load the mat into your Cricut using the flashing arrow buttons
12) Once loaded, press the flashing Cricut button to cut!
13) Once your stencil is cut, use your weeding tool to “weed out” or remove the letters or parts of the image that you want to paint
14) Once weeded, apply your transfer tape – stick the tape onto your stencil
15) Once the transfer tape is on your stencil, peel the transfer tape up – your stencil should come with it – you may need to get it started and help it out
16) Using the transfer tape as the carrier sheet, stick your stencil onto your surface
17) Using your scraper, press and smooth out the stencil (the tape is still on the stencil at this point)
18) Peel off the transfer tape – your stencil will be sticking to the sign - MAKE SURE THERE ARE NO BUBBLES NEAR THE PARTOF THE STENCIL YOU WILL BE ETCHING
19) Now it’s time to apply the etching cream - using a q-tip get a little cream and start to dab your stencil ! I do multiple light coats – be gentle!
20) Once fully covered, let your etching cream sit on the stencil for 10 minutes or more
21) rinse off etching cream and then peel off stencil
22) You’re done! Enjoy!
**Follow me on Instagram - @thecraft_scraps
**Subscribe to my Youtube Channel for more tutorials - youtube.com/channel/UCLQmXfG9McbtLO7k6A2_nvA
**Like me on Facebook - facebook.com/thecraftscraps
*******************************************
SHOP:
**Shop Auntie Tay Materials (TRANSFER TAPE, VINYL, ETC.) - Use code “thecraftscraps” for 10% off your order! shopauntietay.com/
**Shop my Amazon Favorites (CRICUT TOOLS, SEALERS, PRODUCTS, ETC.)- amazon.com/shop/thecraft_scraps
*JOIN MAKERS GONNA LEARN makersgonnalearn.com/join
~ USE MY CODE “LAUREN10” TO GET $40 OFF YOUR YEARLY MEMBERSHIP FROM MAKERS GONNA LEARN! BECOME A MEMBER OF MAKERS GONNA LEARN AND GET ACCESS TO TUTORIALS, SVGs, FONTS, CUT FILES, AND SO MUCH MORE!
*I DO RECEIVE A SMALL COMMISSION ON MY CODES TO SUPPORT THE CHANNEL - THANK YOU!*
MATERIALS NEEDED
-Cricut machine
-Etching Cream - amazon.com/dp/B001BE3UM4/?ref=idea_lv_dp_ov_d&a…
815 Oramask Stencil Film OR Removable Vinyl
-Transfer Tape - don’t forget to use my code “thecraftscraps” for 10% off! shopauntietay.com/collections/transfer-tape/pro…
-Glass of some sort
-Q tips
1) Open Design Space
2) Make a new project/canvas - click “shapes” to create a rectangle or square (this is to make the stencil)
3) Insert your image or make a text box and arrange your text
4) Once you have the image/text how you want it, size the image appropriate for your sign size (if you have script or cursive text, you might need to ungroup it and move the letters together then WELD)
5) Once your text is how you want it, move the text ON TOP OF the square or rectangle shape (this will be your stencil)
6) Highlight both the shape and your text and click SLICE - this is creating your stencil
7) Move away the sliced layer of the stencil - you will be left with a shape with your text cut out of it aka a stencil
8) Once you have it sized how you want, click MAKE IT
9) Select your cut settings – for the Oramask 813 Stencil film, I used Vinyl + more pressure
10) Put your stencil film onto the mat – I used the light grip blue mat
11) Once the film is on your mat, load the mat into your Cricut using the flashing arrow buttons
12) Once loaded, press the flashing Cricut button to cut!
13) Once your stencil is cut, use your weeding tool to “weed out” or remove the letters or parts of the image that you want to paint
14) Once weeded, apply your transfer tape – stick the tape onto your stencil
15) Once the transfer tape is on your stencil, peel the transfer tape up – your stencil should come with it – you may need to get it started and help it out
16) Using the transfer tape as the carrier sheet, stick your stencil onto your surface
17) Using your scraper, press and smooth out the stencil (the tape is still on the stencil at this point)
18) Peel off the transfer tape – your stencil will be sticking to the sign - MAKE SURE THERE ARE NO BUBBLES NEAR THE PARTOF THE STENCIL YOU WILL BE ETCHING
19) Now it’s time to apply the etching cream - using a q-tip get a little cream and start to dab your stencil ! I do multiple light coats – be gentle!
20) Once fully covered, let your etching cream sit on the stencil for 10 minutes or more
21) rinse off etching cream and then peel off stencil
22) You’re done! Enjoy!
About this tutorial
Lauren Laski published this 21:28 video tutorial on January 3, 2020. It has been watched 39,175 times on YouTube.
- Channel
- Lauren Laski
- Category
- Howto & Style
- Duration
- 21:28
- Published
- January 3, 2020
- Views
- 39,175
- Likes
- 1,061
Tags
Share
This tutorial in other languages
- FRCOMMENT EN VERRE FACILEMENT ATTAQUE UTILISATION DE VOTRE CRICUT & ATTAQUE CREAM | CRAFTMAS JOUR 5!
- ESCOMO grabar vidrio fácilmente usando SU de CRICUT y AGUAFUERTE CREAM | CRAFTMAS DÍA 5!
- PTCOMO ETCH VIDRO facilmente usando SEU cricut & ETCHING CREME | CRAFTMAS DIA 5!
- ITCOME ETCH GLASS FACILMENTE UTILIZZO cricut ed Acquaforte CREAM | CRAFTMAS GIORNO 5!
- DEWIE ETCH GLAS LEICHT IHR CRICUT & ÄTZEN Creme | CRAFTMAS TAG 5!
- NLHOE glas etsen gemakkelijk met behulp van de Cricut & ETCHING CREAM | CRAFTMAS DAG 5!
- RUКАК травить GLASS ЛЕГКО ИСПОЛЬЗОВАНИЕ Cricut и травление КРЕМ | CRAFTMAS ДЕНЬ 5!
- PLJAK ŁATWO ETCH GLASS UŻYTKOWANIE Cricut & akwaforta CREAM | CRAFTMAS DZIEŃ 5!
- JAHOW TO ETCH GLASS簡単にあなたのCricut&エッチングクリームを使用しました| CRAFTMAS DAY 5!
- ARHOW TO ETCH GLASS بسهولة باستخدام الخاص بك CRICUT والنقش CREAM | CRAFTMAS DAY 5!
- HIकैसे करने के लिए खोदना ग्लास आसानी से अपने Cricut और नक़्क़ाशी क्रीम का प्रयोग | CRAFTMAS दिन 5!
- IDCARA ETCH KACA DENGAN MUDAH MENGGUNAKAN CRICUT & Etching ANDA CREAM | CRAFTMAS HARI 5!