Playback starts YouTube’s embedded player (privacy-enhanced mode).
How to Fold Pieces Faster Tutorial - 3D Origami Basics
ChannelArthur 3D origamiDescription from the creator
Today you're going to learn exactly how to fold pieces for 3D Origami step by step. You will make them faster if you watch this video to the end. You will learn how to make one piece less than 8 seconds. Keep watching.
First take some sheets of paper format A4 or Letter. We usually use format of paper A4 but in North America you can use your common format of paper for printer Letter.
Fold sheets of paper in half. Fold them in half again. Then unfold them and fold sheets again. Unfold them and fold both sides to the middle. Like this. Fold sheets again. Unfold them and fold both sides to the middle.
Then make as I show you. Repeat it after me.
Take one side and fold it to the middle. Repeat it with another side. We will get 32 rectangles from each sheet. Take scissors and cut sheets along these lines. Like this.
And repeat it again and again.
We got 32 small rectangles from each sheet. We will use them for folding pieces.
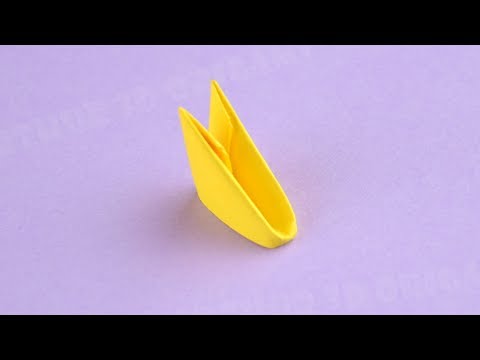
Take one rectangle and start folding pieces. Fold it in half and push in the middle of rectangle. Like this. Then fold one side. Like this. Repeat it. Fold a corner. Rotate it and repeat it. Fold it and push your finger thumb in the middle and fold two corners. We made a triangle piece for modular 3D origami.
Take another rectangle and repeat all steps.
And now let’s fold pieces on the speed. How many pieces you can fold in one minute?
Ready, set, go!
OK. Type your result in the comments below.
When you will make a lot of pieces your speed will increase more and more.
Your brain will evolve new skills and write them into the basal nuclei of the brain. And you will make origami pieces (modules) faster and faster.
And some time later you will can watch TV or listen music or listen audiobooks when you will fold pieces. You will fold pieces on automatism. And you will can make all the more complex figures.
OK. Now when you made many pieces you should widen their holes.
Take one piece and put on another piece. Repeat it.
But as you can see the first piece is too flattened. Take and disconnect the chain of pieces in the middle. And do it like this.
You will make all the pieces with wide holes in this way.
You can save pieces in plastic bags or boxes. And use them when you need them.
I hope you enjoyed this video and it deserved your likes!
See other video tutorials:
HOW TO MAKE AN ORIGAMI and other DIY PAPER CRAFT
youtube.com/playlist?list=PLbUAy4EbbEob4Pew4ZPS…
HOW TO MAKE 3D ORIGAMI: clearly tutorials by Arthur 3D origami channel
youtube.com/playlist?list=PLbUAy4EbbEoat2PB0soE…
Subscribe to get more paper craft ideas:
youtube.com/channel/UCwNBvoJ2WZGUf2C9VmY4jyQ
First take some sheets of paper format A4 or Letter. We usually use format of paper A4 but in North America you can use your common format of paper for printer Letter.
Fold sheets of paper in half. Fold them in half again. Then unfold them and fold sheets again. Unfold them and fold both sides to the middle. Like this. Fold sheets again. Unfold them and fold both sides to the middle.
Then make as I show you. Repeat it after me.
Take one side and fold it to the middle. Repeat it with another side. We will get 32 rectangles from each sheet. Take scissors and cut sheets along these lines. Like this.
And repeat it again and again.
We got 32 small rectangles from each sheet. We will use them for folding pieces.
Take one rectangle and start folding pieces. Fold it in half and push in the middle of rectangle. Like this. Then fold one side. Like this. Repeat it. Fold a corner. Rotate it and repeat it. Fold it and push your finger thumb in the middle and fold two corners. We made a triangle piece for modular 3D origami.
Take another rectangle and repeat all steps.
And now let’s fold pieces on the speed. How many pieces you can fold in one minute?
Ready, set, go!
OK. Type your result in the comments below.
When you will make a lot of pieces your speed will increase more and more.
Your brain will evolve new skills and write them into the basal nuclei of the brain. And you will make origami pieces (modules) faster and faster.
And some time later you will can watch TV or listen music or listen audiobooks when you will fold pieces. You will fold pieces on automatism. And you will can make all the more complex figures.
OK. Now when you made many pieces you should widen their holes.
Take one piece and put on another piece. Repeat it.
But as you can see the first piece is too flattened. Take and disconnect the chain of pieces in the middle. And do it like this.
You will make all the pieces with wide holes in this way.
You can save pieces in plastic bags or boxes. And use them when you need them.
I hope you enjoyed this video and it deserved your likes!
See other video tutorials:
HOW TO MAKE AN ORIGAMI and other DIY PAPER CRAFT
youtube.com/playlist?list=PLbUAy4EbbEob4Pew4ZPS…
HOW TO MAKE 3D ORIGAMI: clearly tutorials by Arthur 3D origami channel
youtube.com/playlist?list=PLbUAy4EbbEoat2PB0soE…
Subscribe to get more paper craft ideas:
youtube.com/channel/UCwNBvoJ2WZGUf2C9VmY4jyQ
About this tutorial
Arthur 3D origami published this 10:46 video tutorial on November 4, 2019. It has been watched 300,663 times on YouTube.
- Channel
- Arthur 3D origami
- Category
- Howto & Style
- Duration
- 10:46
- Published
- November 4, 2019
- Views
- 300,663
- Likes
- 3,934
Share
This tutorial in other languages
- FRComment plier Pièces Faster Tutorial - Notions de base Origami 3D
- ESCómo doblar piezas más rápido Tutorial - 3D Origami Fundamentos
- PTComo dobrar Pieces Faster Tutorial - 3D Origami Basics
- ITCome piegare pezzi più veloce Tutorial - 3D Origami Basics
- DEWie man Falten Stück schneller Tutorial - 3D Origami Basics
- NLHoe Fold Pieces Faster Tutorial - 3D Origami Basics
- RUКак сложить Кусочки Быстрее Учебник - 3D Оригами Основы
- PLJak Złożyć Kawałki Faster Tutorial - 3D Origami Podstawy
- JA3D折り紙の基礎 - より高速なチュートリアルピースを折る方法
- ARكيفية أضعاف قطع أسرع تعليمي - 3D اوريغامي أساسيات
- HIमोहरे तेज़ ट्यूटोरियल गुना कैसे - 3 डी Origami मूल बातें
- IDCara Lipat Potongan Cepat Tutorial - Origami Dasar 3D