Playback starts YouTube’s embedded player (privacy-enhanced mode).
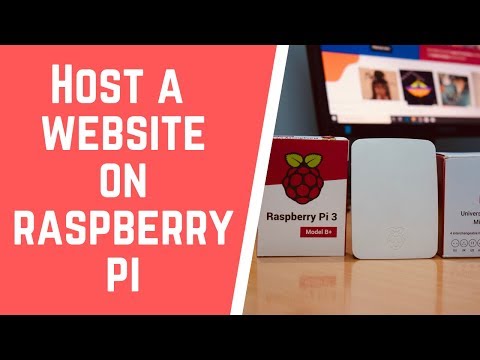
How to host a website on Raspberry Pi
ChannelTech N FitnessDescription from the creator
In this video, we are going to learn how you can create a web server from your home on a Raspberry Pi and host a website on it using WordPress. This tutorial is for all those enthusiasts who want to host a decent website from their home without spending a lot of money for hosting. The following are terminal commands that you need to execute in order to follow the complete process throughout the video timeline.
02:16 Installing Apache2 - sudo apt-get install apache2
05:03 Installing PHP - sudo apt install libapache2-mod-php7.0 libapache2-mod-php
05:51 Opening leafpad editor - sudo leafpad
07:16 Download MySQL (Maria DB) - sudo apt install mysql-server php-mysql
07:50 Restart Apache2 - sudo service apache2 restart
08:02 Change your directory to www - cd /var/www/html/
08:11 Remove all files from www dir - sudo rm *
08:22 Download wordpress - sudo wget wordpress.org/latest.tar.gz
08:44 Extract wordpress tarball - sudo tar xzf latest.tar.gz
09:06 Move contents of wordpress dir to www dir - sudo mv wordpress/* .
09:20 Tidy up www dir - sudo rm -rf wordpress latest.tar.gz
10:11 Changing ownership of wp files to Apache user - sudo chown -R www-data: .
10:22 Setup MySQL DB - sudo mysql_secure_installation
12:41 Run MySQL - sudo mysql -uroot -p
13:10 Create wordpress database - create database wordpress;
I hope this tutorial helps you to set up a website on your Raspberry Pi, if you have any questions or you are not able to follow certain steps, feel free to comment on this video and I shall be able to help.
------------------------------------------------------------------------------------------------
-About Me-
An IT guy by profession
A YouTuber by passion
Fitness enthusiasts by heart
Love for Motorsports & Rallying
Utkarsh Seth
------------------------------------------------------------------------------------------------
Checkout my new vlog - youtu.be/0UAFltHOtZ4
Want to create your own free internet tv station? Here's how to do it - youtu.be/inLw9VsOPLQ
We're also doing a FREE WHEY PROTEIN Giveaway, check it out - youtu.be/QyWzqL2JNW8
Looking for an action camera? Here to find it - youtu.be/gUDTHP0mcHo
My Facebook Page - facebook.com/TechNFitness/
My Instagram - @i.m.utkarshseth / @n33ra.sharma
-----------------------------------------------------------------------------------------------
Music Credits:
Song: Ship Wrek, Zookeepers & Trauzers - Vessel [NCS Release]
Music provided by NoCopyrightSounds.
Watch: youtu.be/PXf4rkguwDI
Download/Stream: ncs.io/VesselCr
bensound.com
02:16 Installing Apache2 - sudo apt-get install apache2
05:03 Installing PHP - sudo apt install libapache2-mod-php7.0 libapache2-mod-php
05:51 Opening leafpad editor - sudo leafpad
07:16 Download MySQL (Maria DB) - sudo apt install mysql-server php-mysql
07:50 Restart Apache2 - sudo service apache2 restart
08:02 Change your directory to www - cd /var/www/html/
08:11 Remove all files from www dir - sudo rm *
08:22 Download wordpress - sudo wget wordpress.org/latest.tar.gz
08:44 Extract wordpress tarball - sudo tar xzf latest.tar.gz
09:06 Move contents of wordpress dir to www dir - sudo mv wordpress/* .
09:20 Tidy up www dir - sudo rm -rf wordpress latest.tar.gz
10:11 Changing ownership of wp files to Apache user - sudo chown -R www-data: .
10:22 Setup MySQL DB - sudo mysql_secure_installation
12:41 Run MySQL - sudo mysql -uroot -p
13:10 Create wordpress database - create database wordpress;
I hope this tutorial helps you to set up a website on your Raspberry Pi, if you have any questions or you are not able to follow certain steps, feel free to comment on this video and I shall be able to help.
------------------------------------------------------------------------------------------------
-About Me-
An IT guy by profession
A YouTuber by passion
Fitness enthusiasts by heart
Love for Motorsports & Rallying
Utkarsh Seth
------------------------------------------------------------------------------------------------
Checkout my new vlog - youtu.be/0UAFltHOtZ4
Want to create your own free internet tv station? Here's how to do it - youtu.be/inLw9VsOPLQ
We're also doing a FREE WHEY PROTEIN Giveaway, check it out - youtu.be/QyWzqL2JNW8
Looking for an action camera? Here to find it - youtu.be/gUDTHP0mcHo
My Facebook Page - facebook.com/TechNFitness/
My Instagram - @i.m.utkarshseth / @n33ra.sharma
-----------------------------------------------------------------------------------------------
Music Credits:
Song: Ship Wrek, Zookeepers & Trauzers - Vessel [NCS Release]
Music provided by NoCopyrightSounds.
Watch: youtu.be/PXf4rkguwDI
Download/Stream: ncs.io/VesselCr
bensound.com
About this tutorial
Tech N Fitness published this 25:53 video tutorial on November 14, 2019. It has been watched 27,393 times on YouTube.
- Channel
- Tech N Fitness
- Category
- Howto & Style
- Duration
- 25:53
- Published
- November 14, 2019
- Views
- 27,393
- Likes
- 462
Tags
Share
This tutorial in other languages
- FRComment héberger un site Web sur Raspberry Pi
- ESCómo alojar un sitio web en Frambuesa Pi
- PTComo hospedar um site na Raspberry Pi
- ITCome ospitare un sito web su Raspberry Pi
- DEWie man eine Website auf Raspberry Pi Gastgeber
- NLHoe maak je een website op de Raspberry Pi hosten
- RUКак разместить сайт на Raspberry Pi
- PLJak zorganizować internetową na Raspberry Pi
- JAラズベリーパイのウェブサイトをホストする方法
- ARكيف لاستضافة موقع على شبكة الانترنت على التوت بي
- HIरास्पबेरी Pi पर एक वेबसाइट की मेजबानी के लिए कैसे
- IDBagaimana host sebuah situs web di Raspberry Pi