Playback starts YouTube’s embedded player (privacy-enhanced mode).
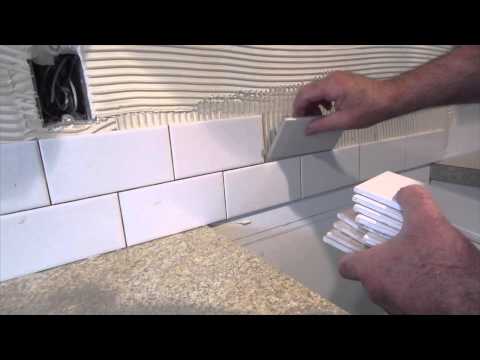
How to install a simple subway tile kitchen backsplash
ChannelSal DiBlasiIn brief
You’ll install a clean, professional-looking subway tile backsplash in your kitchen using mastic adhesive—ideal for dry areas like backsplashes. The process is straightforward, with built-in spacers on most tiles simplifying alignment. Perfect for DIYers tackling a kitchen refresh without needing advanced tools.
Questions & answers
Can I use mastic for a shower backsplash?
No—the description says mastic is only for dry areas like kitchen backsplashes.
Do I need ledger boards or bracing for subway tiles?
Not usually with mastic, unless tiles are very heavy.
How do I know which trowel size to use?
The mastic bucket includes a guide for selecting the correct trowel.
Description from the creator
SUBSCRIBE Learn how tile the right way
How to install a simple subway tile kitchen backsplash. Depending on the tile that is to be installed, and where it will be installed, it is sometimes appropriate to use mastic as an adhesive for the tile. When installing tile in a wet area such as a shower stall, mastic is not to be used, instead use a thinset mortar adhesive in areas that will be exposed to water. When using mastic to install subway tiles, ledger boards or bracing of the tile to prevent them from sliding down, will more than likely not be required. Mastic usually will hold a tile in place, unless the tile is very heavy. Mastic is a premixed adhesive that is sold in a bucket and is not thinset, and is not to be used in wet areas. A kitchen backsplash such as the one in this video is an instant where mastic is suitable. Use the correct size trowel to spread your mastic, the mastic bucket will have a description and a guide to help in the selection of the trowel for you tile. Once you have started to install your tile, always check to confirm that the coverage of adhesive on the back of the tile is adequate. Subway tiles more often than not will have automatic spacers on them; this will make it possible to just place a tile on to the next tile without the use of any other spaces. This is not always the case so check your tile before starting the installation. Once the tile is installed allow the mastic to set the appropriate amount of time before grouting. All tile installed by Sal DiBlasi, Elite-tile Company, in the Boston North Shore area. This video contains affiliate links, which means I will receive a small commission if you click on the product link. #tile #transformthetrade #howtotile #installingtile #howtoinstalltile #laticrete #mapei #Schlutersystems #diy #construction #ardex
🙂 This is my Amazon Store 🙂 amazon.com/shop/saldiblasi
🌲 Link Tree 🌲linktr.ee/saldiblasi
PayPal paypal.com/donate/?hosted_button_id=UMJSX3UHEHQ…
Patreon patreon.com/c/saldiblasi
☕ Buy me a coffee ☕
buymeacoffee.com/saldibs2
📷Camera Equipment 👇
DJI Action 2 Power Combo amzn.to/3xA5fMH
DJI Action 2 Dual-Screen amzn.to/3Qvk8IX
DJI Pocket 2 Creator Combo amzn.to/3mUr1pu
👇 Some of my favorite Tools 👇
Float amzn.to/2tdEpN2
Rubbing Stone amzn.to/2QrgRfh
Notched Trowel 1/4 x 1/4 x 1/4-inch amzn.to/36bq5mQ
Notched Trowel 1/2 x 1/2 x 1/2-Inch amzn.to/2Q5e90g
Notched Trowel 1/4 x 3/8 x 1/4-Inch amzn.to/39j1caB
Super Dust Collector – WaleTale amzn.to/2MDuVkK
Black Nitrile Gloves - 6 mil amzn.to/2SJQ6FZ
Margin Trowel amzn.to/352MYHx
Mortar Mixer amzn.to/2ZxYqtF
4in Sandpaper for Stone Polishing amzn.to/2ZB2skT
Polishing Rubber Backing Pad amzn.to/2srikdy
Montolit 63P3 24 Inch Tile Cutter amzn.to/2MDoFt l
DEWALT Wet Tile Saw amzn.to/2QqpO8O
Rubi Thinset mixer amzn.to/39VmNWV
Grabo Pro Lifter
amzn.to/3BBO5ys
IQ 7" Dustless/Dry Cut Tile Saw IQ228
amzn.to/3wFE3w0
Thanks For Watching
How to install a simple subway tile kitchen backsplash. Depending on the tile that is to be installed, and where it will be installed, it is sometimes appropriate to use mastic as an adhesive for the tile. When installing tile in a wet area such as a shower stall, mastic is not to be used, instead use a thinset mortar adhesive in areas that will be exposed to water. When using mastic to install subway tiles, ledger boards or bracing of the tile to prevent them from sliding down, will more than likely not be required. Mastic usually will hold a tile in place, unless the tile is very heavy. Mastic is a premixed adhesive that is sold in a bucket and is not thinset, and is not to be used in wet areas. A kitchen backsplash such as the one in this video is an instant where mastic is suitable. Use the correct size trowel to spread your mastic, the mastic bucket will have a description and a guide to help in the selection of the trowel for you tile. Once you have started to install your tile, always check to confirm that the coverage of adhesive on the back of the tile is adequate. Subway tiles more often than not will have automatic spacers on them; this will make it possible to just place a tile on to the next tile without the use of any other spaces. This is not always the case so check your tile before starting the installation. Once the tile is installed allow the mastic to set the appropriate amount of time before grouting. All tile installed by Sal DiBlasi, Elite-tile Company, in the Boston North Shore area. This video contains affiliate links, which means I will receive a small commission if you click on the product link. #tile #transformthetrade #howtotile #installingtile #howtoinstalltile #laticrete #mapei #Schlutersystems #diy #construction #ardex
🙂 This is my Amazon Store 🙂 amazon.com/shop/saldiblasi
🌲 Link Tree 🌲linktr.ee/saldiblasi
PayPal paypal.com/donate/?hosted_button_id=UMJSX3UHEHQ…
Patreon patreon.com/c/saldiblasi
☕ Buy me a coffee ☕
buymeacoffee.com/saldibs2
📷Camera Equipment 👇
DJI Action 2 Power Combo amzn.to/3xA5fMH
DJI Action 2 Dual-Screen amzn.to/3Qvk8IX
DJI Pocket 2 Creator Combo amzn.to/3mUr1pu
👇 Some of my favorite Tools 👇
Float amzn.to/2tdEpN2
Rubbing Stone amzn.to/2QrgRfh
Notched Trowel 1/4 x 1/4 x 1/4-inch amzn.to/36bq5mQ
Notched Trowel 1/2 x 1/2 x 1/2-Inch amzn.to/2Q5e90g
Notched Trowel 1/4 x 3/8 x 1/4-Inch amzn.to/39j1caB
Super Dust Collector – WaleTale amzn.to/2MDuVkK
Black Nitrile Gloves - 6 mil amzn.to/2SJQ6FZ
Margin Trowel amzn.to/352MYHx
Mortar Mixer amzn.to/2ZxYqtF
4in Sandpaper for Stone Polishing amzn.to/2ZB2skT
Polishing Rubber Backing Pad amzn.to/2srikdy
Montolit 63P3 24 Inch Tile Cutter amzn.to/2MDoFt l
DEWALT Wet Tile Saw amzn.to/2QqpO8O
Rubi Thinset mixer amzn.to/39VmNWV
Grabo Pro Lifter
amzn.to/3BBO5ys
IQ 7" Dustless/Dry Cut Tile Saw IQ228
amzn.to/3wFE3w0
Thanks For Watching
About this tutorial
Sal DiBlasi published this 10:07 video tutorial on October 26, 2013. It has been watched 3,319,233 times on YouTube.
- Channel
- Sal DiBlasi
- Category
- Howto & Style
- Duration
- 10:07
- Published
- October 26, 2013
- Views
- 3,319,233
- Likes
- 9,720
Tags
Share
This tutorial in other languages
- FRComment installer une cuisine de tuiles simples métro backsplash
- ESComo instalar una cocina de azulejos pared posterior sencilla de metro
- PTComo instalar um simples metrô cozinha da telha backsplash
- ITCome installare un semplice metro di piastrelle backsplash cucina
- DEWie eine einfache U-Bahn-Fliese Küche Aufkantung installieren
- NLHoe maak je een eenvoudige metro tegel keuken backsplash installeren
- RUКак установить простое метро плитки кухню обратной разбрызгивань
- PLJak zainstalować prosty metra płytek kuchennych backsplash
- JAシンプルな地下鉄のタイルキッチンbacksplashのインストール方法
- ARكيفية تثبيت المترو بسيط بلاط المطبخ باكسبلاش
- HIएक सरल मेट्रो टाइल रसोई backsplash स्थापित करने के लिए
- IDBagaimana menginstal subway sederhana ubin dapur backsplash