Playback starts YouTube’s embedded player (privacy-enhanced mode).
How to Install Plastic Pegboard in Minutes!
ChannelMother Daughter ProjectsDescription from the creator
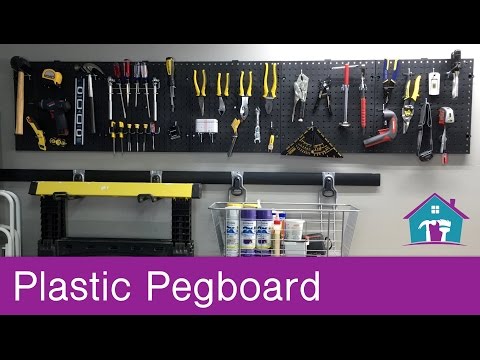
Join the Mother Daughter team of Vicki & Steph as we install plastic pegboard to hang tools in Steph’s garage. (Click ‘Show More’ for materials, tools, and tips)
Materials:
- 5 Everbilt 16x16 plastic pegboards
- Assorted peg hooks (choose what works best for your tools)
- Rubbermaid Fasttrack hardware packs (we have used these in many projects and they work really well for us- but any wood/drywall screws and anchors should work)
Tools
- Magnetic stud finder
- Pencil
- Level
- Rubbermaid hardware packs
- Screw driver/ drill bits
Steps
- We started by finding a stud, leveling our first board and marking where the screws will go. We added anchors where there were no studs and attached the board in place.
- We continued this process. The pegboards have grooves on each side to fit them together.
- With the pegboard in place, we added peg hooks and loaded them up with tools.
FYI: We are not professionals, and we don’t claim to be. This is what we found worked for our project. Yours may need a little different approach. Safety first!
Visit our website @ motherdaughterprojects.com
Like us on Facebook: facebook.com/motherdaughterprojects
Materials:
- 5 Everbilt 16x16 plastic pegboards
- Assorted peg hooks (choose what works best for your tools)
- Rubbermaid Fasttrack hardware packs (we have used these in many projects and they work really well for us- but any wood/drywall screws and anchors should work)
Tools
- Magnetic stud finder
- Pencil
- Level
- Rubbermaid hardware packs
- Screw driver/ drill bits
Steps
- We started by finding a stud, leveling our first board and marking where the screws will go. We added anchors where there were no studs and attached the board in place.
- We continued this process. The pegboards have grooves on each side to fit them together.
- With the pegboard in place, we added peg hooks and loaded them up with tools.
FYI: We are not professionals, and we don’t claim to be. This is what we found worked for our project. Yours may need a little different approach. Safety first!
Visit our website @ motherdaughterprojects.com
Like us on Facebook: facebook.com/motherdaughterprojects
About this tutorial
Mother Daughter Projects published this 1:43 video tutorial on November 13, 2016. It has been watched 17,356 times on YouTube.
- Channel
- Mother Daughter Projects
- Category
- Howto & Style
- Duration
- 1:43
- Published
- November 13, 2016
- Views
- 17,356
- Likes
- 140
Tags
Share
This tutorial in other languages
- FRComment faire pour installer Pegboard plastique en quelques minutes!
- ESCómo instalar plástico Pared perforada en minutos!
- PTComo instalar Plastic Pegboard em minutos!
- ITCome installare in plastica Pegboard in pochi minuti!
- DEWie aus Kunststoff Pegboard in wenigen Minuten installieren!
- NLHoe te installeren Plastic Pegboard in enkele minuten!
- RUКак установить Пластиковую Pegboard в считанных минутах!
- PLJak zainstalować Plastic blachy perforowanej w kilka minut!
- JA議事録にプラスチックフックボードをインストールする方法!
- ARكيفية تثبيت البلاستيك Pegboard في دقائق!
- HIकैसे मिनट में प्लास्टिक पेगबोर्ड स्थापित करने के लिए!
- IDCara Install Plastik Papan Lubang di Menit!