Playback starts YouTube’s embedded player (privacy-enhanced mode).
How to Install Thermostatic Radiator Valves | This Old House
ChannelThis Old HouseDescription from the creator
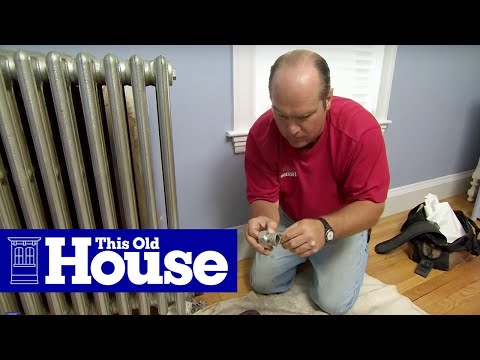
This Old House plumbing and heating expert Richard Trethewey enhances the performance of an old radiator with a new thermostatic valve. (See below for a shopping list and tools.)
SUBSCRIBE to This Old House: bit.ly/SubscribeThisOldHouse
What Does a Thermostatic Radiator Valve Do?
Thermostatic radiator valves control the heat output from a single radiator for better energy efficiency. In doing so, you also create mini-zones in your heating system.
Cost: $50 to $100
Time: 60 to 90 minutes
Skill level: Moderate. Requires basic plumbing skills and the strength to bust loose old threaded fittings
Shopping List for How to Install Thermostatic Radiator Valves:
- thermostatic radiator valve
- pipe sealant (dope), seals threaded fittings
- single-strand wicking, improves water-tight seal on threaded fittings
- canvas drop cloth, used to protect floor
Tools for How to Install Thermostatic Radiator Valves:
- two pipe wrenches, used to loosen and tighten threaded fittings
- spud wrench, used to loosen and tighten spud
- drill/driver, for drilling holes and driving screws
- 3/8-inch-diameter twist drill bit, for drilling hole in side of metal radiator cover
Thermostatic Valve Installation in 13 Steps
Drain water from radiator.
Use pipe wrenches to disconnect old valve from radiator.
Remove spud using a spud wrench and pipe wrench.
Apply thread sealant to new spud, then wrap single-strand wicking around the spud threads.
Use a spud wrench and pipe wrench to install the new spud.
Apply pipe dope and single-strand wicking to the threads of the existing pipe.
Install the new thermostatic radiator valve and tighten with a pipe wrench.
Apply pipe sealant to face of spud.
Tighten connection between spud and new valve using a pipe wrench.
Drill hole in radiator cover.
Feed wire through hole, then screw sensor to side of radiator cover.
Connect the sensor's wire to the valve.
Slide radiator cover into place.
About Ask This Old House TV:
Homeowners have a virtual truckload of questions for us on smaller projects, and we're ready to answer. Ask This Old House solves the steady stream of home improvement problems faced by our viewers—and we make house calls! Ask This Old House features some familiar faces from This Old House, including Kevin O'Connor, general contractor Tom Silva, plumbing and heating expert Richard Trethewey, and landscape contractor Roger Cook.
Looking for more step by step guidance on how to complete projects around the house? Join This Old House INSIDER to stream over 1,000 episodes commercial-free: bit.ly/2GPiYbH
Plus, download our FREE app for full-episode streaming to your connected TV, phone or tablet: thisoldhouse.com/pages/streaming-app
Follow This Old House and Ask This Old House:
Facebook: bit.ly/ThisOldHouseFB
Twitter: bit.ly/ThisOldHouseTwitter
bit.ly/AskTOHTwitter
Pinterest: bit.ly/ThisOldHousePinterest
Instagram: bit.ly/ThisOldHouseIG
bit.ly/AskTOHIG
For more on This Old House and Ask This Old House, visit us at: bit.ly/ThisOldHouseWebsite
How to Install Thermostatic Radiator Valves | This Old House
youtube.com/user/thisoldhouse/
SUBSCRIBE to This Old House: bit.ly/SubscribeThisOldHouse
What Does a Thermostatic Radiator Valve Do?
Thermostatic radiator valves control the heat output from a single radiator for better energy efficiency. In doing so, you also create mini-zones in your heating system.
Cost: $50 to $100
Time: 60 to 90 minutes
Skill level: Moderate. Requires basic plumbing skills and the strength to bust loose old threaded fittings
Shopping List for How to Install Thermostatic Radiator Valves:
- thermostatic radiator valve
- pipe sealant (dope), seals threaded fittings
- single-strand wicking, improves water-tight seal on threaded fittings
- canvas drop cloth, used to protect floor
Tools for How to Install Thermostatic Radiator Valves:
- two pipe wrenches, used to loosen and tighten threaded fittings
- spud wrench, used to loosen and tighten spud
- drill/driver, for drilling holes and driving screws
- 3/8-inch-diameter twist drill bit, for drilling hole in side of metal radiator cover
Thermostatic Valve Installation in 13 Steps
Drain water from radiator.
Use pipe wrenches to disconnect old valve from radiator.
Remove spud using a spud wrench and pipe wrench.
Apply thread sealant to new spud, then wrap single-strand wicking around the spud threads.
Use a spud wrench and pipe wrench to install the new spud.
Apply pipe dope and single-strand wicking to the threads of the existing pipe.
Install the new thermostatic radiator valve and tighten with a pipe wrench.
Apply pipe sealant to face of spud.
Tighten connection between spud and new valve using a pipe wrench.
Drill hole in radiator cover.
Feed wire through hole, then screw sensor to side of radiator cover.
Connect the sensor's wire to the valve.
Slide radiator cover into place.
About Ask This Old House TV:
Homeowners have a virtual truckload of questions for us on smaller projects, and we're ready to answer. Ask This Old House solves the steady stream of home improvement problems faced by our viewers—and we make house calls! Ask This Old House features some familiar faces from This Old House, including Kevin O'Connor, general contractor Tom Silva, plumbing and heating expert Richard Trethewey, and landscape contractor Roger Cook.
Looking for more step by step guidance on how to complete projects around the house? Join This Old House INSIDER to stream over 1,000 episodes commercial-free: bit.ly/2GPiYbH
Plus, download our FREE app for full-episode streaming to your connected TV, phone or tablet: thisoldhouse.com/pages/streaming-app
Follow This Old House and Ask This Old House:
Facebook: bit.ly/ThisOldHouseFB
Twitter: bit.ly/ThisOldHouseTwitter
bit.ly/AskTOHTwitter
Pinterest: bit.ly/ThisOldHousePinterest
Instagram: bit.ly/ThisOldHouseIG
bit.ly/AskTOHIG
For more on This Old House and Ask This Old House, visit us at: bit.ly/ThisOldHouseWebsite
How to Install Thermostatic Radiator Valves | This Old House
youtube.com/user/thisoldhouse/
About this tutorial
This Old House published this 2:56 video tutorial on October 29, 2015. It has been watched 296,016 times on YouTube.
- Channel
- This Old House
- Category
- Howto & Style
- Duration
- 2:56
- Published
- October 29, 2015
- Views
- 296,016
- Likes
- 1,253
Tags
Share
This tutorial in other languages
- FRComment faire pour installer thermostatiques de radiateur | Cette ancienne maison
- ESCómo instalar válvulas termostáticas para radiadores | Esta casa vieja
- PTComo instalar termostáticas do radiador Válvulas | This Old House
- ITCome installare Valvole termostatiche per radiatori | This Old House
- DESo installieren Sie Thermostatheizkörperventile | Dieses alte Haus
- NLHoe te installeren thermostatische radiatorafsluiters | This Old House
- RUКак установить термостатические клапаны | Это старый дом
- PLJak zainstalować termostatyczne zawory grzejnikowe | Ten stary dom
- JAサーモスタットラジエーターバルブをインストールする方法|このオールド・ハウス
- ARكيفية تثبيت المبرد ثرموستاتي صمامات | هذا البيت القديم
- HIथर्मास्टाटिक रेडिएटर वाल्व स्थापित करने के लिए कैसे | यह पुराने हाउस
- IDCara Install Termostatik Radiator Valves | Old House ini