Playback starts YouTube’s embedded player (privacy-enhanced mode).
How to Make a Timeline in Microsoft Word
ChannelExcel, Word and PowerPoint Tutorials from HowtechDescription from the creator
This tutorial will show you how to create a timeline in Word.
Don't forget to check out our site howtech.tv/ for more free how-to videos!
youtube.com/ithowtovids - our feed
facebook.com/howtechtv - join us on facebook
plus.google.com/103440382717658277879 - our group in Google+
In this tutorial you are going to learn how to make a timeline in Word.
Step # 1 -- Creating a New Document
Create a new document in Word and you will want to insert a graphic that will represent our timeline. From the ribbon at the top click on "Insert" and below this click the "SmartArt" logo in the "Illustrations" area. The "Choose a SmartArt Graphic" window will open.
Step # 2 -- Inserting the Timeline and Entering Some Data
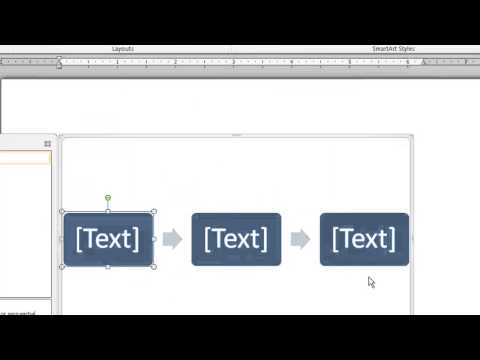
From the options on the left select "Process" and then on the right look through and find one appropriate for a timeline, here we are using "Basic Timeline", click "OK" to insert this into your image. You will now have to enter data into the timeline, here we are going to enter some concurrent events.
Step # 3 -- Adding Additional Events
You are also able to add additional events. Click on the arrow, then right click on it and in the menu that appears navigate to "Add Shape" then click "Add Shape After" or "Add Shape Before". Here we are choosing to add a shape after, this will add a new point to our timeline and we can add text to it just as before and that is how to make a timeline in Word.
Don't forget to check out our site howtech.tv/ for more free how-to videos!
youtube.com/ithowtovids - our feed
facebook.com/howtechtv - join us on facebook
plus.google.com/103440382717658277879 - our group in Google+
In this tutorial you are going to learn how to make a timeline in Word.
Step # 1 -- Creating a New Document
Create a new document in Word and you will want to insert a graphic that will represent our timeline. From the ribbon at the top click on "Insert" and below this click the "SmartArt" logo in the "Illustrations" area. The "Choose a SmartArt Graphic" window will open.
Step # 2 -- Inserting the Timeline and Entering Some Data
From the options on the left select "Process" and then on the right look through and find one appropriate for a timeline, here we are using "Basic Timeline", click "OK" to insert this into your image. You will now have to enter data into the timeline, here we are going to enter some concurrent events.
Step # 3 -- Adding Additional Events
You are also able to add additional events. Click on the arrow, then right click on it and in the menu that appears navigate to "Add Shape" then click "Add Shape After" or "Add Shape Before". Here we are choosing to add a shape after, this will add a new point to our timeline and we can add text to it just as before and that is how to make a timeline in Word.
About this tutorial
Excel, Word and PowerPoint Tutorials from Howtech published this 1:02 video tutorial on November 14, 2013. It has been watched 108,184 times on YouTube.
- Category
- Howto & Style
- Duration
- 1:02
- Published
- November 14, 2013
- Views
- 108,184
- Likes
- 308
Tags
Share
This tutorial in other languages
- FRComment faire un scénario dans Microsoft Word
- ESCómo hacer una línea de tiempo en Microsoft Word
- PTComo fazer uma linha de tempo no Microsoft Word
- ITCome fare una linea temporale in Microsoft Word
- DEWie man eine Zeitleiste in Microsoft Word Stellen
- NLHoe maak je een tijdlijn in Microsoft Word Maak
- RUКак сделать временную шкалу в Microsoft Word
- PLJak zrobić Oś czasu w programie Microsoft Word
- JAMicrosoft Wordでのタイムラインを作る方法
- ARكيفية جعل الجدول الزمني في Microsoft Word
- HIमाइक्रोसॉफ्ट वर्ड में एक समय बनाने के लिए कैसे
- IDCara Membuat Timeline di Microsoft Word