Playback starts YouTube’s embedded player (privacy-enhanced mode).
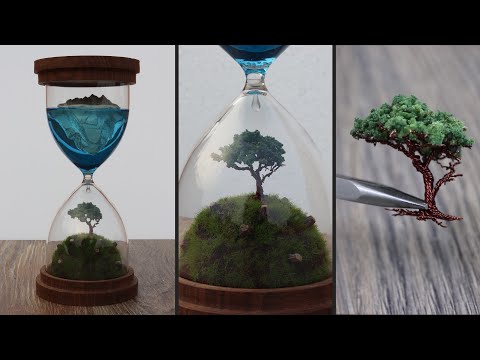
How to Make Hourglass Diorama | Resin Art | Wire Tree
ChannelHow toIn brief
Create a striking hourglass diorama with resin, wire trees, and miniature icebergs—perfect for resin art lovers. You’ll shape sand into an hourglass, craft tiny trees and stumps, and pour resin for a glossy iceberg effect, then add a water droplet for realism. The project uses simple materials like wire, plaster, and acrylic paints, with clear steps for each component.
Description from the creator
Welcome to new tutorial. Hope you enjoy watching this video. Don't forget to like, comment and subscribe.
Materials:
Plastic Wine Glasses
Marker
Sandpaper (100, 400, 1000 grit)
Superglue
Tennis Ball
Adhesive (T8000 glue)
Artificial Moss Sheet
Magnet wire (28 gauge, 6 inches, 30 pieces)
Acrylic Paints (Burnt umber, Raw umber, Yellow Ocher, Black, White, Cerulean blue)
Aluminium foil
Plaster of Paris
Water
Paint Brush
Hot Glue Gun
Epoxy Resin 132 grams
Epoxy Hardener 66 grams
Alcohol Ink / Transparent dye for epoxy (Blue)
popsicle sticks
Tools:
Scissor
Hacksaw
Wire cutter
Plier
Paper Cutter
Hobby Knife
TIMESTAMPS:
00:08 How to make an Hourglass.
02:20 How to make a miniature wire tree.
04:28 How to make miniature tree stumps.
06:27 How to make Iceberg.
10:24 How to make a water drop.
#SaveTrees #ResinArt #DIY
Materials:
Plastic Wine Glasses
Marker
Sandpaper (100, 400, 1000 grit)
Superglue
Tennis Ball
Adhesive (T8000 glue)
Artificial Moss Sheet
Magnet wire (28 gauge, 6 inches, 30 pieces)
Acrylic Paints (Burnt umber, Raw umber, Yellow Ocher, Black, White, Cerulean blue)
Aluminium foil
Plaster of Paris
Water
Paint Brush
Hot Glue Gun
Epoxy Resin 132 grams
Epoxy Hardener 66 grams
Alcohol Ink / Transparent dye for epoxy (Blue)
popsicle sticks
Tools:
Scissor
Hacksaw
Wire cutter
Plier
Paper Cutter
Hobby Knife
TIMESTAMPS:
00:08 How to make an Hourglass.
02:20 How to make a miniature wire tree.
04:28 How to make miniature tree stumps.
06:27 How to make Iceberg.
10:24 How to make a water drop.
#SaveTrees #ResinArt #DIY
About this tutorial
How to published this 12:06 video tutorial on March 5, 2020. It has been watched 9,482,241 times on YouTube.
- Channel
- How to
- Category
- Howto & Style
- Duration
- 12:06
- Published
- March 5, 2020
- Views
- 9,482,241
- Likes
- 219,740
Tags
Share
This tutorial in other languages
- FRComment faire Hourglass Diorama | Art Résine | Arbre fil
- ESCómo hacer de reloj de arena diorama | Arte de resina | Árbol de alambre
- PTComo fazer Hourglass Diorama | Resina Art | Árvore de arame
- ITCome fare a clessidra Diorama | Arte della resina | filo Albero
- DEWie man Sanduhr Diorama | Harz-Kunst | Drahtbaum
- NLHoe maak Hourglass Diorama | Resin Art | Wire Tree
- RUКак сделать песочные часы Diorama | Смола Искусство | Wire Tree
- PLJak zrobić Hourglass Diorama | Żywica Art | drut Drzewo
- JA砂時計ジオラマを作る方法|樹脂アート|ワイヤーツリー
- ARكيفية جعل الساعة الرملية الديوراما | الراتنج الفن | شجرة الأسلاك
- HIकैसे Hourglass चित्रावली बनाने के लिए | राल कला | तार पेड़
- IDCara Membuat Hourglass Diorama | Resin Art | kawat Pohon