Playback starts YouTube’s embedded player (privacy-enhanced mode).
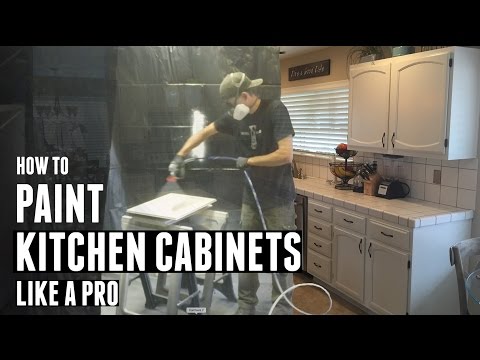
How To Paint Kitchen Cabinets Like a Pro
ChannelHandyman StartupDescription from the creator
In this video, I walk you through the process of painting kitchen cabinets step by step. You'll get to see the entire process I used to paint my old oak cabinets white as well as learn the easiest way to get a professional finished product.
Painting your kitchen cabinets is a lot of work and will usually take 3 or 4 days to complete. If you want to end up with a quality finished product, don’t skip steps!
Before you can tackle this project, it’s important to choose the correct paint for the job. There are many different options available, but I recommend Benjamin-Moore Aura Semi-Gloss paint. It’s a high quality paint with great coverage. It’s mildew resistant, stains wash off easily, it’s long lasting, zero VOC, and it’s easy to cleanup. Whether you choose to use this paint or not, be sure to use a high quality paint!
Painting your cabinets is very cheap when it comes to materials, but expensive when it comes to time and labor. You aren’t going to want to do this twice!
Once you’ve got the paint, it’s time to prep the cabinets. You can’t just start painting them right away. First, you’ll need to wipe them down with a degreaser or mineral spirits. Then, fill in any scratches, nicks, or dents with wood filler. Caulk any gaps in the cabinets. Then, you are ready for the most time consuming part of the project: sanding. Sand all surfaces of the cabinets using 180 grit sandpaper. I would NOT recommend painting your cabinets without sanding as the paint will peel and you’ll end up with more of a mess than you started with.
Once you’ve sanded and cleaned off the dust, it’s time to paint! In order to get a durable finish that lasts, you’ll want to do once coat of primer and two coats of paint.
Start by priming the doors and drawer fronts. I recommend using a paint sprayer if you have one, but you can also use a high quality smooth finish roller and a high quality paint brush for this job. It will just take much longer.
In between coats on the drawers, work on priming and painting the interior cabinet boxes. Be sure to tape off areas around and inside the cabinets you don’t want to get paint on.
You can spray the cabinet boxes as well, but that is a huge pain and it creates a lot of garbage. So, I actually recommend using a roller and a brush for this as it takes much less time than the cabinet doors and drawers do. It also requires less prep and will save you some cash.
Once you’ve done 1 coat of primer and 2 coats of paint, let the paint dry for about a day and then put the hardware back on! You’ve successfully painted your cabinets and are ready to enjoy a brand new and amazing kitchen.
Painting your kitchen cabinets is a lot of work and will usually take 3 or 4 days to complete. If you want to end up with a quality finished product, don’t skip steps!
Before you can tackle this project, it’s important to choose the correct paint for the job. There are many different options available, but I recommend Benjamin-Moore Aura Semi-Gloss paint. It’s a high quality paint with great coverage. It’s mildew resistant, stains wash off easily, it’s long lasting, zero VOC, and it’s easy to cleanup. Whether you choose to use this paint or not, be sure to use a high quality paint!
Painting your cabinets is very cheap when it comes to materials, but expensive when it comes to time and labor. You aren’t going to want to do this twice!
Once you’ve got the paint, it’s time to prep the cabinets. You can’t just start painting them right away. First, you’ll need to wipe them down with a degreaser or mineral spirits. Then, fill in any scratches, nicks, or dents with wood filler. Caulk any gaps in the cabinets. Then, you are ready for the most time consuming part of the project: sanding. Sand all surfaces of the cabinets using 180 grit sandpaper. I would NOT recommend painting your cabinets without sanding as the paint will peel and you’ll end up with more of a mess than you started with.
Once you’ve sanded and cleaned off the dust, it’s time to paint! In order to get a durable finish that lasts, you’ll want to do once coat of primer and two coats of paint.
Start by priming the doors and drawer fronts. I recommend using a paint sprayer if you have one, but you can also use a high quality smooth finish roller and a high quality paint brush for this job. It will just take much longer.
In between coats on the drawers, work on priming and painting the interior cabinet boxes. Be sure to tape off areas around and inside the cabinets you don’t want to get paint on.
You can spray the cabinet boxes as well, but that is a huge pain and it creates a lot of garbage. So, I actually recommend using a roller and a brush for this as it takes much less time than the cabinet doors and drawers do. It also requires less prep and will save you some cash.
Once you’ve done 1 coat of primer and 2 coats of paint, let the paint dry for about a day and then put the hardware back on! You’ve successfully painted your cabinets and are ready to enjoy a brand new and amazing kitchen.
About this tutorial
Handyman Startup published this 7:01 video tutorial on October 27, 2015. It has been watched 832,135 times on YouTube.
- Channel
- Handyman Startup
- Category
- Howto & Style
- Duration
- 7:01
- Published
- October 27, 2015
- Views
- 832,135
- Likes
- 4,025
Tags
Share
This tutorial in other languages
- FRComment peindre des armoires de cuisine comme un pro
- ESCómo pintar gabinetes de la cocina como un profesional
- PTComo pintar cozinha armários Like a Pro
- ITCome dipingere Armadi da cucina come un pro
- DEWie malen Küchenschränke wie ein Profi
- NLHow To Paint keukenkastjes als een Pro
- RUКак Краска кухонные шкафы Like A Pro
- PLJak malować Szafki kuchenne jak profesjonalista
- JAキッチンキャビネットのようにプロをペイントする方法
- ARكيفية الطلاء خزائن المطبخ مثل برو
- HIरसोई अलमारियाँ की तरह पेंट करने के लिए कैसे एक प्रो
- IDCara Cat lemari dapur Seperti Pro