Playback starts YouTube’s embedded player (privacy-enhanced mode).
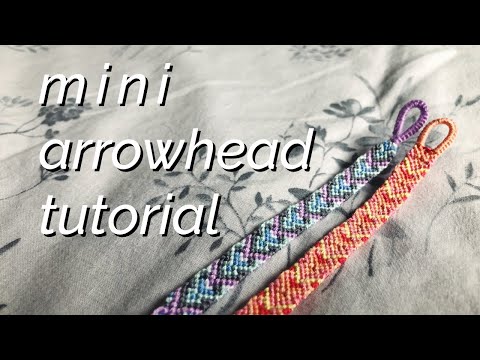
mini arrowhead bracelet tutorial! (advanced/intermediate) (SEGMENT KNOTTING)
Channelkinsey bDescription from the creator
mini arrowhead bracelet!
ZANATARY'S INSTA: instagram.com/zanatary/
thank you for letting me use your pattern 💞
how to start and end bracelets PLUS the different kinds of knots: youtu.be/x38n6V28020
how to start your bracelet with a teardrop loop: m.youtube.com/watch?v=h0k1i7azFH4
how to make your bracelets adjustable: m.youtube.com/watch?v=XfdHQb5dxPI&t=15s
INSTRUCTIONS:
you'll need 5 colors, each cut at a wingspans length (65-70 inches). fold all your strings in half so you have a total of 10 strings, 2 strings of each color. your strings should be set up as a mirror image.
if you don't want to segment knot, here is the steps, row by row.
f=forward knot
b=backward knot
fb= forward backward knot
bf= backward forward knot
outer strings will be left out on the even numbered rows.
row 1: f, f, f, b, b
row 2: f, f, b, b
row 3: f, f, f, b, b
row 4: fb, fb, bf, bf
row 5: bf, bf, f, fb, fb
row 6: f, f, b, b
row 7: f, f ,f, b, b
row 8: f, f, b, b
row 9: f, f, f, b, b
row 10: b, f, b, f
row 11: b, b, f, f, f
row 12: b, f, b, f
PATTERN: braceletbook.com/patterns/normal/29341/
FAQ:
•what kind of thread do you use, and where is it from?
-i use embroidery floss! it's the loops and threads brand from michales. you can also use craft cord or yarn.
•what's a wingspan?
-hold one end of your thread in your left hand, and stretch your left arm out. taking the thread in your right hand, bring i across your chest and stretch out your right arm. this is your wingspan! google has a good picture if you search it, or you could cut 65-70 inches.
•do you sell your bracelets?
-i do not! i've looked into as much as i could, but unfortunately you have to be 18 to sell on most sites. and even so, my mom is very against me getting into things like that, because the IRS will get involved (for taxes on income) and it's just a whole mess. maybe in a year or so!
•how long does it take to make this bracelet?
-for me, each bracelet i make takes me about two hours (however i've been doing it for 2+ years). depending on the pattern it might be less, or more. however, for a beginner it might take even longer, especially if you have to keep looking at a pattern.
•why does my bracelet have holes in it/how do i prevent it?
-you're bracelets aren't going to be perfect when you first start making them! the more you make them, the better you'll get and you'll pick up your own technique. also, the way some patterns are designed just make your bracelets turn out wonky regardless!
•do i have to add a button? / how do i make this specific bracelet adjustable?
-you can start/end your bracelet however you want! there is no set rule, or anything. just cut the strings like you normally would for your bracelet, and start it! it's all about personal preference.
follow my socials!
bracelet instagram: instagram.com/kinseybracelets/
personal instagram: instagram.com/kinseeyyy/
tik tok: @-kins-
twitter: mobile.twitter.com/kiinseyyyy
pinterest: pinterest.com/kiinseyy/
wattpad: wattpad.com/user/novellla
💗💗💗
DISCLAIMER: I do NOT take credit for the pattern/design of this bracelet. Any and all credit goes to the rightful creator(s) for the design.
ZANATARY'S INSTA: instagram.com/zanatary/
thank you for letting me use your pattern 💞
how to start and end bracelets PLUS the different kinds of knots: youtu.be/x38n6V28020
how to start your bracelet with a teardrop loop: m.youtube.com/watch?v=h0k1i7azFH4
how to make your bracelets adjustable: m.youtube.com/watch?v=XfdHQb5dxPI&t=15s
INSTRUCTIONS:
you'll need 5 colors, each cut at a wingspans length (65-70 inches). fold all your strings in half so you have a total of 10 strings, 2 strings of each color. your strings should be set up as a mirror image.
if you don't want to segment knot, here is the steps, row by row.
f=forward knot
b=backward knot
fb= forward backward knot
bf= backward forward knot
outer strings will be left out on the even numbered rows.
row 1: f, f, f, b, b
row 2: f, f, b, b
row 3: f, f, f, b, b
row 4: fb, fb, bf, bf
row 5: bf, bf, f, fb, fb
row 6: f, f, b, b
row 7: f, f ,f, b, b
row 8: f, f, b, b
row 9: f, f, f, b, b
row 10: b, f, b, f
row 11: b, b, f, f, f
row 12: b, f, b, f
PATTERN: braceletbook.com/patterns/normal/29341/
FAQ:
•what kind of thread do you use, and where is it from?
-i use embroidery floss! it's the loops and threads brand from michales. you can also use craft cord or yarn.
•what's a wingspan?
-hold one end of your thread in your left hand, and stretch your left arm out. taking the thread in your right hand, bring i across your chest and stretch out your right arm. this is your wingspan! google has a good picture if you search it, or you could cut 65-70 inches.
•do you sell your bracelets?
-i do not! i've looked into as much as i could, but unfortunately you have to be 18 to sell on most sites. and even so, my mom is very against me getting into things like that, because the IRS will get involved (for taxes on income) and it's just a whole mess. maybe in a year or so!
•how long does it take to make this bracelet?
-for me, each bracelet i make takes me about two hours (however i've been doing it for 2+ years). depending on the pattern it might be less, or more. however, for a beginner it might take even longer, especially if you have to keep looking at a pattern.
•why does my bracelet have holes in it/how do i prevent it?
-you're bracelets aren't going to be perfect when you first start making them! the more you make them, the better you'll get and you'll pick up your own technique. also, the way some patterns are designed just make your bracelets turn out wonky regardless!
•do i have to add a button? / how do i make this specific bracelet adjustable?
-you can start/end your bracelet however you want! there is no set rule, or anything. just cut the strings like you normally would for your bracelet, and start it! it's all about personal preference.
follow my socials!
bracelet instagram: instagram.com/kinseybracelets/
personal instagram: instagram.com/kinseeyyy/
tik tok: @-kins-
twitter: mobile.twitter.com/kiinseyyyy
pinterest: pinterest.com/kiinseyy/
wattpad: wattpad.com/user/novellla
💗💗💗
DISCLAIMER: I do NOT take credit for the pattern/design of this bracelet. Any and all credit goes to the rightful creator(s) for the design.
About this tutorial
kinsey b published this 11:08 video tutorial on February 6, 2020. It has been watched 23,942 times on YouTube.
- Channel
- kinsey b
- Category
- Howto & Style
- Duration
- 11:08
- Published
- February 6, 2020
- Views
- 23,942
- Likes
- 511
Share
This tutorial in other languages
- FRmini-tutoriel bracelet flèche du repère! (Avancé / intermédiaire) (SEGMENT NOUAGE)
- ESMini tutorial punta de flecha de la pulsera! (Advanced / intermedia) (ANUDADO segmento)
- PTmini-arrowhead tutorial pulseira! (Avançado / intermediário) (atar SEGMENTO)
- ITmini Arrowhead esercitazione braccialetto! (Avanzato / intermedio) (annodatura segmento)
- DEMini-Pfeilspitze Armband Tutorial! (Advanced / intermediate) (SEGMENT Knüpfen)
- NLmini pijlpunt armband les! (Geavanceerd / intermediair) (SEGMENT KNOPEN)
- RUмини-браслет наконечник стрелы учебник! (Расширенный / промежуточный) (СЕГМЕНТНАЯ Knotting)
- PLmini grot bransoletka poradnik! (Advanced / pośrednia) (segment Knotting)
- JAミニは、ブレスレットのチュートリアルを矢じり! (前進/中間体)(セグメント結節)
- ARرأس السهم مصغرة تعليمي سوار! (متقدمة / وسيط) (الغزل القطاعي)
- HIमिनी कंगन ट्यूटोरियल Arrowhead! (उन्नत / मध्यवर्ती) (खंड बाँध रही है)
- IDMini Arrowhead tutorial gelang! (Maju / menengah) (SEGMEN knotting)