Playback starts YouTube’s embedded player (privacy-enhanced mode).
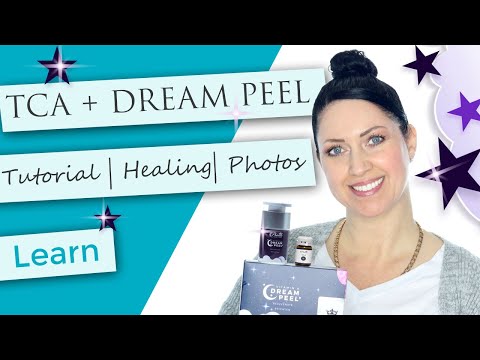
TCA + Vitamin A Dream Peel Finishing Layer Application Tutorial | Flaking Peeling Photos | How to
ChannelPlatinum Skin CareDescription from the creator
👇 SUBSCRIBE TO PLATINUM SKINCARE👇
youtube.com/channel/UC0hpE9DDQpXjFSsOx0XwwcA?su…
★☆★ CONNECT WITH PLATINUM ON SOCIAL MEDIA ★☆★
Facebook: facebook.com/platinumskincare/?utm_source=youtu…
Join Our Facebook Group: facebook.com/groups/183811351987436/?utm_source…
YouTube: youtube.com/channel/UC0hpE9DDQpXjFSsOx0XwwcA/?u…
Website: platinumskincare.com/?utm_source=youtube&ut…
Today I am going to do something super cool. I am going to perform a step-by-step demo of a TCA peel and then finish it off with our new Vitamin A Dream Peel for extra flaking. I am excited to show you the process… so, let’s get started!
Purchase CERTIFIED TCA Peels here: *We used the 13% platinumskincare.com/tca-peel-13-20-30/?utm_sou…
Purchase your CERTIFIED Vitamin A Dream Peel here: *Single night application only: platinumskincare.com/dream-peel-vitamin-a-peel/…
First things first. Why would you want to add on vitamin A to a tca peel?
This is an easy one. We have used our Luminosity .50% Retinol for several months now as a Peel Booster for our TCA and Jessners peels. What it does is help your skin start the peeling process a bit more quickly and then it also helps the skin to flake more aggressively. Many of our customers see a big difference when adding on the layer of vitamin A.
Luminosity versus Dream Peel application?
There is a big difference with applying Luminosity as opposed to the Dream peel. With Luminosity, you rinse your TCA or Jessners, apply the serum and then do it again for the next few days – or until your skin starts flaking.
With Dream Peel this is a 1X shot ONLY. You will do your peel, rinse and then apply the Dream Peel. For the remaining time after your peel you will use healing items only. NEVER any more vitamin A.
Let’s get going. … I have my manual and know that Step 1 is to wash my face with a good deep cleanser. My skin is oily/acne, so I am going to use our AB Cleanser.
Let me go take care of that.
…
Ok, I am back with freshly cleansed skin. Time for step 2 which is stripping the skin. I have our Prep B Solution here.. but, if you don’t have that, a 90% or 99% alcohol will work just fine.
Go over your skin like you would a toner. Apply to every area that you want to do the peel on today.
Let that air dry for a few seconds and you are ready to apply your TCA peel.
**Here is a little memo for the “Glove Police” … LOL… Usually I do not wear gloves for application… but then your fingers CAN peel. So, if you want to avoid that – wear gloves for the process. I will make everyone happy here to day and use them.
I am applying the 13% today. We will see how many layers I can get to.
I am going to take a second here to REALLY reiterate how WET this pad is supposed to be – as many of you might be applying it too dry.
We want it WET … but not dripping wet. The way I like to get this to be JUST RIGHT is by saturating my gauze here and then giving it a little squeeze.
The gauze we have is thin… so I like to use 2 of them together. This works great for me.
Now, I am going to apply the acid everywhere I want to peel.
As always, we are going to wait 5 minutes for the skin’s proteins to coagulate and for the TCA to neutralize.
Why 5 minutes? … We don’t know exactly how long it takes for everyone’s skin to process – so we like to give it a full 5 minutes. Some may happen in lesser time, but always wait to be 100% sure before applying the next layer or rinsing. OK?
…..
Now that5 minutes has gone by its time to evaluate my skin.
You want to check for things like frosting *That white haze that shows up sometimes*
If you see a tiny bit you are good to apply another layer – but if your face were to turn white white… then you definitely want to stop, rinse and then apply products.
I am good… so I am going to apply a 2nd layer.
Notice that you do NOT rinse in between TCA or Jessners layering.
Apply as normal and wait again.
youtube.com/channel/UC0hpE9DDQpXjFSsOx0XwwcA?su…
★☆★ CONNECT WITH PLATINUM ON SOCIAL MEDIA ★☆★
Facebook: facebook.com/platinumskincare/?utm_source=youtu…
Join Our Facebook Group: facebook.com/groups/183811351987436/?utm_source…
YouTube: youtube.com/channel/UC0hpE9DDQpXjFSsOx0XwwcA/?u…
Website: platinumskincare.com/?utm_source=youtube&ut…
Today I am going to do something super cool. I am going to perform a step-by-step demo of a TCA peel and then finish it off with our new Vitamin A Dream Peel for extra flaking. I am excited to show you the process… so, let’s get started!
Purchase CERTIFIED TCA Peels here: *We used the 13% platinumskincare.com/tca-peel-13-20-30/?utm_sou…
Purchase your CERTIFIED Vitamin A Dream Peel here: *Single night application only: platinumskincare.com/dream-peel-vitamin-a-peel/…
First things first. Why would you want to add on vitamin A to a tca peel?
This is an easy one. We have used our Luminosity .50% Retinol for several months now as a Peel Booster for our TCA and Jessners peels. What it does is help your skin start the peeling process a bit more quickly and then it also helps the skin to flake more aggressively. Many of our customers see a big difference when adding on the layer of vitamin A.
Luminosity versus Dream Peel application?
There is a big difference with applying Luminosity as opposed to the Dream peel. With Luminosity, you rinse your TCA or Jessners, apply the serum and then do it again for the next few days – or until your skin starts flaking.
With Dream Peel this is a 1X shot ONLY. You will do your peel, rinse and then apply the Dream Peel. For the remaining time after your peel you will use healing items only. NEVER any more vitamin A.
Let’s get going. … I have my manual and know that Step 1 is to wash my face with a good deep cleanser. My skin is oily/acne, so I am going to use our AB Cleanser.
Let me go take care of that.
…
Ok, I am back with freshly cleansed skin. Time for step 2 which is stripping the skin. I have our Prep B Solution here.. but, if you don’t have that, a 90% or 99% alcohol will work just fine.
Go over your skin like you would a toner. Apply to every area that you want to do the peel on today.
Let that air dry for a few seconds and you are ready to apply your TCA peel.
**Here is a little memo for the “Glove Police” … LOL… Usually I do not wear gloves for application… but then your fingers CAN peel. So, if you want to avoid that – wear gloves for the process. I will make everyone happy here to day and use them.
I am applying the 13% today. We will see how many layers I can get to.
I am going to take a second here to REALLY reiterate how WET this pad is supposed to be – as many of you might be applying it too dry.
We want it WET … but not dripping wet. The way I like to get this to be JUST RIGHT is by saturating my gauze here and then giving it a little squeeze.
The gauze we have is thin… so I like to use 2 of them together. This works great for me.
Now, I am going to apply the acid everywhere I want to peel.
As always, we are going to wait 5 minutes for the skin’s proteins to coagulate and for the TCA to neutralize.
Why 5 minutes? … We don’t know exactly how long it takes for everyone’s skin to process – so we like to give it a full 5 minutes. Some may happen in lesser time, but always wait to be 100% sure before applying the next layer or rinsing. OK?
…..
Now that5 minutes has gone by its time to evaluate my skin.
You want to check for things like frosting *That white haze that shows up sometimes*
If you see a tiny bit you are good to apply another layer – but if your face were to turn white white… then you definitely want to stop, rinse and then apply products.
I am good… so I am going to apply a 2nd layer.
Notice that you do NOT rinse in between TCA or Jessners layering.
Apply as normal and wait again.
About this tutorial
Platinum Skin Care published this 10:20 video tutorial on April 9, 2020. It has been watched 37,018 times on YouTube.
- Channel
- Platinum Skin Care
- Category
- Howto & Style
- Duration
- 10:20
- Published
- April 9, 2020
- Views
- 37,018
- Likes
- 713
Tags
Share
This tutorial in other languages
- FRTCA + vitamine A couche de finition Peel rêve application Tutoriel | Écaillage Photos Peeling | Comment
- ESTCA + Vitamina A Dream Peel Acabado de capa de aplicación Tutorial | Descamación Fotos Peeling | Cómo
- PTTCA + Vitamina A Dream Peel Acabamento Camada Tutorial Aplicação | Descamação Peeling Fotos | Como
- ITTCA + Vitamina A Dream Peel finitura Application Layer Tutorial | Desquamazione Peeling Foto | Come
- DETCA + Vitamin A Dream Peel Endschicht Anwendung Tutorial | Abplatzungen Peeling Fotos | Wie man
- NLTCA + Vitamine A Dream Peel afwerklaag Application Tutorial | Het afschilferen Peeling Foto's | Hoe
- RUTCA + Витамин A Dream Peel отделочный слой Учебник Применение | Шелушение Пилинг Фотографии | Как
- PLTCA + Witamina A Dream Peel Wykończenie Warstwa aplikacji Tutorial | Łuszczenie Peeling Zdjęcia | Jak
- JATCA +ビタミンAドリームピール仕上げ層アプリケーションのチュートリアル|ピーリング写真をフレーキング|方法
- ARTCA + فيتامين حلم بيل التشطيب طبقة التطبيق التعليمي | يتساقط تقشير صور | كيف
- HIटीसीए + विटामिन ए ड्रीम पील फिनिशिंग परत आवेदन ट्यूटोरियल | Flaking छील तस्वीरें | कैसे
- IDTCA + Vitamin A Dream Peel Finishing Lapisan Aplikasi Tutorial | Mengelupas Peeling Foto | Cara