Playback starts YouTube’s embedded player (privacy-enhanced mode).
Valentine's Day Tutorial: Heart Hair Clip
ChannelwhippycakeDescription from the creator
Read Blog post here:
whippycake.com/2015/02/valentines-day-tutorial-…
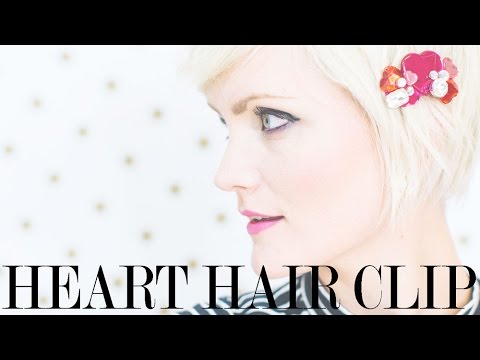
In this video, I show you how to make this DIY rhinestone heart hair clip. I used a variety of heart rhinestones to create a sparkling base, and then added in a second layer of varying diamond-shaped rhinestones to add some dimension. You could recreate this hair clip using vintage earrings or other jewelry remnants—there are no rules. This is the perfect gift for any Valentine or the cherry on top of your favorite festive ensemble. Show me your creations on Instagram by using the hash tag #whippycake! You should also take a sec to subscribe to my channel to see new videos and tutorials!
-XOXO-
whip
View full post with bonus images on my blog here: whippycake.com/?p=8468
Check out my Blonde Routine here:
youtube.com/watch?v=RM2No4RRNfA
********************************************************
WHAT I AM WEARING:
Top || Forever 21 bit.ly/1GVzkmA
Earrings || Cents of Style bit.ly/1A9FeCT
Metallic Nail Wraps || bit.ly/1m41dm6
Photo Backdrop || bit.ly/1zwfXfb
********************************************************
Supplies used in this video:
Rhinestones: Varying sizes, shapes, and colors
Felt
Scissors
E6000 Glue
Metal Hair Clip
Directions:
1. Cut out a piece of felt the same size as your hair clip.
2. Pick out and arrange the rhinestones to your liking and glue with E6000.
3. Glue accent rhinestones to add a second layer of dimension to the clip.
4. Glue the back of the felt to the metal clip.
5. For extra security, you can add a second piece of felt on the inside of the clip.
6. Allow glue to dry 24-48 hrs before wearing.
See more beauty and hair tips and tricks on my blog:
whippycake.com/
*************************************************************
WHERE ELSE TO FIND ME:
FACEBOOK: facebook.com/whippycake
INSTAGRAM: instagram.com/whippycake
PINTEREST: pinterest.com/becki_crosby/
WEBSITE: whippycake.com/
Don't forget to SUBSCRIBE to my channel!
youtube.com/channel/UCKhZj4lpGjErDtkG3l4S9fQ
.............................................................
FTC: I am not being paid by any of the mentioned companies or designers to make this video. The views in this video are strictly my own, and I am not affiliated with any of these companies.
For more styling tips and topics, visit my blog: whippycake.com
whippycake.com/2015/02/valentines-day-tutorial-…
In this video, I show you how to make this DIY rhinestone heart hair clip. I used a variety of heart rhinestones to create a sparkling base, and then added in a second layer of varying diamond-shaped rhinestones to add some dimension. You could recreate this hair clip using vintage earrings or other jewelry remnants—there are no rules. This is the perfect gift for any Valentine or the cherry on top of your favorite festive ensemble. Show me your creations on Instagram by using the hash tag #whippycake! You should also take a sec to subscribe to my channel to see new videos and tutorials!
-XOXO-
whip
View full post with bonus images on my blog here: whippycake.com/?p=8468
Check out my Blonde Routine here:
youtube.com/watch?v=RM2No4RRNfA
********************************************************
WHAT I AM WEARING:
Top || Forever 21 bit.ly/1GVzkmA
Earrings || Cents of Style bit.ly/1A9FeCT
Metallic Nail Wraps || bit.ly/1m41dm6
Photo Backdrop || bit.ly/1zwfXfb
********************************************************
Supplies used in this video:
Rhinestones: Varying sizes, shapes, and colors
Felt
Scissors
E6000 Glue
Metal Hair Clip
Directions:
1. Cut out a piece of felt the same size as your hair clip.
2. Pick out and arrange the rhinestones to your liking and glue with E6000.
3. Glue accent rhinestones to add a second layer of dimension to the clip.
4. Glue the back of the felt to the metal clip.
5. For extra security, you can add a second piece of felt on the inside of the clip.
6. Allow glue to dry 24-48 hrs before wearing.
See more beauty and hair tips and tricks on my blog:
whippycake.com/
*************************************************************
WHERE ELSE TO FIND ME:
FACEBOOK: facebook.com/whippycake
INSTAGRAM: instagram.com/whippycake
PINTEREST: pinterest.com/becki_crosby/
WEBSITE: whippycake.com/
Don't forget to SUBSCRIBE to my channel!
youtube.com/channel/UCKhZj4lpGjErDtkG3l4S9fQ
.............................................................
FTC: I am not being paid by any of the mentioned companies or designers to make this video. The views in this video are strictly my own, and I am not affiliated with any of these companies.
For more styling tips and topics, visit my blog: whippycake.com
About this tutorial
whippycake published this 2:44 video tutorial on November 4, 2015. It has been watched 2,422 times on YouTube.
- Channel
- whippycake
- Category
- Howto & Style
- Duration
- 2:44
- Published
- November 4, 2015
- Views
- 2,422
- Likes
- 52
Tags
Share
This tutorial in other languages
- FRCOMMENT: Faire une Saint Valentin « Woven coeur » Hair-Clip
- ESCómo: Hacer un Día de San Valentín "tejido del corazón" Hair-Clip
- PTCOMO: Criar um Dia dos Namorados "Woven Coração" Hair-Clip
- ITHOW TO: Fare un San Valentino "Woven Cuore" Hair-Clip
- DEGewusst wie: Machen Sie einen Valentinstag „Woven Herz“ Hair-Clip
- NLProcedure: Maak een Valentines Day "Woven Heart" Hair-Clip
- RUКАК: Сделать День Святого Валентина «Тканые сердца» Hair-Clip
- PLJAK: Zrób Valentines Day "Woven serce" Hair-Clip
- JAHOW TO:バレンタインデー「織ハート」ヘアクリップください
- ARHOW TO: جعل يوم عيد الحب "نسج القلب" الشعر كليب
- HIकैसे करने के लिए: सुनिश्चित एक वैलेंटाइन्स दिवस "बुना हार्ट" बाल-क्लिप
- IDHari Valentine Tutorial: Rambut Hati Clip