Playback starts YouTube’s embedded player (privacy-enhanced mode).
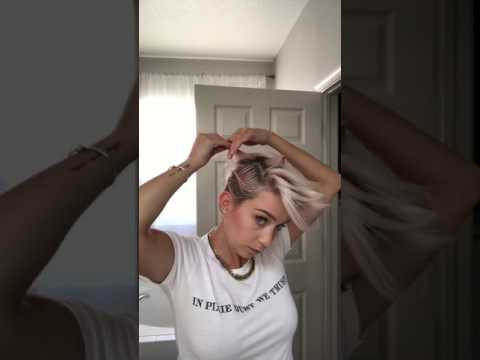
Faux Hawk Pixie Tutorial
ChannelSarah BryantDescription from the creator
Happy #tutorialwednesday! Today is for all my faux hawk fanatics 😊
I started with wet hair and used the brand new Power Dry.Me (officially on the market today) to cut my blow dry time. Next up I added a good amount of mousse to the sides and worked a bit into my roots on top.
Using a comb, I created 2 waves on the sides to give it a flat/pulled back look- make sure you do not blow dry the sides too high or it will lose the shape! Once the sides are set, get working on the top volume- ai blow dried in sections to make sure I got each piece as high as it could get.
After the top is dry, run a curling iron through it, always curling towards the center of your head. Comb through, add a couple back-combs if you like or to really get the volume add some Puff.Me like I did. When everything is set in place spray the hell out of it to make sure it doesn't go anywhere 😜
Products Used:
🔹 power dry me and puff me by @designmehair
🔹 aircraft mousse pomade by @randcohair
🔹 rat tail comb
🔹 luxe dryer from @bioionicla
🔹 1 1/4" curler
🔹 masterpiece hairspray by @bedheadbytigi
I started with wet hair and used the brand new Power Dry.Me (officially on the market today) to cut my blow dry time. Next up I added a good amount of mousse to the sides and worked a bit into my roots on top.
Using a comb, I created 2 waves on the sides to give it a flat/pulled back look- make sure you do not blow dry the sides too high or it will lose the shape! Once the sides are set, get working on the top volume- ai blow dried in sections to make sure I got each piece as high as it could get.
After the top is dry, run a curling iron through it, always curling towards the center of your head. Comb through, add a couple back-combs if you like or to really get the volume add some Puff.Me like I did. When everything is set in place spray the hell out of it to make sure it doesn't go anywhere 😜
Products Used:
🔹 power dry me and puff me by @designmehair
🔹 aircraft mousse pomade by @randcohair
🔹 rat tail comb
🔹 luxe dryer from @bioionicla
🔹 1 1/4" curler
🔹 masterpiece hairspray by @bedheadbytigi
About this tutorial
Sarah Bryant published this 3:37 video tutorial on November 12, 2017. It has been watched 95,938 times on YouTube.
- Channel
- Sarah Bryant
- Category
- People & Blogs
- Duration
- 3:37
- Published
- November 12, 2017
- Views
- 95,938
- Likes
- 1,014
Share
This tutorial in other languages
- FRFaux faucon Pixie Tutorial
- ESFaux Hawk Pixie Tutorial
- PTCrista de Galo Pixie Tutorial
- ITFauxhawk Pixie Tutorial
- DEFaux Hawk Pixie Tutorial
- NLFaux Hawk Pixie Tutorial
- RUПоддельный Hawk Pixie Учебное пособие
- PLFaux Hawk Pixie Tutorial
- JAフェイクホークピクシーチュートリアル
- ARفو هوك الجني دروس
- HIकृत्रिम हॉक पिक्सी ट्यूटोरियल
- IDFaux Elang Pixie Tutorial