Playback starts YouTube’s embedded player (privacy-enhanced mode).
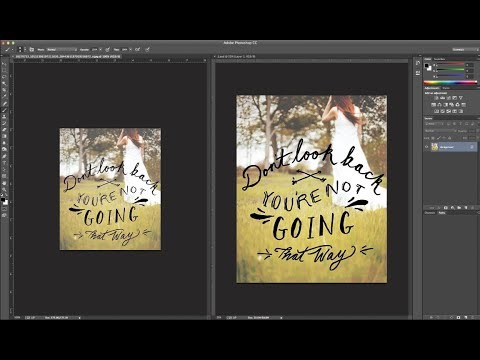
How To Enlarge a Low Resolution Image For Print Using Photoshop
ChannelJason YadlovskiDescription from the creator
Has there ever been a time when you had a low resolution image you want to print? Maybe a screenshot of something or an image where the quality just wasn't there? In this tutorial I'll show you one way you can modify an image and enlarge it to be printed as an 8x10. It only takes a few minutes and a couple of steps. One quick note, I did not create the original image used in this tutorial - I'm not sure who did, but I have seen the image used in various places on the web.
Video Summary
This particular image was at a resolution of 72 ppi and approximately 5.5" x 6.5". Our goal was to modify this image so it could be printed as an 8x10. When preparing images for print, it's important to keep in mind that your file resolution should be a minimum of 240 ppi to get a high quality print. In this case I wanted to use 300 ppi.
Step 1
Open image. Unlock background layer by double clicking on the LOCK icon on the layer. Resize the image by going to Image - Image Size. Then change the resolution to 300. Click OK
Step 2
Change canvas size to 8x10 by going to Image - Canvas Size. Use 8 for the width and 10 for the height. Click OK.
Step 3
Using Free Transform, cmd + T, resize the image so it is as large as it can be without cutting off any of the edges. Notice we have a small area on the bottom and side that we will need to fill in.
Step 4
Extract the text. Select the Magic Wand tool. Change sample size to 3 by 3, and tolarance to 12. Select a black portion of the text. Right click and select 'Similar'. If there are more pixels to be selected within the text, select Similar again. Right click in the selection and select Make Work Path. For the tolerance, use 2.0. The text and graphics will be extracted as a path and can be found in the Paths panel.
Step 5
Blur the background layer to remove pixilation. Go to Filter - Blur - Gaussian Blur. Adjust the blur to your liking. I used a 4 pixel blur.
Step 6
Fill in the missing areas on the bottom and right hand side. Use the Marquee tool to select the blank areas. Be sure to overlap the surrounding pixels so Photoshop knows what to fill the area in with. After making the selection press Shift + Delete to bring up the Fill dialog box. Choose Content-Aware and click OK. Blend further if necessary.
Step 7
Add text back on top of image. Create a new blank layer labeled Text. Go into the Paths panel and highlight the work path that was created. Right click and select Fill Path. Use Black as the color for fill.
Step 8
Add stroke around text. First setup your brush settings -- use a hard edge brush and a width of 8 pixels in this case. Right click on the text Path again and select Stroke. Use the Brush as the tool to stroke the path with.
Step 9
Increase Contrast. Create a new curves adjustment layer. Select preset called 'Medium Contrast'.
Step 10
Combine all layers and Sharpen. Combine all layers using Shift + Option + CMD + E. To sharpen the image go to Filter - Sharpen - Smart Sharpen. Use an amount of 200 and leave the rest of the settings as they are. You're Done!
Step 11
Send out for print, the image is complete! The image is now 8x10 with a resolution of 300 ppi and will make a great print.
For another way to enlarge a low resolution image for print, take a look at another one of my videos here: youtu.be/V_Z0aKUpRvM
----------------------------- 🙌 Support the Channel 🙌 -------------------------------------------
If you enjoy my content, would you consider Buying Me A Coffee to support the channel? buymeacoffee.com/JY
Check out TubeBuddy! tubebuddy.com/FocusPhotography
Full Disclosure: As an Amazon Associate, I earn money from qualifying purchases when the links below are used. There is NO EXTRA COST to you.
--------------------------------- 🎥 My Camera Gear 🎥 ---------------------------------------------
Canon 5D Mark IV: geni.us/TuSBL
Canon Battery Grip: geni.us/868E
Canon 60D: geni.us/gDxpU7
THE Canon 70-200 f2.8 III: geni.us/Ofr4t1y
Canon EF 24-70mm f/2.8L II USM: geni.us/RBJg
Canon EF 16-35mm f/4 IS: geni.us/ahpZXO
Canon EF-S 10-22mm f/3.5-4.5: geni.us/bJXvckl
Canon EF 50mm f/1.4 USM: geni.us/A6wLn
Good Kit Lens for Beginners: geni.us/iqav
Canon 430 EX II: geni.us/lflB4hH
Rogue Flash Bender Soft Box: geni.us/qHokjdS
GoPro Hero 5 Black: geni.us/dYipp
GoPro Dual Battery Charger + Battery: geni.us/ezBjWIz
Wacom Intuos Pro Pen and Touch Small Tablet: geni.us/Dgxgo
My Camera Bag: geni.us/sibSvME
MeFOTO BackPacker Aluminum Travel Tripod: geni.us/gAozPWD
Sensor Cleaning Kit: geni.us/cEBiD
----------------------------- 🎧 Audio Recording 🎧 -------------------------------------------
Blue Yeti: geni.us/pMeEA7X (Amazon)
Lav Mic, Rode RodeLink FM Wireless Filmmaker System: geni.us/SqhvW
Video Summary
This particular image was at a resolution of 72 ppi and approximately 5.5" x 6.5". Our goal was to modify this image so it could be printed as an 8x10. When preparing images for print, it's important to keep in mind that your file resolution should be a minimum of 240 ppi to get a high quality print. In this case I wanted to use 300 ppi.
Step 1
Open image. Unlock background layer by double clicking on the LOCK icon on the layer. Resize the image by going to Image - Image Size. Then change the resolution to 300. Click OK
Step 2
Change canvas size to 8x10 by going to Image - Canvas Size. Use 8 for the width and 10 for the height. Click OK.
Step 3
Using Free Transform, cmd + T, resize the image so it is as large as it can be without cutting off any of the edges. Notice we have a small area on the bottom and side that we will need to fill in.
Step 4
Extract the text. Select the Magic Wand tool. Change sample size to 3 by 3, and tolarance to 12. Select a black portion of the text. Right click and select 'Similar'. If there are more pixels to be selected within the text, select Similar again. Right click in the selection and select Make Work Path. For the tolerance, use 2.0. The text and graphics will be extracted as a path and can be found in the Paths panel.
Step 5
Blur the background layer to remove pixilation. Go to Filter - Blur - Gaussian Blur. Adjust the blur to your liking. I used a 4 pixel blur.
Step 6
Fill in the missing areas on the bottom and right hand side. Use the Marquee tool to select the blank areas. Be sure to overlap the surrounding pixels so Photoshop knows what to fill the area in with. After making the selection press Shift + Delete to bring up the Fill dialog box. Choose Content-Aware and click OK. Blend further if necessary.
Step 7
Add text back on top of image. Create a new blank layer labeled Text. Go into the Paths panel and highlight the work path that was created. Right click and select Fill Path. Use Black as the color for fill.
Step 8
Add stroke around text. First setup your brush settings -- use a hard edge brush and a width of 8 pixels in this case. Right click on the text Path again and select Stroke. Use the Brush as the tool to stroke the path with.
Step 9
Increase Contrast. Create a new curves adjustment layer. Select preset called 'Medium Contrast'.
Step 10
Combine all layers and Sharpen. Combine all layers using Shift + Option + CMD + E. To sharpen the image go to Filter - Sharpen - Smart Sharpen. Use an amount of 200 and leave the rest of the settings as they are. You're Done!
Step 11
Send out for print, the image is complete! The image is now 8x10 with a resolution of 300 ppi and will make a great print.
For another way to enlarge a low resolution image for print, take a look at another one of my videos here: youtu.be/V_Z0aKUpRvM
----------------------------- 🙌 Support the Channel 🙌 -------------------------------------------
If you enjoy my content, would you consider Buying Me A Coffee to support the channel? buymeacoffee.com/JY
Check out TubeBuddy! tubebuddy.com/FocusPhotography
Full Disclosure: As an Amazon Associate, I earn money from qualifying purchases when the links below are used. There is NO EXTRA COST to you.
--------------------------------- 🎥 My Camera Gear 🎥 ---------------------------------------------
Canon 5D Mark IV: geni.us/TuSBL
Canon Battery Grip: geni.us/868E
Canon 60D: geni.us/gDxpU7
THE Canon 70-200 f2.8 III: geni.us/Ofr4t1y
Canon EF 24-70mm f/2.8L II USM: geni.us/RBJg
Canon EF 16-35mm f/4 IS: geni.us/ahpZXO
Canon EF-S 10-22mm f/3.5-4.5: geni.us/bJXvckl
Canon EF 50mm f/1.4 USM: geni.us/A6wLn
Good Kit Lens for Beginners: geni.us/iqav
Canon 430 EX II: geni.us/lflB4hH
Rogue Flash Bender Soft Box: geni.us/qHokjdS
GoPro Hero 5 Black: geni.us/dYipp
GoPro Dual Battery Charger + Battery: geni.us/ezBjWIz
Wacom Intuos Pro Pen and Touch Small Tablet: geni.us/Dgxgo
My Camera Bag: geni.us/sibSvME
MeFOTO BackPacker Aluminum Travel Tripod: geni.us/gAozPWD
Sensor Cleaning Kit: geni.us/cEBiD
----------------------------- 🎧 Audio Recording 🎧 -------------------------------------------
Blue Yeti: geni.us/pMeEA7X (Amazon)
Lav Mic, Rode RodeLink FM Wireless Filmmaker System: geni.us/SqhvW
About this tutorial
Jason Yadlovski published this 10:08 video tutorial on November 6, 2014. It has been watched 301,011 times on YouTube.
- Channel
- Jason Yadlovski
- Category
- People & Blogs
- Duration
- 10:08
- Published
- November 6, 2014
- Views
- 301,011
- Likes
- 1,176
Tags
Share
This tutorial in other languages
- FRComment Agrandir une Image Basse Résolution Pour impression Utilisation de Photoshop
- ESCómo ampliar una imagen de baja resolución Para Imprimir con Photoshop
- PTComo ampliar uma imagem de baixa resolução Para Imprimir usando Photoshop
- ITCome per ingrandire un'immagine a bassa risoluzione Per Stampa con Photoshop
- DEWie zum Vergrößern auf ein Bild mit niedriger Auflösung für Drucke mit Photoshop
- NLHoe te vergroten een lage resolutie afdrukken: Photoshop
- RUКак Увеличить низкое разрешение изображения для печати с помощью Photoshop
- PLJak powiększyć niskiej rozdzielczości obrazu na potrzeby druku za pomocą Photoshopa
- JAどのように拡大するのPhotoshopを使用して印刷するための低解像度画像
- ARكيفية تكبير صورة منخفضة الدقة للطباعة باستخدام فوتوشوب
- HIकैसे विस्तार प्रिंट के लिए एक कम संकल्प छवि का उपयोग करते हुए फ़ोटोशॉप
- IDCara Memperbesar Image Resolusi Rendah Untuk Cetak Menggunakan Photoshop