Playback starts YouTube’s embedded player (privacy-enhanced mode).
How to Boot an Asus Eee PC Netbook from a USB Flash Drive
ChannelCrafted FlashDescription from the creator
craftedflash.com -- There are two ways to boot an Asus Eee PC from a USB flash drive or USB pendrive. Addresses booting via the boot device menu and by changing the BIOS settings to prefer the USB drive over the internal hard drive.
USB Boot Guide
craftedflash.com/info/how-boot-computer-from-us…
Bootable USB Used in the Video
craftedflash.com/products/games_to_go_flash_dri…
Transcript
Hi, I'm brian with CraftedFlash.com
We are going to boot an Asus Eee PC Netbook from a USB flash drive.
The flash drive is a 16GB USB 3.0 drive from CraftedFlash.com. In this video,
I will demonstrate two methods. In the first method, we will use the boot device
menu to select the USB drive for a one-time boot. In the second method, we will
setup the computer to always boot from the USB drive when it is connected to the
computer.
The first method is best when borrowing a friend's computer or using a public
computer in a hotel or Internet cafe. The second method is better for configuring
your own computer to boot from a flash drive.
To start the first method, we insert the USB drive in any available USB slot
and the power on the computer.
Now we need to press the Esc key several times as it powers up.
This will tell the computer to display the boot device menu.
From the boot device menu, we select the "USB: Patriot Memory" entry.
Patriot Memory is the hardware manufacturer of this USB drive..
As soon as we press enter, the computer begins loading the distro list from the
USB drive.
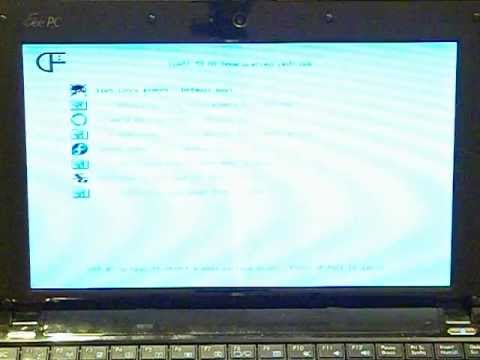
Once the distro list is displayed, we can use the arrow keys again to select the
distro or software that we wish to boot. This USB drive contains several gaming
distros.
Now that we have the distro list booted and running, this concludes the one-time
boot via the boot device menu. We can power down now and move on to method two.
The second method prepares your computer to always boot from the inserted USB
drive. If the USB drive is not inserted, the computer will boot from the
internal hard drive as usual.
To start method two, we can leave the USB drive attached and power on and use the
F2 key to enter the BIOS setup.
Now we need to change the boot priority so that the USB drive is preferred
over the internal hard drive. This will allow us to boot from the USB drive by
simply inserting the flash drive and powering up the netbook.
First we use the right arrow key to move to the "Boot" screen.
Then we use the down arrow key to move to the "Hard Disk Drives" entry and press
enter to select.
Then we use the down arrow key to move to the "USB: Patriot Memory".
Now use the "+" key to move it to the top priority.
Finally, we press F10 and the Enter to save the setting and exit the BIOS.
The computer will immediately begin the boot process and this time it will
automatically boot from the USB drive without using the boot device menu.
Now we can select a distro and from the menu and boot it from the USB drive.
We will select the live.linux-gamers distro and watch it boot up.
Please note that the keys used in this video are specific for this computer model.
To learn which keys are right for your computer, please visit CraftedFlash.com
and refer to our USB Flash Boot Guide.
Now we can play any of the games listed at the bottom of the screen.
If you have any questions about booting from USB flash drives, please visit our
forums at CraftedFlash.com.
USB Boot Guide
craftedflash.com/info/how-boot-computer-from-us…
Bootable USB Used in the Video
craftedflash.com/products/games_to_go_flash_dri…
Transcript
Hi, I'm brian with CraftedFlash.com
We are going to boot an Asus Eee PC Netbook from a USB flash drive.
The flash drive is a 16GB USB 3.0 drive from CraftedFlash.com. In this video,
I will demonstrate two methods. In the first method, we will use the boot device
menu to select the USB drive for a one-time boot. In the second method, we will
setup the computer to always boot from the USB drive when it is connected to the
computer.
The first method is best when borrowing a friend's computer or using a public
computer in a hotel or Internet cafe. The second method is better for configuring
your own computer to boot from a flash drive.
To start the first method, we insert the USB drive in any available USB slot
and the power on the computer.
Now we need to press the Esc key several times as it powers up.
This will tell the computer to display the boot device menu.
From the boot device menu, we select the "USB: Patriot Memory" entry.
Patriot Memory is the hardware manufacturer of this USB drive..
As soon as we press enter, the computer begins loading the distro list from the
USB drive.
Once the distro list is displayed, we can use the arrow keys again to select the
distro or software that we wish to boot. This USB drive contains several gaming
distros.
Now that we have the distro list booted and running, this concludes the one-time
boot via the boot device menu. We can power down now and move on to method two.
The second method prepares your computer to always boot from the inserted USB
drive. If the USB drive is not inserted, the computer will boot from the
internal hard drive as usual.
To start method two, we can leave the USB drive attached and power on and use the
F2 key to enter the BIOS setup.
Now we need to change the boot priority so that the USB drive is preferred
over the internal hard drive. This will allow us to boot from the USB drive by
simply inserting the flash drive and powering up the netbook.
First we use the right arrow key to move to the "Boot" screen.
Then we use the down arrow key to move to the "Hard Disk Drives" entry and press
enter to select.
Then we use the down arrow key to move to the "USB: Patriot Memory".
Now use the "+" key to move it to the top priority.
Finally, we press F10 and the Enter to save the setting and exit the BIOS.
The computer will immediately begin the boot process and this time it will
automatically boot from the USB drive without using the boot device menu.
Now we can select a distro and from the menu and boot it from the USB drive.
We will select the live.linux-gamers distro and watch it boot up.
Please note that the keys used in this video are specific for this computer model.
To learn which keys are right for your computer, please visit CraftedFlash.com
and refer to our USB Flash Boot Guide.
Now we can play any of the games listed at the bottom of the screen.
If you have any questions about booting from USB flash drives, please visit our
forums at CraftedFlash.com.
About this tutorial
Crafted Flash published this 5:02 video tutorial on November 11, 2012. It has been watched 248,021 times on YouTube.
- Channel
- Crafted Flash
- Category
- Science & Technology
- Duration
- 5:02
- Published
- November 11, 2012
- Views
- 248,021
- Likes
- 336
Tags
Share
This tutorial in other languages
- FRComment démarrer un Netbook Asus Eee PC à partir d'une clé USB
- ESCómo iniciar un Asus Eee PC Netbook desde una unidad flash USB
- PTComo inicializar um Asus Eee PC Netbook de um Flash Drive USB
- ITCome avviare un Asus Eee PC Netbook da un USB Flash Drive
- DEWie ein Asus Eee PC Netbook von einem USB-Flash-Laufwerk booten
- NLHoe kan ik een Asus Eee PC netbook te starten vanaf een USB-stick
- RUКак загрузиться в Asus Eee PC Netbook с флэш-накопителя USB
- PLJak uruchamiał Netbook Asus Eee PC z pamięci flash USB
- JAUSBフラッシュドライブからのAsus Eee PCのネットブックをブートする方法
- ARكيفية التمهيد جهاز آسوس PC النت بوك من USB فلاش حملة
- HIकैसे एक USB फ्लैश ड्राइव से एक Asus Eee पीसी नेटबुक बूट करने के लिए
- IDCara Boot Asus Eee PC Netbook dari USB Flash Drive