Playback starts YouTube’s embedded player (privacy-enhanced mode).
How to Exchange Membrane and Electrolyte of an InPro6850iG Oxygen Sensor
ChannelProcess Analytics from METTLER TOLEDOChapters
Description from the creator
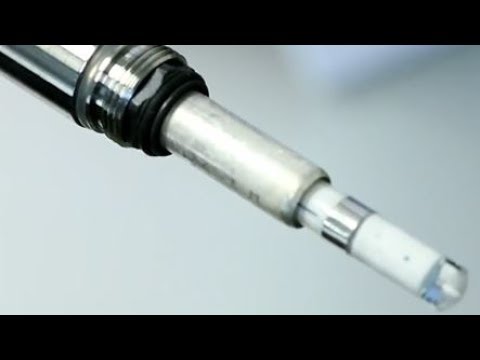
This video demonstrates how to exchange the membrane module and electrolyte of the InPro6850iG Amperometric gas-phase oxygen sensor.
To request information or pricing on the InPro6850iG Amperometric gas-phase oxygen sensor, visit:
mt.com/global/en/home/products/Process-Analytic…
The InPro6850iG can be installed directly in to the process and in contact with the gas stream, and they are easy to maintain. The following steps are the process for exchanging the membrane module and electrolyte:
After the sensor has been safely removed from the process you unscrew the cap sleeve from the shaft and gently pull it off the sensor.
Pull off the membrane body from the inner body.
Be careful, the membrane body is filled with the electrolyte which has a very alkaline pH of about 13. Contact with the skin and the eyes should be avoided at all times, so make sure that you wear protective eyewear and the required lab coat protection and gloves for this operation.
Once the used membrane body and electrolyte have been disposed of properly rinse the inner body with DI water and dry it with a clean tissue.
Visually inspect the o-rings and the washer for mechanical damage and replace them if necessary. New o-rings for each type of gas sensor can be found in the membrane replacement kit.
Take a new membrane body from the replacement kit and half fill the cavity with electrolyte, which is also part of the kit.
Make sure that the electrolyte is bubble free. Air bubbles can be removed by carefully tapping on the membrane body.
Slowly slip the membrane body over the interior body while holding the sensor in a vertical position.
The excess electrolyte will be displaced and should be removed using a
tissue.
Carefully slip the cap sleeve over the fitted membrane body and screw
it in tightly. The cap sleeve must be clean and dry. Clean up all excess
electrolyte using a clean tissue.
After each replacement of the electrolyte in the membrane, the sensor must be polarized over a period of six hours or more. For polarizing the sensor three options are available. You can use our polarizer and checking unit called sensor master. You can use the transmitter the sensor will be connected to during operation. Or you can polarize it on iSense, the PC-based asset suite that allows you to monitor the health status of your sensor. After the sensor has been polarized calibration is necessary. Using iSense this can be performed easily in a lab environment. Because the Amperometric sensors are highly linear from 0 to 100 percent oxygen, it is sufficient to perform a one-point calibration in air. The calibration itself is very fast and straightforward.
Connect with METTLER TOLEDO online:
Visit METTLER TOLEDO Process and Analytics website: mt.com/pro
Find METTLER TOLEDO on LinkedIn: linkedin.com/company/mettlertoledo
Find METTLER TOLEDO on Facebook: facebook.com/mettlertoledo
0:00 Amperometric sensors
0:44 Membrane body and electrolyte exchange
2:38 Polarization
3:12 Calibration
3:40 Saving on investment and maintenance cost
About this tutorial
Process Analytics from METTLER TOLEDO published this 4:12 video tutorial on October 28, 2017. It has been watched 12,783 times on YouTube.
- Category
- Science & Technology
- Duration
- 4:12
- Published
- October 28, 2017
- Views
- 12,783
- Likes
- 75
Tags
Share
This tutorial in other languages
- FRComment Exchange Membrane et Electrolyte d'un capteur d'oxygène InPro6850iG
- ESCómo Membrana de Intercambio de electrolitos y de un sensor de oxígeno InPro6850iG
- PTComo Exchange Membrane e eletrólitos de um Oxygen InPro6850iG Sensor
- ITCome Exchange Membrane e degli elettroliti di ossigeno InPro6850iG Sensor
- DEWie zu Exchange Membrane und Elektrolyt eines InPro6850iG Sauerstoff-Sensor
- NLHoe kan ik Exchange Membrane en elektrolyten van een InPro6850iG Oxygen Sensor
- RUКак обменной мембраны и электролитом в InPro6850iG кислородного датчика
- PLJak Exchange Membrane-elektrolitowej atomu tlenu InPro6850iG Sensor
- JAどのようにInPro6850iG酸素センサーの交換膜と電解質へ
- ARكيفية غشاء تبادل وبالكهرباء من الأوكسجين الاستشعار InPro6850iG
- HIकैसे विनिमय झिल्ली और एक InPro6850iG ऑक्सीजन सेंसर का इलेक्ट्रोलाइट के लिए
- IDCara Exchange Membrane dan elektrolit dari InPro6850iG Oxygen Sensor