Playback starts YouTube’s embedded player (privacy-enhanced mode).
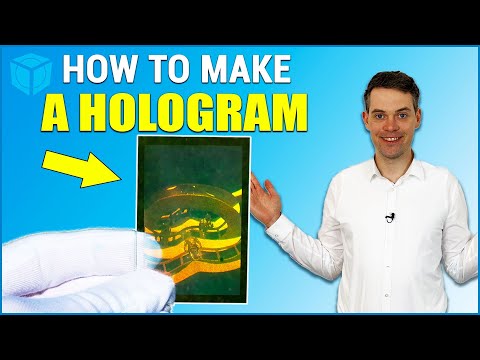
How to make a Hologram
ChannelHolocreators GmbHChapters
Description from the creator
A very detailed 12 step DIY guide on how to make a Hologram. We start by cutting the glass, then making the film, then exposing it to Laser light and finally developing and sealing the finished Hologram. This is DCG (dichromated gelatin) Holography. holocreators.com/
These are the 12 Steps you need to do to create your own real hologram on glass with DCG (dichromated gelatin):
0:00 Introduction
0:13 Step 1 – Checking the glass – To get the perfect Hologram you have to check the orientation of the “parallel-lines-pattern” inside the glass.
1:53 Step 2 – Cutting the glass – With a good cutting technique you will waste less glass in your hologram production.
4:12 Step 3 – Cleaning the glass – An Overview of the best chemicals for glass cleaning and how to detect the correct side for coating the glass.
6:26 Step 4 – Preparing the gelatin – Some proven DCG Hologram recipes and how they are adjusted for different temperatures and laser wavelengths.
9:49 Step 5 – Sensitizing the gelatin – How to add the Ammonium Dichromate to the gelatin mix and properly filter it.
13:08 Step 6 – Coating the glass – Working in a controlled coating environment makes better, cleaner holograms and also keeps you safe.
16:07 Step 7 – Building the exposure setup – Instructions on how to build a holographic recording setup.
18:03 Step 8 – Exposure – Expose your coated plates correctly to get the best holograms.
22:37 Step 9 – Developing – Keeping the many variables under control makes this the most crucial and difficult step in the hologram production.
30:38 Step 10 – Scraping – By removing some of the gelatin the Hologram will be properly framed.
33:49 Step 11 – Sealing – Using Epoxy Resin and gluing a cover plate on the hologram will protect it from moisture and preserve it for many years.
39:44 Step 12 – Grinding – Taking off the sharp edges from the glass will make the Hologram safer and more presentable.
ABOUT HOLOCREATORS
Holocreators is a 3D scanning and reverse engineering company. We offer 3D Scan and Reverse Engineering Services:
holocreators.com/
Email: [email protected]
Want more videos? Please subscribe ► youtube.com/channel/UCCqASJ0TtkgTtXN5on_POYw?su…
CONNECT WITH US
Blog: holocreators.com/blog/
Youtube: youtube.com/holocreators
Facebook: facebook.com/holocreators
Twitter: twitter.com/Holocreators
Reddit: reddit.com/user/Holocreators
LinkedIn: linkedin.com/company/holocreators
Instagram: instagram.com/holocreators/
HASHTAGS
#Holography
#Hologram
#DIY
#Laser
#Science
#DCGholography
#Lightartist
#3D
These are the 12 Steps you need to do to create your own real hologram on glass with DCG (dichromated gelatin):
0:00 Introduction
0:13 Step 1 – Checking the glass – To get the perfect Hologram you have to check the orientation of the “parallel-lines-pattern” inside the glass.
1:53 Step 2 – Cutting the glass – With a good cutting technique you will waste less glass in your hologram production.
4:12 Step 3 – Cleaning the glass – An Overview of the best chemicals for glass cleaning and how to detect the correct side for coating the glass.
6:26 Step 4 – Preparing the gelatin – Some proven DCG Hologram recipes and how they are adjusted for different temperatures and laser wavelengths.
9:49 Step 5 – Sensitizing the gelatin – How to add the Ammonium Dichromate to the gelatin mix and properly filter it.
13:08 Step 6 – Coating the glass – Working in a controlled coating environment makes better, cleaner holograms and also keeps you safe.
16:07 Step 7 – Building the exposure setup – Instructions on how to build a holographic recording setup.
18:03 Step 8 – Exposure – Expose your coated plates correctly to get the best holograms.
22:37 Step 9 – Developing – Keeping the many variables under control makes this the most crucial and difficult step in the hologram production.
30:38 Step 10 – Scraping – By removing some of the gelatin the Hologram will be properly framed.
33:49 Step 11 – Sealing – Using Epoxy Resin and gluing a cover plate on the hologram will protect it from moisture and preserve it for many years.
39:44 Step 12 – Grinding – Taking off the sharp edges from the glass will make the Hologram safer and more presentable.
ABOUT HOLOCREATORS
Holocreators is a 3D scanning and reverse engineering company. We offer 3D Scan and Reverse Engineering Services:
holocreators.com/
Email: [email protected]
Want more videos? Please subscribe ► youtube.com/channel/UCCqASJ0TtkgTtXN5on_POYw?su…
CONNECT WITH US
Blog: holocreators.com/blog/
Youtube: youtube.com/holocreators
Facebook: facebook.com/holocreators
Twitter: twitter.com/Holocreators
Reddit: reddit.com/user/Holocreators
LinkedIn: linkedin.com/company/holocreators
Instagram: instagram.com/holocreators/
HASHTAGS
#Holography
#Hologram
#DIY
#Laser
#Science
#DCGholography
#Lightartist
#3D
About this tutorial
Holocreators GmbH published this 44:51 video tutorial on November 5, 2018. It has been watched 285,098 times on YouTube.
- Channel
- Holocreators GmbH
- Category
- Science & Technology
- Duration
- 44:51
- Published
- November 5, 2018
- Views
- 285,098
- Likes
- 6,076
Share
This tutorial in other languages
- FRComment faire un Hologram
- ESComo hacer un holograma
- PTComo fazer um holograma
- ITCome fare un ologramma
- DEWie macht man einen Hologram
- NLHoe maak je een hologram te maken
- RUКак сделать голограмму
- PLJak zrobić hologram
- JAホログラムを作る方法
- ARكيفية جعل الصورة المجسمة
- HIकैसे एक होलोग्राम बनाने के लिए
- IDCara membuat Hologram