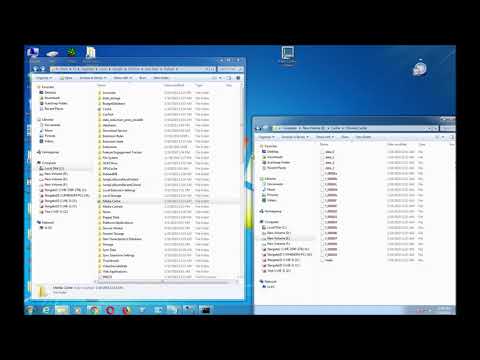
Playback starts YouTube’s embedded player (privacy-enhanced mode).
How to Move Google Chrome Cache Folder (Microsoft Windows)
ChannelAce1000ks1975Description from the creator
Procedure:
1. Locate the Google cache folder.
C:\Users\%Username%\AppData\Local\Google\Chrome\User Data\Default
(This should work on all computers, because I used %username% does not work in Windows 10. For Windows 10 find your user name and put it in.)
2. Delete or rename the cache folder. If you do not do this, you will get an error which states. Cannot create a file when that file already exists . You cannot link a folder which exists; therefore, you must delete or change the folder name.
3. Open Command Prompt, use the Mklink command.
Format: Mklink /d "Source Directory" "Target Target"
Examples used in this video
mklink /d "C:\Users\%username%\AppData\Local\Google\Chrome\User Data\Default\Cache" "E:\Cache\Chrome_Cache"
(Chrome Cache Folder was moved E:\Cachce\Chrome_Cache)
mklink /d "C:\Users\%username%\AppData\Local\Google\Chrome\User Data\Default\Media Cache" "E:\Cache\Chrome_MediaCache"
(Chrome Media Cache folder was moved to E:\Cache\Chrome_MediaCache folder)
To Undo it:
1. Go to
C:\Users\%username%\AppData\Local\Google\Chrome\User Data\Default , and delete the cache folder or folders you created. After that, chrome will automatically create another cache folder.
♦ Move Temp Folder in Windows
• youtube.com/watch?v=qsmATaLW7BE&feature=you…
1. Locate the Google cache folder.
C:\Users\%Username%\AppData\Local\Google\Chrome\User Data\Default
(This should work on all computers, because I used %username% does not work in Windows 10. For Windows 10 find your user name and put it in.)
2. Delete or rename the cache folder. If you do not do this, you will get an error which states. Cannot create a file when that file already exists . You cannot link a folder which exists; therefore, you must delete or change the folder name.
3. Open Command Prompt, use the Mklink command.
Format: Mklink /d "Source Directory" "Target Target"
Examples used in this video
mklink /d "C:\Users\%username%\AppData\Local\Google\Chrome\User Data\Default\Cache" "E:\Cache\Chrome_Cache"
(Chrome Cache Folder was moved E:\Cachce\Chrome_Cache)
mklink /d "C:\Users\%username%\AppData\Local\Google\Chrome\User Data\Default\Media Cache" "E:\Cache\Chrome_MediaCache"
(Chrome Media Cache folder was moved to E:\Cache\Chrome_MediaCache folder)
To Undo it:
1. Go to
C:\Users\%username%\AppData\Local\Google\Chrome\User Data\Default , and delete the cache folder or folders you created. After that, chrome will automatically create another cache folder.
♦ Move Temp Folder in Windows
• youtube.com/watch?v=qsmATaLW7BE&feature=you…
About this tutorial
Ace1000ks1975 published this 12:24 video tutorial on November 4, 2019. It has been watched 23,694 times on YouTube.
- Channel
- Ace1000ks1975
- Category
- Science & Technology
- Duration
- 12:24
- Published
- November 4, 2019
- Views
- 23,694
- Likes
- 161
Tags
Share
This tutorial in other languages
- FRComment déplacer Google Chrome Cache dossier (Microsoft Windows)
- ESCómo mover Google Chrome caché de carpeta (Microsoft Windows)
- PTComo mover pasta Cache Chrome Google (Microsoft Windows)
- ITCome spostare Google Chrome cartella Cache (Microsoft Windows)
- DESo verschieben Sie Google Chrome Cache-Ordner (Microsoft Windows)
- NLHow to Move Google Chrome Cache map (Microsoft Windows)
- RUКак переместить Google Chrome Cache Folder (Microsoft Windows)
- PLJak przenieść Google Chrome Cache Folder (Microsoft Windows)
- JAGoogle Chromeのキャッシュフォルダ(マイクロソフトWindows)を移動する方法
- ARكيفية نقل جوجل كروم مجلد التخزين المؤقت (مايكروسوفت ويندوز)
- HIकैसे ले जाएँ करने के लिए गूगल क्रोम कैश फ़ोल्डर (माइक्रोसॉफ्ट विंडोज)
- IDCara Pindah Google Chrome Cache Folder (Microsoft Windows)