Playback starts YouTube’s embedded player (privacy-enhanced mode).
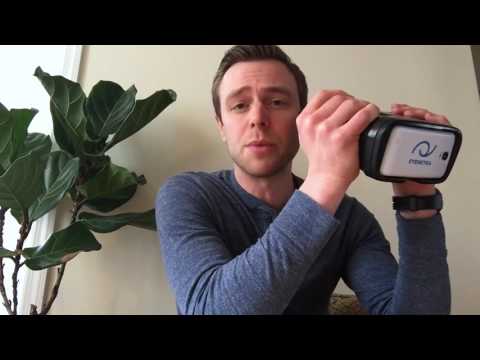
How to Use the EyeNetra Autorefractor
ChannelEyeNetra IncDescription from the creator
Get to know the tips and tricks for running Netra.
1: Remember to run the tutorial with every patient. It's important that they understand beforehand what they need to do.
2: Make sure people are comfortable: seated, elbows on a table, thumbs facing up.
3: Find the patterns (not a big deal, Patients just need to see the lines well). Remember them that the center lines will not be sharp, but they should be fully visible. They are being fogged, so everything will be blurry.
4: Align and Confirm. 8 times per eye.
5: The numbers that pop up are just a distraction. If they are reading them, it is a sign that they are being correctly fogged, relaxing their eyes.
6: On the result screen Poor and Lousy results usually mean that the patient was not completely aware of the procedures. You can retake the test or refine them on the phoropter.
Additional Information for technicians:
Netra measures in this sequence: the left eye (1x), right eye (9x) and left eye (8x). The first left and right alignments measure PD only while helping them train for the following alignments.
So, it is very common to see the following pattern:
(i) they find the patterns on the first and second alignments,
(ii) then they will do a streak of 8 alignments on the right eye without having to find them,
(iii) the test will start the left eye measurements, so they will need to find the patterns again
(iv) and then complete with the following 8 alignments.
You can purchase yours directly here: store.eyenetra.com/products/netra-autorefractor…
1: Remember to run the tutorial with every patient. It's important that they understand beforehand what they need to do.
2: Make sure people are comfortable: seated, elbows on a table, thumbs facing up.
3: Find the patterns (not a big deal, Patients just need to see the lines well). Remember them that the center lines will not be sharp, but they should be fully visible. They are being fogged, so everything will be blurry.
4: Align and Confirm. 8 times per eye.
5: The numbers that pop up are just a distraction. If they are reading them, it is a sign that they are being correctly fogged, relaxing their eyes.
6: On the result screen Poor and Lousy results usually mean that the patient was not completely aware of the procedures. You can retake the test or refine them on the phoropter.
Additional Information for technicians:
Netra measures in this sequence: the left eye (1x), right eye (9x) and left eye (8x). The first left and right alignments measure PD only while helping them train for the following alignments.
So, it is very common to see the following pattern:
(i) they find the patterns on the first and second alignments,
(ii) then they will do a streak of 8 alignments on the right eye without having to find them,
(iii) the test will start the left eye measurements, so they will need to find the patterns again
(iv) and then complete with the following 8 alignments.
You can purchase yours directly here: store.eyenetra.com/products/netra-autorefractor…
About this tutorial
EyeNetra Inc published this 4:53 video tutorial on November 15, 2016. It has been watched 30,989 times on YouTube.
- Channel
- EyeNetra Inc
- Category
- Science & Technology
- Duration
- 4:53
- Published
- November 15, 2016
- Views
- 30,989
- Likes
- 88
Tags
Share
This tutorial in other languages
- FRComment utiliser le EyeNetra Autoréfractomètre
- ESCómo utilizar el EyeNetra Autorefractor
- PTComo usar o EyeNetra Autorefractor
- ITCome utilizzare l'EyeNetra autorifrattore
- DESo verwenden Sie die EyeNetra Autorefraktometer
- NLHoe de EyeNetra Autorefractor Gebruik
- RUКак использовать EyeNetra Autorefractor
- PLJak korzystać z EyeNetra Autorefractor
- JAEyeNetra Autorefractorを使用する方法
- ARكيفية استخدام EyeNetra Autorefractor
- HIEyeNetra Autorefractor का उपयोग कैसे करें
- IDCara Menggunakan EyeNetra Autorefractor