Playback starts YouTube’s embedded player (privacy-enhanced mode).
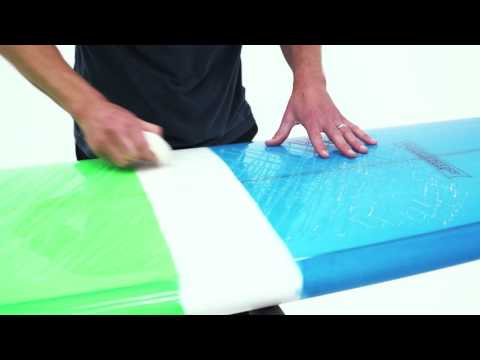
How to Wax a Surfboard
ChannelGlobalSurfIndustriesDescription from the creator
Choose wax density based on water temperature: harder wax works as a basecoat or in warm water; softer wax suits cold water or as a topcoat over a base layer. A mid-density wax is a solid all-rounder across most conditions. If you're re-waxing a used board, clean off the old wax thoroughly first.
To build a grippy coat, use the block's edge to lay diagonal lines across the board, then repeat in the opposite diagonal direction, keeping pressure even and lines close together; this creates a criss-cross texture that raises small bumps.
Once the block wears a flat side, switch to longer strokes up and down the board to build the bumps further, continuing the criss-cross pattern until they reach at least 1mm high.
If the wax smears instead of building texture, you're pressing too hard; keep wax off the rails to avoid extra drag.
Finish with circular motions in your foot zones to reinforce grip where you need it most.
For extra grip before every surf, give the board a light re-rub rather than a full re-wax.
In this video:
– How to choose the right wax hardness for water temperature and use (base vs. top coat)
– Building a textured, grippy wax coat with the criss-cross technique
– Target bump height and how to tell if you're pressing too hard
– Why wax shouldn't extend too far around the rails
– Quick pre-surf touch-up tip
View our complete range of 'How to" videos:
AU: au.surfindustries.com/pages/how-to-videos
EU: eu.surfindustries.com/pages/how-to-videos
NZ: nz.surfindustries.com/pages/how-to-videos
UK: uk.surfindustries.com/pages/how-to-videos
US: us.surfindustries.com/pages/how-to-videos
To build a grippy coat, use the block's edge to lay diagonal lines across the board, then repeat in the opposite diagonal direction, keeping pressure even and lines close together; this creates a criss-cross texture that raises small bumps.
Once the block wears a flat side, switch to longer strokes up and down the board to build the bumps further, continuing the criss-cross pattern until they reach at least 1mm high.
If the wax smears instead of building texture, you're pressing too hard; keep wax off the rails to avoid extra drag.
Finish with circular motions in your foot zones to reinforce grip where you need it most.
For extra grip before every surf, give the board a light re-rub rather than a full re-wax.
In this video:
– How to choose the right wax hardness for water temperature and use (base vs. top coat)
– Building a textured, grippy wax coat with the criss-cross technique
– Target bump height and how to tell if you're pressing too hard
– Why wax shouldn't extend too far around the rails
– Quick pre-surf touch-up tip
View our complete range of 'How to" videos:
AU: au.surfindustries.com/pages/how-to-videos
EU: eu.surfindustries.com/pages/how-to-videos
NZ: nz.surfindustries.com/pages/how-to-videos
UK: uk.surfindustries.com/pages/how-to-videos
US: us.surfindustries.com/pages/how-to-videos
About this tutorial
GlobalSurfIndustries published this 1:46 video tutorial on November 8, 2015. It has been watched 96,247 times on YouTube.
- Channel
- GlobalSurfIndustries
- Category
- Sports
- Duration
- 1:46
- Published
- November 8, 2015
- Views
- 96,247
Tags
Share
This tutorial in other languages
- FRComment cire une planche de surf
- ESCómo Cera una tabla de surf
- PTComo Wax uma prancha
- ITCome Cera una tavola da surf
- DEWie man Wachs ein Surfbrett
- NLHoe maak je Wax een surfplank
- RUКак Воск Surfboard
- PLJak Wax deska surfingowa
- JAどのようにワックスサーフボードへ
- ARكيفية الشمع على لوح التزلج
- HIकैसे वैक्स एक सर्फ़बोर्ड के लिए
- IDCara Wax sebuah papan selancar