Playback starts YouTube’s embedded player (privacy-enhanced mode).
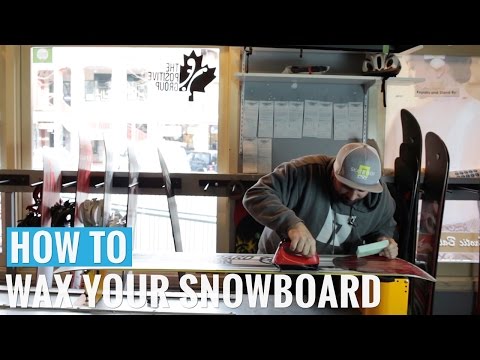
How To Wax Your Snowboard
ChannelSnowboard AddictionDescription from the creator
snowboardaddiction.com/
In this video and blog, Yohann shows you how to wax your snowboard correctly; to keep your board maintained, riding faster and lasting you longer!
Tools Needed
A Block Of Wax
An Iron
Why Do You Need To Wax Your Board?
1. Go Faster!
By waxing your board regularly (once per week), you will ensure your board rides fast! In doing so, waxing your board reduces your chances of having to one foot along flat spots...No snowboarder enjoys getting caught on the flats with no speed!
2. Your Snowboard Will Last Longer
Waxing your board will increase the longevity of your snowboard. Waxing hydrates the base and stops the pores of the P-tex base drying up. If you wax your board regularly, your board will stay as fast and fresh as a daisy.
How To Wax Your Board In 3 Easy Steps!
Step 1: Drip Line And Iron Wax Into The Closest Edge To You
Melt the wax on your heated iron. Ironing Tip - You want a hot iron that melts the wax quickly, but not too hot that the wax begins to smoke when in contact with the iron.
Start with the edge closet to you. Do one drip line along the the edge from one end to the other. Try to keep the drip line 1cm in width. This will give you the perfect amount of wax and allow you to spread it evenly along the edge.
Once you get to the end of your snowboard with the drip line. Start going back and fourth along the drip line with the hot iron. Slowly melt the wax. You can push the wax in as hard as you like. The harder you push the wax into your snowboard base, the more the wax will seep into each P-tex pore.
Get the board nice and warm. Feel the underneath of the board to ensure the iron is not too hot and the board does not overheat. If the top sheet feels warm (but not hot) and the wax is nicely spread out, move onto the next edge.
Step 2: Drip Line And Iron Wax Into The Furthest Edge To You
Again, do another drip line making sure its 1cm in width along the other edge.
If needed, go in a circular motion to push the wax into the board. This can help get the wax into the pores, because a base of a snowboard is never fully flat, so you may need to force the wax into base from different angles.
Step 3: Drip Line And Iron Wax Into The Middle Of Your Board
Now that you have waxed the edges of your board, melt wax in a drip line down the middle of your snowboard. Try to make the drip line a bit thicker for the middle (2-4cm wide) as you have more surface area to cover.
Once you have done the drip line on the middle of the board, do a couple of laps up and down the snowboard with your iron. Spread the wax evenly and try to cover the whole of the middle section of your board.
A Tip For Your Tip & Tail
Be careful when waxing the tip and tail. You should wax the tip and tail, but not every time you wax your board. This is because the tip and tail is hard to scrape and does not get as much wear on the snow, as the middle or edges of your board.
If you wax your tip and tail regularly, you might notice that you get a build of gunk and wax on the tip and tail of your board. It will just look super dirty. To avoid this build up, iron with less wax on the tip and tail, or don't wax the tip and tail every time you wax your board.
To Finish
After about 5 - 10 minutes of waxing your board, the wax should be spread out evenly along your snowboard and the underside of your board should start to feel warm. Once your snowboard feels warm and the wax is evenly spread out, leave your board for at least 30 minutes (ideally overnight) to allow the wax to dry and seep into every P-tex pore.
You are now ready for the next step, which is scraping the wax (Scraping Wax is part 3 of our 3 part series - coming soon).
Living Or Visiting Whistler And Want To Get Your Own Board Professionally Waxed?
Pay Yohann a visit at Underground Tuning. Mention Snowboard Addiction and you will get an exclusive 15% discount. Keep that on the down low...
FOLLOW US!
Facebook: on.fb.me/1GlT55K
Instagram: bit.ly/1HuvQKz
Twitter: bit.ly/1CDPOUz
Enjoyed the video? Be sure to LIKE, COMMENT, and SUBSCRIBE below!
In this video and blog, Yohann shows you how to wax your snowboard correctly; to keep your board maintained, riding faster and lasting you longer!
Tools Needed
A Block Of Wax
An Iron
Why Do You Need To Wax Your Board?
1. Go Faster!
By waxing your board regularly (once per week), you will ensure your board rides fast! In doing so, waxing your board reduces your chances of having to one foot along flat spots...No snowboarder enjoys getting caught on the flats with no speed!
2. Your Snowboard Will Last Longer
Waxing your board will increase the longevity of your snowboard. Waxing hydrates the base and stops the pores of the P-tex base drying up. If you wax your board regularly, your board will stay as fast and fresh as a daisy.
How To Wax Your Board In 3 Easy Steps!
Step 1: Drip Line And Iron Wax Into The Closest Edge To You
Melt the wax on your heated iron. Ironing Tip - You want a hot iron that melts the wax quickly, but not too hot that the wax begins to smoke when in contact with the iron.
Start with the edge closet to you. Do one drip line along the the edge from one end to the other. Try to keep the drip line 1cm in width. This will give you the perfect amount of wax and allow you to spread it evenly along the edge.
Once you get to the end of your snowboard with the drip line. Start going back and fourth along the drip line with the hot iron. Slowly melt the wax. You can push the wax in as hard as you like. The harder you push the wax into your snowboard base, the more the wax will seep into each P-tex pore.
Get the board nice and warm. Feel the underneath of the board to ensure the iron is not too hot and the board does not overheat. If the top sheet feels warm (but not hot) and the wax is nicely spread out, move onto the next edge.
Step 2: Drip Line And Iron Wax Into The Furthest Edge To You
Again, do another drip line making sure its 1cm in width along the other edge.
If needed, go in a circular motion to push the wax into the board. This can help get the wax into the pores, because a base of a snowboard is never fully flat, so you may need to force the wax into base from different angles.
Step 3: Drip Line And Iron Wax Into The Middle Of Your Board
Now that you have waxed the edges of your board, melt wax in a drip line down the middle of your snowboard. Try to make the drip line a bit thicker for the middle (2-4cm wide) as you have more surface area to cover.
Once you have done the drip line on the middle of the board, do a couple of laps up and down the snowboard with your iron. Spread the wax evenly and try to cover the whole of the middle section of your board.
A Tip For Your Tip & Tail
Be careful when waxing the tip and tail. You should wax the tip and tail, but not every time you wax your board. This is because the tip and tail is hard to scrape and does not get as much wear on the snow, as the middle or edges of your board.
If you wax your tip and tail regularly, you might notice that you get a build of gunk and wax on the tip and tail of your board. It will just look super dirty. To avoid this build up, iron with less wax on the tip and tail, or don't wax the tip and tail every time you wax your board.
To Finish
After about 5 - 10 minutes of waxing your board, the wax should be spread out evenly along your snowboard and the underside of your board should start to feel warm. Once your snowboard feels warm and the wax is evenly spread out, leave your board for at least 30 minutes (ideally overnight) to allow the wax to dry and seep into every P-tex pore.
You are now ready for the next step, which is scraping the wax (Scraping Wax is part 3 of our 3 part series - coming soon).
Living Or Visiting Whistler And Want To Get Your Own Board Professionally Waxed?
Pay Yohann a visit at Underground Tuning. Mention Snowboard Addiction and you will get an exclusive 15% discount. Keep that on the down low...
FOLLOW US!
Facebook: on.fb.me/1GlT55K
Instagram: bit.ly/1HuvQKz
Twitter: bit.ly/1CDPOUz
Enjoyed the video? Be sure to LIKE, COMMENT, and SUBSCRIBE below!
About this tutorial
Snowboard Addiction published this 3:16 video tutorial on November 8, 2016. It has been watched 31,187 times on YouTube.
- Channel
- Snowboard Addiction
- Category
- Sports
- Duration
- 3:16
- Published
- November 8, 2016
- Views
- 31,187
- Likes
- 219
Tags
Share
This tutorial in other languages
- FRComment faire pour lustrer la planche à neige
- ESCómo Cera su tabla de snowboard
- PTComo Wax seu snowboard
- ITCome Cera tuo snowboard
- DEHow To Wax Ihr Snowboard
- NLHow To Wax je snowboard
- RUКак Воск Ваш сноуборд
- PLJak Wax Twoje Snowboard
- JAどのようにするにはワックスあなたのスノーボード
- ARكيفية الشمع بك على الجليد
- HIकैसे करने के लिए वैक्स आपका स्नोबोर्ड
- IDCara Wax Snowboard Anda