Playback starts YouTube’s embedded player (privacy-enhanced mode).
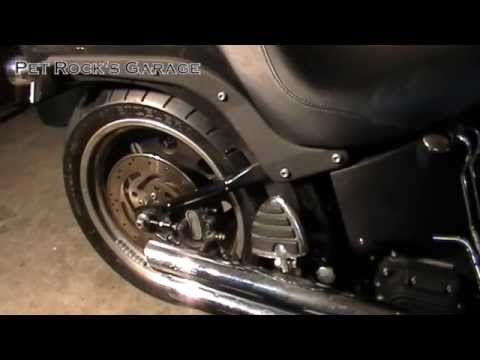
How To Remove & Install Rear Wheel - Harley Davidson Softail
ChannelPet Rock's GarageDescription from the creator
This is a step by step instructional video on how to remove and reinstall the rear wheel on a Harley Davidson Softail that came from the factory with a 200mm rear tire. While I’m working on a 2006 Night Train (FXSTBI), other year & model Harley’s came with this configuration (see below). This job seems fairly straight forward, but it is anything but. There are quite a few pit-falls you need to watch out for and ultimately can be a P.I.T.A. especially if it is your first time. I’ll cover various tips & tricks to make this job quick & easy. With a little practice you can have this job done in less then hour, even if you take your time.
2006 was the first year that Harley Davidson came out with a motorcycle with a 200mm rear tire from the factory. At that time it included the Night Train (FXSTB & FXSTBI), Standard (FXST & FXSTI), and Springer (FXSTS & FXSTSI) models. Later on the Cross Bones (FLSTSB & FLSTSBI), Fat Boy (FLSTF & FLSTFI) and Fat Boy Lo (FLSTFB & FLSTFBI) came out with this size rear tire. There may be other models that I’m not aware of that came this rear tire. The Fat Boy & Fat Boy Lo are still in production with this 200mm rear tire as of 2014.
How To Remove & Install Front Wheel - Harley Davidson Softail:
youtu.be/orPTdaFIukk
My "'06 Harley Night Train (FXSTBI) Repair & Maintenance" Playlist:
youtube.com/playlist?list=PLRaskbwUWbool2I6BFs-…
The information in this video is for educational purposes only. Pet Rock assumes no liability for property damage or injury incurred as a result of any of the information contained in this video. Use the information in this video at your own risk. Pet Rock recommends safe practices when working with power tools, automotive lifts, lifting tools, jack stands, electrical equipment, blunt instruments, chemicals, lubricants, or any other tools or equipment seen or implied in this video. Any injury, damage or loss that may result from improper use of these tools, equipment, or the information contained in this video is the sole responsibility of the user and not Pet Rock.
2006 was the first year that Harley Davidson came out with a motorcycle with a 200mm rear tire from the factory. At that time it included the Night Train (FXSTB & FXSTBI), Standard (FXST & FXSTI), and Springer (FXSTS & FXSTSI) models. Later on the Cross Bones (FLSTSB & FLSTSBI), Fat Boy (FLSTF & FLSTFI) and Fat Boy Lo (FLSTFB & FLSTFBI) came out with this size rear tire. There may be other models that I’m not aware of that came this rear tire. The Fat Boy & Fat Boy Lo are still in production with this 200mm rear tire as of 2014.
How To Remove & Install Front Wheel - Harley Davidson Softail:
youtu.be/orPTdaFIukk
My "'06 Harley Night Train (FXSTBI) Repair & Maintenance" Playlist:
youtube.com/playlist?list=PLRaskbwUWbool2I6BFs-…
The information in this video is for educational purposes only. Pet Rock assumes no liability for property damage or injury incurred as a result of any of the information contained in this video. Use the information in this video at your own risk. Pet Rock recommends safe practices when working with power tools, automotive lifts, lifting tools, jack stands, electrical equipment, blunt instruments, chemicals, lubricants, or any other tools or equipment seen or implied in this video. Any injury, damage or loss that may result from improper use of these tools, equipment, or the information contained in this video is the sole responsibility of the user and not Pet Rock.
About this tutorial
Pet Rock's Garage published this 25:17 video tutorial on October 26, 2014. It has been watched 489,636 times on YouTube.
- Channel
- Pet Rock's Garage
- Category
- Autos & Vehicles
- Duration
- 25:17
- Published
- October 26, 2014
- Views
- 489,636
- Likes
- 3,914
Share
This tutorial in other languages
- FRComment faire pour supprimer et installer la roue arrière - Harley Davidson Softail
- ESCómo quitar e instalar la rueda trasera - Harley Davidson Softail
- PTComo remover e instalar roda traseira - Harley Davidson Softail
- ITCome rimuovere e installare ruota posteriore - Harley Davidson Softail
- DEWie zum Entfernen und Installieren Rear-Rad - Harley Davidson Softail
- NLHoe te verwijderen en installeren Rear Wheel - Harley Davidson Softail
- RUКак удалить и установить заднее колесо - Harley Davidson Softail
- PLJak usunąć i zainstalować tylne koło - Harley Davidson Softail
- JAハーレーダビッドソンソフテイルを - リアホイールを外し&インストールする方法
- ARكيفية إزالة وتثبيت العجلات الخلفية - هارلي ديفيدسون سوفتيل
- HIकैसे निकालें और रियर व्हील स्थापित करने के लिए - हार्ले डेविडसन सॉफ्टेल
- IDCara Hapus & Install Rear Wheel - Harley Davidson Softail