Playback starts YouTube’s embedded player (privacy-enhanced mode).
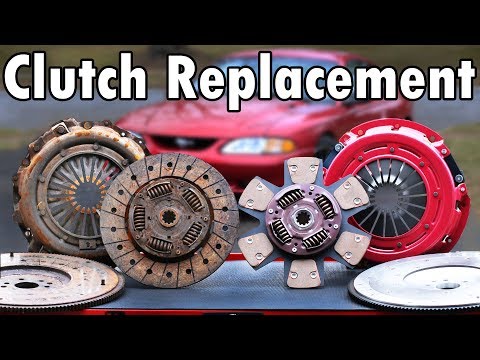
How to Replace a Clutch in your Car or Truck (Full DIY Guide)
ChannelChrisFixIn brief
This guide shows how to replace a clutch system’s key components—flywheel, pressure plate, throwout bearing, pilot bearing, and rear main seal—while the transmission is already removed. It’s ideal for DIYers tackling a full rebuild to avoid future repeat work, with clear steps for each part’s removal and installation.
Questions & answers
What parts are included in a typical clutch kit?
Most clutch kits include the pressure plate and throwout bearing, but you’ll need to buy the pilot bearing and rear main seal separately.
Do I need to replace the flywheel if it’s not worn?
No, but the creator upgraded to an aluminum flywheel for weight reduction while the transmission was out.
Description from the creator
My clutch was fine but my throwout bearing was bad so I decided to show how to replace all of the wear items while the transmission was off. This includes replacing the pilot bearing which the transmission input shaft goes into, the throwout bearing which engages the pressure plate via the clutch fork, the flywheel which I upgraded to an aluminum light weight flywheel, and finally the rear main seal because that is a common wear item which causes oil leaks in higher mileage motors. With the transmission out, it is worth it to replace all of these parts now instead of having to do this all over again. Most clutch kits come with the throwout bearing and pilot bearing so you just need to buy a rear main seal.
How to Replace a Transmission (Full DIY Guide): youtube.com/watch?v=al08aGQTkFk
Extendable Ratchet Set: amzn.to/3PzSjOs
Flywheel I used: advanceautoparts.rt8x.net/ORV1AP
Clutch kit I used: advanceautoparts.rt8x.net/2rbKmA
Rear Main Seal: advanceautoparts.rt8x.net/RygRVv
→ Become a ChrisFix Subscriber: youtube.com/subscription_center?add_user=paintb…
→ Instagram: instagram.com/chrisfixit
→ Facebook: facebook.com/chrisfix8
→ Website: ChrisFixed.com
→ My Channel Home Page: youtube.com/ChrisFix
**If the video was helpful, remember to give it a "thumbs up" and consider subscribing.**
Disclaimer:
Due to factors beyond the control of ChrisFix, I cannot guarantee against improper use or unauthorized modifications of this information. ChrisFix assumes no liability for property damage or injury incurred as a result of any of the information contained in this video. Use this information at your own risk. ChrisFix recommends safe practices when working on vehicles and or with tools seen or implied in this video. Due to factors beyond the control of ChrisFix, no information contained in this video shall create any expressed or implied warranty or guarantee of any particular result. Any injury, damage, or loss that may result from improper use of these tools, equipment, or from the information contained in this video is the sole responsibility of the user and not ChrisFix.
About this tutorial
ChrisFix published this 32:00 video tutorial on October 25, 2019. It has been watched 13,553,926 times on YouTube.
- Channel
- ChrisFix
- Category
- Autos & Vehicles
- Duration
- 32:00
- Published
- October 25, 2019
- Views
- 13,553,926
- Likes
- 209,288
Tags
Share
Further reading
-
How to Replace an Automotive Clutch - 2CarPros
2carpros.com
A clutch will slip when it needs o be repalced. Before you replace your clutch its a good idea to see how the clutch works and the symptoms of a bad clutch.A clutch will have problems and can stop working all together b…
-
DIY Tips: Replacing your clutch isn't that hard
autoweek.com
Replacing a clutch disc and pressure plate is probably on your “take it to the mechanic” list. It shouldn’t be -- replacing a whole clutch assembly is something the skilled DIYer can do in a ...
-
How to Change a Clutch in Your Car | DoItYourself.com
doityourself.com
Step 7 - Release the Jack and Lower Your Vehicle. After securing all the bolts on the engine mount and around the transaxle, remove jack stands and gently release the jack to lower the front end of your vehicle. Step 8…
This tutorial in other languages
- FRComment remplacer un embrayage dans votre voiture ou camion (guide complet de bricolage)
- ESCómo reemplazar un embrague en su coche o camión (Guía completa de bricolaje)
- PTComo substituir uma embreagem no seu carro ou caminhão (Guia completa DIY)
- ITCome sostituire una frizione in auto o camion (Guida Completa DIY)
- DESo ersetzen Sie eine Kupplung im Auto oder LKW (Full DIY Guide)
- NLHoe maak je een Clutch Vervang in uw auto of vrachtwagen (Full DIY Guide)
- RUКак заменить сцепление в вашем автомобиле или грузовике (Full Guide DIY)
- PLJak wymienić sprzęgło w samochodzie lub ciężarówki (Full DIY Guide)
- JAあなたの車やトラック(フルDIYガイド)でクラッチを交換する方法
- ARكيفية استبدال الفاصل في سيارة أو شاحنة الخاص بك (دليل DIY الكامل)
- HIअपनी कार या में एक क्लच कैसे बदलें ट्रक (पूर्ण DIY गाइड)
- IDCara Ganti Kopling di Mobil atau Truk (Full DIY Guide)