Playback starts YouTube’s embedded player (privacy-enhanced mode).
How to Replace Nintendo DS Lite Shell and Screen
ChannelThe Broken PastDescription from the creator
Hello again!
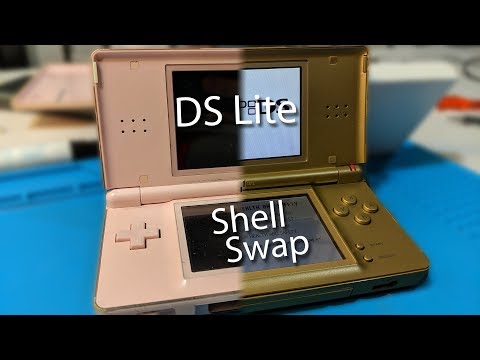
In this video, we have an extremely detailed guide on how to reshell a DS Lite, as well as how to replace a broken top screen in the process. This is quite the lengthy video, and covers the entire process, from start to finish, for removing the old shell, replacing the screen, and putting it all back together in a new shell!
If you're looking for a specific part of the repair process, I've provided a breakdown of the timestamps for each part:
Bottom Removal: 2:15
Shoulder Buttons: 7:27
Wifi Chip / Microphone Cables: 8:55
Wifi Antenna Wire: 9:50
Motherboard Removal: 10:40
Button Pads: 13:00
Hinge: 13:55
Top Panel: 15:20
Top LCD Cover: 17:03
Top LCD Screen and Speakers: 20:37
Wifi Antenna and Microphone: 25:00
Speaker Swap to New Screen: 28:45
Screen Sticky Tape Surround Swap to New Screen: 35:35
Wifi Antenna and Microphone - Reinstall: 39:13
Top LCD Screen and Speakers - Reinstall: 41:05
Top LCD Cover - Reinstall: 49:28
Top Panel - Reinstall: 53:44
Hinge - Reinstall: 55:05
Digitizer Surround - Removal: 59:46
Button Pads - Reinstall: 1:04:08
Motherboard - Reinstall: 1:05:53
Wifi Antenna and Microphone - Reinstall: 1:07:50
Shoulder Buttons - Reinstall: 1:10:00
Bottom - Reinstall: 1:14:04
Testing the Unit: 1:25:50
Digitizer Surround - Reinstall: 1:27:10
Top LCD Cover - Reinstall: 1:29:20
Bumpers and Screw Covers - Reinstall: 1:31:25
The Result! 1:38:30
Thanks for watching!
In this video, we have an extremely detailed guide on how to reshell a DS Lite, as well as how to replace a broken top screen in the process. This is quite the lengthy video, and covers the entire process, from start to finish, for removing the old shell, replacing the screen, and putting it all back together in a new shell!
If you're looking for a specific part of the repair process, I've provided a breakdown of the timestamps for each part:
Bottom Removal: 2:15
Shoulder Buttons: 7:27
Wifi Chip / Microphone Cables: 8:55
Wifi Antenna Wire: 9:50
Motherboard Removal: 10:40
Button Pads: 13:00
Hinge: 13:55
Top Panel: 15:20
Top LCD Cover: 17:03
Top LCD Screen and Speakers: 20:37
Wifi Antenna and Microphone: 25:00
Speaker Swap to New Screen: 28:45
Screen Sticky Tape Surround Swap to New Screen: 35:35
Wifi Antenna and Microphone - Reinstall: 39:13
Top LCD Screen and Speakers - Reinstall: 41:05
Top LCD Cover - Reinstall: 49:28
Top Panel - Reinstall: 53:44
Hinge - Reinstall: 55:05
Digitizer Surround - Removal: 59:46
Button Pads - Reinstall: 1:04:08
Motherboard - Reinstall: 1:05:53
Wifi Antenna and Microphone - Reinstall: 1:07:50
Shoulder Buttons - Reinstall: 1:10:00
Bottom - Reinstall: 1:14:04
Testing the Unit: 1:25:50
Digitizer Surround - Reinstall: 1:27:10
Top LCD Cover - Reinstall: 1:29:20
Bumpers and Screw Covers - Reinstall: 1:31:25
The Result! 1:38:30
Thanks for watching!
About this tutorial
The Broken Past published this 1:42:18 video tutorial on November 2, 2019. It has been watched 191,420 times on YouTube.
- Channel
- The Broken Past
- Category
- Gaming
- Duration
- 1:42:18
- Published
- November 2, 2019
- Views
- 191,420
- Likes
- 3,507
Tags
Share
This tutorial in other languages
- FRComment remplacer Nintendo DS Lite Shell et écran
- ESCómo reemplazar Nintendo DS Lite Shell y pantalla
- PTComo substituir Nintendo DS Lite Shell e Tela
- ITCome sostituire Nintendo DS Lite Shell e Screen
- DESo ersetzen Nintendo DS Lite Shell und Bildschirm
- NLHoe te vervangen Nintendo DS Lite Shell en Screen
- RUКак заменить Nintendo DS Lite консоли и экран
- PLJak wymienić Nintendo DS Lite Shell i ekran
- JAニンテンドーDS Liteのシェルと画面を交換する方法
- ARكيفية استبدال نينتندو DS لايت شل والشاشة
- HIकैसे बदलें Nintendo DS लाइट शेल और स्क्रीन
- IDCara Ganti Nintendo DS Lite Shell dan Screen