Playback starts YouTube’s embedded player (privacy-enhanced mode).
How to Create a Zoetrope
ChannelHowcastDescription from the creator
Watch more Animation Techniques videos: howcast.com/videos/169724-How-to-Create-a-Zoetr…
For a fun novelty project, try making a zoetrope at home.
Step 1: Plan the animation
Plan out your animation. Assume there will be about 12 cells, or steps.
Tip
The best animations for a zoetrope are cyclical, like a man walking, or a sun rising and setting.
Step 2: Place the lid flat side down
Place the can lid flat side down.
Step 3: Roll white paper into a tube and place into lid
Gently roll the white paper into a tube and place it into the lid, so that the rim of the lid supports the tube of paper. You will have a drum with an open end and the lid as the bottom.
Step 4: Mark where the inside edge overlaps the paper
Use the pencil to lightly mark where the inside edge overlaps the inside of the white paper.
Step 5: Measure the white paper
Lay the white paper flat and measure the distance from the inside edge of the sheet to the mark. This will be the longer distance to the mark you made.
Step 6: Divide by the number of steps in your animation
Divide the distance by 12 — or the number of steps in your animation — and mark a light line at the bottom edge of the paper to divide each cell.
Step 7: Sketch out the animation
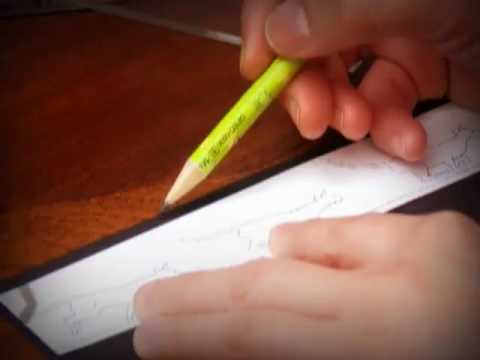
Sketch out your animation, beginning at the left cell and moving right along each cell.
Step 8: Return the paper to the lid
Gently re-roll the white sheet and place it back into the lid to make sure all of your cells will be shown.
Step 9: Place black paper flat with white paper on top
Place the black paper flat with the white paper on top and flush along the long edge. Make sure the light lines you made in Step 6 run along the middle of the black sheet.
Step 10: Draw a line down the length of the black paper
Use the edge of the white paper to draw a line down the length of the black paper. It will run down the middle.
Step 11: Continue the marks you made onto the black sheet
Continue the marks you made on the white sheet onto the black sheet. They should intersect the long line you made in Step 9.
Step 12: Move the white sheet
Move the white sheet to 1/8" inside of the opposite edge of the black sheet.
Step 13: Extend the lines
Extend the lines again from the white sheet to the edge of the black sheet. Remove the white sheet.
Tip
The sets of small lines you copied on to the black sheet should line up all the way down the black sheet.
Step 14: Connect the sets of marks
Use the ruler and pencil to connect the sets of marks you made on the black sheet.
Step 15: Cut windows
Using the lines you made in Step 13 as guides, cut windows out of the black sheet with craft knife. The windows should start in the middle, run about 1" down the line and be about 1/8" wide.
Step 16: Cut an X in the lid’s center
Carefully find the center of the lid and cut a 3/8"-wide X in the top.
Step 17: Run a bead of glue on the inside of the lid’s lip
Run a light bead of glue along the inside edge of the lid's lip.
Step 18: Roll the black paper and place it in the lid
Gently roll the black sheet and place it in the lid so that the slits are furthest away from the lid.
Step 19: Push the black paper against the glue and let dry
Gently press the black paper out against the lid's lip so that it bonds to the glue on the lid. Set aside to dry.
Step 20: Poke the pencil down through the X
Poke the pencil down through the X you had cut so that it sticks out the bottom.
Tip
The brass eraser holder should snag on the cut edges of the lid’s X.
Step 21: Roll the white sheet and place inside the drum
Gently roll the white sheet and place it inside the drum so the bottom of the animation rests on the lid.
Step 22: Rotate the drum
Clasp the pencil between your palms and slowly rotate the drum while looking through windows from the outside in to the opposite side of the drum.
Step 23: Watch your animation
Watch your animation in glorious Zoetrope vision.
Did You Know?
A convection-powered version of the zoetrope was built around 180 A.D. by the Chinese inventor Ting Huan.
For a fun novelty project, try making a zoetrope at home.
Step 1: Plan the animation
Plan out your animation. Assume there will be about 12 cells, or steps.
Tip
The best animations for a zoetrope are cyclical, like a man walking, or a sun rising and setting.
Step 2: Place the lid flat side down
Place the can lid flat side down.
Step 3: Roll white paper into a tube and place into lid
Gently roll the white paper into a tube and place it into the lid, so that the rim of the lid supports the tube of paper. You will have a drum with an open end and the lid as the bottom.
Step 4: Mark where the inside edge overlaps the paper
Use the pencil to lightly mark where the inside edge overlaps the inside of the white paper.
Step 5: Measure the white paper
Lay the white paper flat and measure the distance from the inside edge of the sheet to the mark. This will be the longer distance to the mark you made.
Step 6: Divide by the number of steps in your animation
Divide the distance by 12 — or the number of steps in your animation — and mark a light line at the bottom edge of the paper to divide each cell.
Step 7: Sketch out the animation
Sketch out your animation, beginning at the left cell and moving right along each cell.
Step 8: Return the paper to the lid
Gently re-roll the white sheet and place it back into the lid to make sure all of your cells will be shown.
Step 9: Place black paper flat with white paper on top
Place the black paper flat with the white paper on top and flush along the long edge. Make sure the light lines you made in Step 6 run along the middle of the black sheet.
Step 10: Draw a line down the length of the black paper
Use the edge of the white paper to draw a line down the length of the black paper. It will run down the middle.
Step 11: Continue the marks you made onto the black sheet
Continue the marks you made on the white sheet onto the black sheet. They should intersect the long line you made in Step 9.
Step 12: Move the white sheet
Move the white sheet to 1/8" inside of the opposite edge of the black sheet.
Step 13: Extend the lines
Extend the lines again from the white sheet to the edge of the black sheet. Remove the white sheet.
Tip
The sets of small lines you copied on to the black sheet should line up all the way down the black sheet.
Step 14: Connect the sets of marks
Use the ruler and pencil to connect the sets of marks you made on the black sheet.
Step 15: Cut windows
Using the lines you made in Step 13 as guides, cut windows out of the black sheet with craft knife. The windows should start in the middle, run about 1" down the line and be about 1/8" wide.
Step 16: Cut an X in the lid’s center
Carefully find the center of the lid and cut a 3/8"-wide X in the top.
Step 17: Run a bead of glue on the inside of the lid’s lip
Run a light bead of glue along the inside edge of the lid's lip.
Step 18: Roll the black paper and place it in the lid
Gently roll the black sheet and place it in the lid so that the slits are furthest away from the lid.
Step 19: Push the black paper against the glue and let dry
Gently press the black paper out against the lid's lip so that it bonds to the glue on the lid. Set aside to dry.
Step 20: Poke the pencil down through the X
Poke the pencil down through the X you had cut so that it sticks out the bottom.
Tip
The brass eraser holder should snag on the cut edges of the lid’s X.
Step 21: Roll the white sheet and place inside the drum
Gently roll the white sheet and place it inside the drum so the bottom of the animation rests on the lid.
Step 22: Rotate the drum
Clasp the pencil between your palms and slowly rotate the drum while looking through windows from the outside in to the opposite side of the drum.
Step 23: Watch your animation
Watch your animation in glorious Zoetrope vision.
Did You Know?
A convection-powered version of the zoetrope was built around 180 A.D. by the Chinese inventor Ting Huan.
About this tutorial
Howcast published this 3:33 video tutorial on November 14, 2010. It has been watched 81,652 times on YouTube.
- Channel
- Howcast
- Category
- Howto & Style
- Duration
- 3:33
- Published
- November 14, 2010
- Views
- 81,652
- Likes
- 374
Tags
Share
This tutorial in other languages
- FRComment créer un Zoetrope
- ESCómo crear un zootropo
- PTComo criar um Zoetrope
- ITCome creare uno Zoetrope
- DEWie ein Zoetrope erstellen
- NLHoe maak je een Zoetrope maken
- RUКак создать Zoetrope
- PLJak utworzyć Zoetrope
- JA回転のぞき絵を作成する方法
- ARكيفية إنشاء زوتروب
- HIकैसे एक Zoetrope बनाने के लिए
- IDCara Membuat Zoetrope