Playback starts YouTube’s embedded player (privacy-enhanced mode).
How to Install a Nintendo Wii
ChannelHowcastTechGadgetsDescription from the creator
Watch more Gaming Console Hacks & Tips videos: howcast.com/videos/206962-How-to-Install-a-Nint…
A few simple steps will help you quickly install your Nintendo Wii so you can spend more time playing games.
Step 1: Decide if you want to store the console horizontal
Decide whether you want to store the Wii console horizontally or vertically. Attach the console stand if you will store it vertically.
Tip
Have at least 3 feet of space between where you will be playing and your TV.
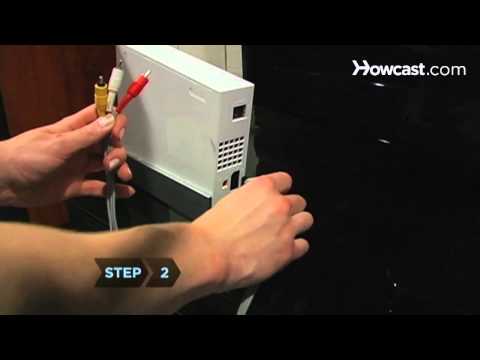
Step 2: Connect the AV cables
Connect the AV plug into the connector on the back of the console. Insert the colored plugs into the proper input connectors on your TV.
Step 3: Connect and mount the sensor bar
Connect the sensor bar plug into the connector on the back of the console. Mount the sensor either on top of the TV or just below the TV screen.
Tip
Be sure that the middle of the sensor bar is aligned with the center of the TV screen.
Step 4: Attach the AC adapter and plug it into an outlet
Attach the DC part of the AC adapter to the back of the console. Plug the other end into a standard wall outlet. Press the Power button on the console to turn the Wii on.
Step 5: Synch the Wii remote
Synch the Wii remote by pressing and releasing the Synch button located under the batteries. The lights on the remote will flash.
Step 6: Finish synching the remote
Press and release the Synch button located under the panel on the front of the Wii. When the lights on the remote stop flashing, your remote has been synched. Now you're ready to play!
Did You Know?
Did you know? The original Nintendo Entertainment System was introduced in 1985.
A few simple steps will help you quickly install your Nintendo Wii so you can spend more time playing games.
Step 1: Decide if you want to store the console horizontal
Decide whether you want to store the Wii console horizontally or vertically. Attach the console stand if you will store it vertically.
Tip
Have at least 3 feet of space between where you will be playing and your TV.
Step 2: Connect the AV cables
Connect the AV plug into the connector on the back of the console. Insert the colored plugs into the proper input connectors on your TV.
Step 3: Connect and mount the sensor bar
Connect the sensor bar plug into the connector on the back of the console. Mount the sensor either on top of the TV or just below the TV screen.
Tip
Be sure that the middle of the sensor bar is aligned with the center of the TV screen.
Step 4: Attach the AC adapter and plug it into an outlet
Attach the DC part of the AC adapter to the back of the console. Plug the other end into a standard wall outlet. Press the Power button on the console to turn the Wii on.
Step 5: Synch the Wii remote
Synch the Wii remote by pressing and releasing the Synch button located under the batteries. The lights on the remote will flash.
Step 6: Finish synching the remote
Press and release the Synch button located under the panel on the front of the Wii. When the lights on the remote stop flashing, your remote has been synched. Now you're ready to play!
Did You Know?
Did you know? The original Nintendo Entertainment System was introduced in 1985.
About this tutorial
HowcastTechGadgets published this 1:32 video tutorial on November 6, 2011. It has been watched 1,441,468 times on YouTube.
- Channel
- HowcastTechGadgets
- Category
- Howto & Style
- Duration
- 1:32
- Published
- November 6, 2011
- Views
- 1,441,468
- Likes
- 5,606
Tags
Share
This tutorial in other languages
- FRComment faire pour installer une console Nintendo Wii
- ESCómo instalar un Nintendo Wii
- PTComo instalar um Nintendo Wii
- ITCome installare un Nintendo Wii
- DESo installieren Sie eine Nintendo Wii
- NLHoe maak je een Nintendo Wii Install
- RUКак установить Nintendo Wii
- PLJak zainstalować Nintendo Wii
- JA任天堂のWiiをインストールする方法
- ARكيفية تثبيت نينتندو وي
- HIएक Nintendo Wii स्थापित करने के लिए कैसे
- IDCara Menginstal Nintendo Wii