Playback starts YouTube’s embedded player (privacy-enhanced mode).
How to Make a Bird Base
ChannelHowcastDescription from the creator
Full Playlist: youtube.com/playlist?list=PLLALQuK1NDrgESOpXZZ2…
-
-
Like these kid's activities? Check out the official app apple.co/1ThDIrx
Watch more How to Do Origami videos: howcast.com/videos/339-How-to-Make-a-Bird-Base
There are a few basic folds in origami that serve as bases—or foundations—for a wide array of models. Among them, the Fish Base, the Frog Base, and, yes, the Bird Base.
Step 1: Fold one corner to opposite corner and unfold
Start with the paper colored side up. Make a diagonal crease by folding one corner to the opposite corner. Unfold.
Step 2: Repeat with other corners
Repeat with the two other opposing corners. You should now have two diagonal creases on the colored side of the paper.
Step 3: Flip paper over and crease paper in half
Turn the paper over to the white side. Fold one edge of the paper to the opposite edge, then unfold.
Step 4: Fold other edges over
Repeat with the other two opposing edges, but this time do not unfold.
Step 5: Bring four corners together
Position the paper so that its folded edge is along the bottom. There should be creases on the paper that form a "V." Hold the paper with each hand on either side of the "V." Slowly bring your hands together, allowing the four corners to meet at the top.
Step 6: Place model on table
Place the model flat onto the table in a diamond shape, making sure there are two flaps to the right and two flaps to the left of the vertical crease running down the center. This is a Preliminary Base.
Step 7: Rotate paper with closed point at top
Rotate the paper so that the closed point is at the top.
Step 8: Fold bottom right and left edges to center
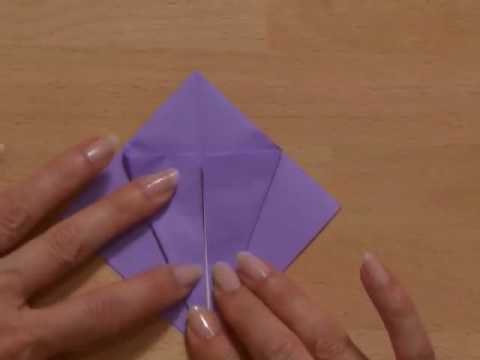
Fold the bottom right and bottom left edges of the uppermost flap to meet on the center vertical line.
Step 9: Fold closed point down and unfold
Fold the closed point over the two flaps as far as it will go. Unfold.
Step 10: Unfold two flaps
Unfold the two flaps back to the Preliminary Base.
Step 11: Lift top layer and bring sides in to flatten
Carefully lift up the top layer of paper as far as it will go. Bring the sides in, toward the middle, using only existing creases in order to flatten the flap. Note that no new creases are made during this step. You should now have created a long diamond shape.
Step 12: Flip over and repeat
Turn over and repeat Steps 8-11. You've made a Bird Base—now you can really start to spread your wings.
Did You Know?
Did you know? "Ori" is the Japanese word for folding, and "kami" is the Japanese word for paper.
-
-
Like these kid's activities? Check out the official app apple.co/1ThDIrx
Watch more How to Do Origami videos: howcast.com/videos/339-How-to-Make-a-Bird-Base
There are a few basic folds in origami that serve as bases—or foundations—for a wide array of models. Among them, the Fish Base, the Frog Base, and, yes, the Bird Base.
Step 1: Fold one corner to opposite corner and unfold
Start with the paper colored side up. Make a diagonal crease by folding one corner to the opposite corner. Unfold.
Step 2: Repeat with other corners
Repeat with the two other opposing corners. You should now have two diagonal creases on the colored side of the paper.
Step 3: Flip paper over and crease paper in half
Turn the paper over to the white side. Fold one edge of the paper to the opposite edge, then unfold.
Step 4: Fold other edges over
Repeat with the other two opposing edges, but this time do not unfold.
Step 5: Bring four corners together
Position the paper so that its folded edge is along the bottom. There should be creases on the paper that form a "V." Hold the paper with each hand on either side of the "V." Slowly bring your hands together, allowing the four corners to meet at the top.
Step 6: Place model on table
Place the model flat onto the table in a diamond shape, making sure there are two flaps to the right and two flaps to the left of the vertical crease running down the center. This is a Preliminary Base.
Step 7: Rotate paper with closed point at top
Rotate the paper so that the closed point is at the top.
Step 8: Fold bottom right and left edges to center
Fold the bottom right and bottom left edges of the uppermost flap to meet on the center vertical line.
Step 9: Fold closed point down and unfold
Fold the closed point over the two flaps as far as it will go. Unfold.
Step 10: Unfold two flaps
Unfold the two flaps back to the Preliminary Base.
Step 11: Lift top layer and bring sides in to flatten
Carefully lift up the top layer of paper as far as it will go. Bring the sides in, toward the middle, using only existing creases in order to flatten the flap. Note that no new creases are made during this step. You should now have created a long diamond shape.
Step 12: Flip over and repeat
Turn over and repeat Steps 8-11. You've made a Bird Base—now you can really start to spread your wings.
Did You Know?
Did you know? "Ori" is the Japanese word for folding, and "kami" is the Japanese word for paper.
About this tutorial
Howcast published this 2:25 video tutorial on November 14, 2010. It has been watched 71,580 times on YouTube.
- Channel
- Howcast
- Category
- Howto & Style
- Duration
- 2:25
- Published
- November 14, 2010
- Views
- 71,580
- Likes
- 128
Tags
Share
This tutorial in other languages
- FRComment faire une base d'oiseaux
- ESCómo hacer una base de Aves
- PTComo fazer uma Base de Pássaro
- ITCome fare una base Uccello
- DEWie man einen Vogel Base-Stellen
- NLHoe maak je een Bird Base
- RUКак сделать Bird Base
- PLJak zrobić ptaka Bazę
- JA鳥のベースを作る方法
- ARكيف اصنع قاعدة الطيور
- HIकैसे एक बर्ड बेस को बनाओ
- IDCara Membuat Base Burung