Playback starts YouTube’s embedded player (privacy-enhanced mode).
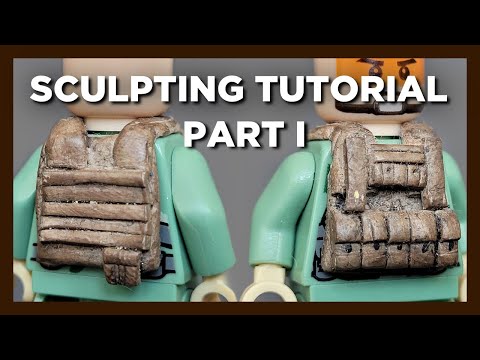
How To Make A LEGO Tactical Vest - Part #1
ChannelStormtekDescription from the creator
NEW tutorial available!
First part: youtube.com/watch?v=GbbusxnFYTQ&t=19s
READ BELOW
IMPORTANT!
------------------------------------------------------------------------------------------------
READ THE INSTRUCTIONS OF USE OF THE CLAY YOU
ARE USING AND ADHERE THE TEMPERATURES AND BAKING TIME THAT ARE WRITTEN THERE!
------------------------------------------------------------------------------------------------
-----------------------------------------------------------------------------------------
Finally, here is the first part of the tutorial! I hope it will help you out. The second and third part will be uploaded in the coming days (the tutorial itself is finished, I just split it in 3 parts).
-----------------------------------------------------------------------------------------
Things you will need: glue, baking paper, aluminium foil, craft knife, Polymer modelling clay (I use FIMO), LEGO torso
Step 1. Cut some aluminium foil size of your lego torso and make a hole for the neck.
Step 2. Wrap the foil round the torso.
Step 3. Roll out some clay and use the torso as template to cut front and back vest panels. The clay must be thin.
Step 4. Cut two thin strips for the vest straps. Do not make them too thin because they could break after baking.
Music by Marcus Neely:
youtube.com/user/mardeedar25
Thanks for watching & reading :)
First part: youtube.com/watch?v=GbbusxnFYTQ&t=19s
READ BELOW
IMPORTANT!
------------------------------------------------------------------------------------------------
READ THE INSTRUCTIONS OF USE OF THE CLAY YOU
ARE USING AND ADHERE THE TEMPERATURES AND BAKING TIME THAT ARE WRITTEN THERE!
------------------------------------------------------------------------------------------------
-----------------------------------------------------------------------------------------
Finally, here is the first part of the tutorial! I hope it will help you out. The second and third part will be uploaded in the coming days (the tutorial itself is finished, I just split it in 3 parts).
-----------------------------------------------------------------------------------------
Things you will need: glue, baking paper, aluminium foil, craft knife, Polymer modelling clay (I use FIMO), LEGO torso
Step 1. Cut some aluminium foil size of your lego torso and make a hole for the neck.
Step 2. Wrap the foil round the torso.
Step 3. Roll out some clay and use the torso as template to cut front and back vest panels. The clay must be thin.
Step 4. Cut two thin strips for the vest straps. Do not make them too thin because they could break after baking.
Music by Marcus Neely:
youtube.com/user/mardeedar25
Thanks for watching & reading :)
About this tutorial
Stormtek published this 6:25 video tutorial on November 14, 2015. It has been watched 19,388 times on YouTube.
- Channel
- Stormtek
- Category
- Howto & Style
- Duration
- 6:25
- Published
- November 14, 2015
- Views
- 19,388
- Likes
- 197
Tags
Share
This tutorial in other languages
- FRComment faire un LEGO tactique Vest - Partie # 1
- ESCómo hacer un chaleco táctico LEGO - Parte # 1
- PTComo Fazer Um LEGO Tactical Vest - Parte # 1
- ITCome fare un LEGO Tactical Vest - Parte # 1
- DEWie man ein LEGO Tactical Vest Make - Part # 1
- NLHow To Make A LEGO Tactical Vest - Part # 1
- RUКак сделать LEGO Tactical Vest - часть # 1
- PLJak zrobić LEGO Tactical Vest - Part # 1
- JAパート#1 - A LEGOタクティカルベストを作成する方法
- ARكيفية جعل LEGO الصدرية التكتيكية - الجزء رقم 1
- HIभाग # 1 - कैसे एक लेगो सामरिक वेस्ट बनाने के लिए
- IDCara Membuat Sebuah LEGO Taktis Vest - Part # 1