Playback starts YouTube’s embedded player (privacy-enhanced mode).
How to Make a Teddy Bear - #10 Facial Features
ChannelTeddytech OnlineDescription from the creator
If you stitched your bear's head very carefully and filled it well, you should have a nice symmetrical face!
Pip downloadable PDF pattern: teddytech.biz/pip-pattern-downloadable-printabl…
Buy Pip kit: teddytech.biz/pip-25cm-steiff-schulte-mohair-5-…
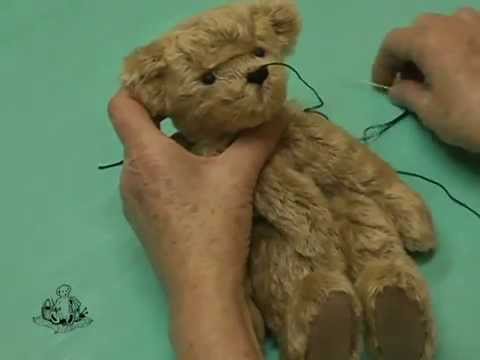
Trim any excess fur over the bridge of the nose. Put pins where the eyes should be inserted and you can take a measurement from the centre snout up to each pin to determine that they are even. Use an awl to make the holes for the glass eye loops to be inserted, thread each of the loops with a strong thread and use a long needle to insert each of the eyes into the bear’s head, exiting the needle at the base of the head at the neck area. Pull both threads (from each eye) firmly so the loop of each eye 'sinks' in to the bear's head and provides definition on his face. Tie them together using a reef knot. Thread the thread tails into a needle again the back stitch to secure, then add off the thread and snip off.
Take a measurement from each eye up to the head where the ears will be secured. Ensure the placement is even. Pin and then stitch the ears securely in place, gently 'cupping' them to provide a nice shape.
Mark the outline of the required nose shape and with a satin stitch, neatly embroider a nose and then a mouth for your bear.
Pip downloadable PDF pattern: teddytech.biz/pip-pattern-downloadable-printabl…
Buy Pip kit: teddytech.biz/pip-25cm-steiff-schulte-mohair-5-…
Trim any excess fur over the bridge of the nose. Put pins where the eyes should be inserted and you can take a measurement from the centre snout up to each pin to determine that they are even. Use an awl to make the holes for the glass eye loops to be inserted, thread each of the loops with a strong thread and use a long needle to insert each of the eyes into the bear’s head, exiting the needle at the base of the head at the neck area. Pull both threads (from each eye) firmly so the loop of each eye 'sinks' in to the bear's head and provides definition on his face. Tie them together using a reef knot. Thread the thread tails into a needle again the back stitch to secure, then add off the thread and snip off.
Take a measurement from each eye up to the head where the ears will be secured. Ensure the placement is even. Pin and then stitch the ears securely in place, gently 'cupping' them to provide a nice shape.
Mark the outline of the required nose shape and with a satin stitch, neatly embroider a nose and then a mouth for your bear.
About this tutorial
Teddytech Online published this 15:35 video tutorial on November 1, 2014. It has been watched 284,372 times on YouTube.
- Channel
- Teddytech Online
- Category
- Howto & Style
- Duration
- 15:35
- Published
- November 1, 2014
- Views
- 284,372
- Likes
- 2,012
Tags
Share
This tutorial in other languages
- FRComment faire un ours en peluche - # 10 Caractéristiques du visage
- ESCómo hacer un oso de peluche - # 10 rasgos faciales
- PTComo fazer um urso de peluche - # 10 feições
- ITCome fare un Teddy Bear - # 10 tratti del viso
- DEWie man einen Teddybären Make - # 10 Gesichtszüge
- NLHoe maak je een Teddy Bear - # 10 gelaatstrekken
- RUКак сделать Teddy Bear - # 10 черт лица
- PLJak zrobić misia - # 10 Cechy twarzy
- JA#10顔の特徴 - テディベアを作る方法
- ARكيفية جعل تيدي بير - # 10 ملامح الوجه
- HI# 10 चेहरे की विशेषताओं - कैसे एक टेडी बियर बनाने के लिए
- IDCara Membuat Teddy Bear - # 10 Fitur Facial