Playback starts YouTube’s embedded player (privacy-enhanced mode).
How to Plank a Ceiling | DIY SHIPLAP WITH PLYWOOD
ChannelFarmhouse on BooneDescription from the creator
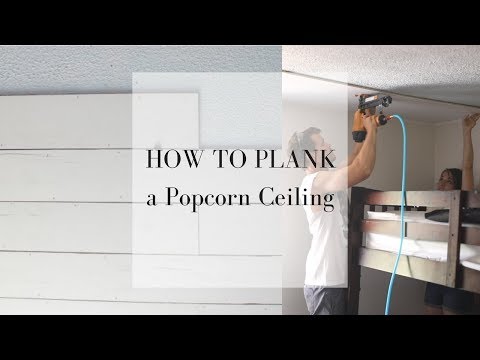
Learn how to plank a popcorn ceiling the easy way with this planked ceiling tutorial.
Farmhouse Boy's Room Makeover Plans- youtube.com/watch?v=BswOX1oWR2k&t=2s
Farmhouse Girl's Room- youtube.com/watch?v=j4lsV9zYjuw
SHOP the supplies:
This post contain affiliate links, which means I make a small commission at no extra cost to you. As an Amazon Associate I earn from qualifying purchases.
Air compressor and nail gun- amzn.to/2lQ60gb
1 3/8" 18 gauge nails- amzn.to/2u3ibd3
White Paint- low.es/2KJzZRG
More on the blog- farmhouseonboone.com/farmhouse-on-boone/cover-u…
MY BLOG COURSE
Learn how our family supports ourselves full-time on our homestead with our blog and Youtube channel with my blogging course. Join over 700 students in learning how to grow your own blog from scratch in my new blogging course:
create-your-blog-dream.teachable.com/p/create-y…
(Use code YOUTUBE for over $50 off!)
Watch my FREE essential oils class: bit.ly/farmhouseoils
When we moved into our 1920's home, every ceiling in our house was covered with texture. We fixed this problem easily and inexpensively, starting with our girls' room.
Learn how to plank a popcorn ceiling the easy way with planked plywood.
Old house ownership comes with many benefits. Crown molding, five panel doors with glass door knobs, original heart pine flooring, to name a few.
But, it also comes with a few drawbacks. Squeaky floors, outdated electrical and plumbing, and, the dreaded, dealing with renovations done through some less fashionable time periods. Linoleum floors, blue carpet, and my favorite, textured ceilings.
Please tell me, when were popcorn ceilings cool? Apparently they were so desirable that, at some point, someone took the effort to cover every ceiling in our house with the stuff. And since, I'm guessing, it wasn't hip in the 1920's, someone probably added the lovely texture in less romantic times, like the 80's, for example.
We decided to cover up this ugly trend, starting with our girls' room.
The Supplies
Five sheets 4′ by 8′ sanded plywood at 11/32″ thickness, cut into 6″ strips
Air compressor and nail gun
1 and 3/8″ 18 gague nails
Nickel for a spacer
White Paint
We started by purchasing five sheets of 4' by 8' sanded plywood at 11/32" thickness from Lowe's.
We had them cut it into 6" strips.
The workers will do this for 25 cents per cut. In my opinion, the convenience of this is totally worth a little added cost.
The Process
We basically planked this ceiling the exact same way we planked our shiplap wall in the master bedroom.
Since our ceiling measured 156" by 104", we ran the planks parallel between the door and window (long ways), as opposed to perpendicular to the door. On each line we had a short board that was 60" and a long board that was 96". We alternated them, so every other board was a long board and a short board.
Since we were working on the ceiling, we decided to paint the board prior to putting them up. It was so much easier than reaching up with all that paint.
We used a Bostitch air compressor and nail gun and 1 and 3/8 inch 18 gauge nails to nail the plywood planks into the ceiling. It made for a very speedy job.
Between each row, we used a nickel for a spacer. This created just a small line between the planks to make them more visible, yet not allow any of the popcorn texture to show through.
I suggest having 10 nickels on hand. We just kept losing them!
After every few rows, we measured from the start of the planks to the current plank we were working on, to see if they came out evenly. This helped to ensure nothing was getting too far off. On our shiplap wall we used a level, but we couldn't do that when working on the ceiling.
To go around the light fixture, we cut a four inch square for the wires to fit through.
When we reached the last row, on other side of the room with the planks, we had to cut them thinner to make them fit.
Wouldn't it be great if we lived in a perfect world where ceilings were perfectly divisible by six, and no modifications would be needed to squeeze the last planks in? Unfortunately, that isn't what we found.
Follow along over on Instagram for more peaks at our daily life in my IG stories: instagram.com/farmhouseonboone
My video equipment:
This post contain affiliate links, which means I make a small commission at no extra cost to you. As an Amazon Associate I earn from qualifying purchases.
Camera- amzn.to/2BebVEO
Lens- amzn.to/2C2cKwY
Lights- amzn.to/2C1H8rt
Microphone- amzn.to/2s9EobG
Tripod- amzn.to/2C1KFpJ
About this tutorial
Farmhouse on Boone published this 11:00 video tutorial on November 9, 2018. It has been watched 180,492 times on YouTube.
- Channel
- Farmhouse on Boone
- Category
- Howto & Style
- Duration
- 11:00
- Published
- November 9, 2018
- Views
- 180,492
- Likes
- 2,146
Tags
Share
This tutorial in other languages
- FRComment Plank un plafond | Feuillure DIY AVEC Contreplaqué
- ESCómo Plank un techo | Shiplap bricolaje con paneles de madera
- PTComo Plank um teto | Shiplap DIY com madeira compensada
- ITCome Plank un soffitto | Shiplap fai da te con compensato
- DEWie man Plank eine Decke | DIY Stufenfalz mit Sperrholz
- NLHoe te Plank een plafond | DIY Shiplap met plywood
- RUКак Plank потолочным | DIY шпунта фанеры
- PLJak Plank suficie | DIY shiplap sklejką
- JAどのようにプランクの天井| PLYWOOD WITH DIY合いじゃくり
- ARكيفية اللوح الخشبي لسقف | SHIPLAP DIY مع الخشب الرقائقي
- HIकैसे तख़्त के लिए एक छत | प्लाईवुड के साथ DIY Shiplap
- IDCara Plank Ceiling sebuah | Shiplap DIY DENGAN PLYWOOD