Playback starts YouTube’s embedded player (privacy-enhanced mode).
How to Set Appointments in Outlook
ChannelExcel, Word and PowerPoint Tutorials from HowtechDescription from the creator
Follow this step by step tutorial to learn how to set appointments through your Calendar or other ways in Microsoft Outlook
Don't forget to check out our site howtech.tv/ for more free how-to videos!
youtube.com/ithowtovids - our feed
facebook.com/howtechtv - join us on facebook
plus.google.com/103440382717658277879 - our group in Google+
Microsoft Outlook helps users to manage personal information and to communicate with others. It is an effective software to manage email messages, appointments, contacts, tasks etc. The many options of Outlook can be explored and utilized to their best by following these simple tutorials. Appointments in Outlook can be set in multiple ways and through different techniques. Outlook Calendar Appointments are an easy way of keeping track of your everyday activities so that you never miss an appointment. Follow this step by step tutorial to learn how to.
Step # 1 -- Click on 'New Appointment'
There are two ways in which you can set Appointments in Outlook. Let's start by clicking on the Calendar icon in the Navigation bar. Once the Calendar opens up, click on the "New Appointment" icon on top which opens a new Appointment window.
Step # 2 -- Enter details of Appointment
In the new window that opened, type the Subject, Location and set the Date and Time for the Appointment. Once you are done, click on the "Save and Close" button.
Step # 3 -- Alternate way to set Appointment
Outlook Calendar Appointments can also be set by double clicking on a particular date in the calendar. With that, the Appointment window will open up and you can fill in the details as mentioned before.
Step # 4 -- Select 'Categorize'
You can also categorize the appointments by moving over to the "Categorize" option by color coding your Appointments.
Step # 5 -- Set recurring appointment
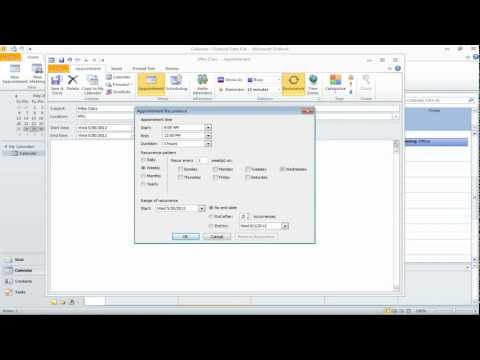
You can schedule activities that are recurring in nature, for example if you are taking a class that will last for the next five weeks. To do that, double click on the day it is supposed to start. Once the new window opens up, enter the details and click on the "Recurrence" button. In this tutorial, we will select the weekly option and set the "End After" option to 5 occurrences. After you're done, click on the save and close button.
Don't forget to check out our site howtech.tv/ for more free how-to videos!
youtube.com/ithowtovids - our feed
facebook.com/howtechtv - join us on facebook
plus.google.com/103440382717658277879 - our group in Google+
Microsoft Outlook helps users to manage personal information and to communicate with others. It is an effective software to manage email messages, appointments, contacts, tasks etc. The many options of Outlook can be explored and utilized to their best by following these simple tutorials. Appointments in Outlook can be set in multiple ways and through different techniques. Outlook Calendar Appointments are an easy way of keeping track of your everyday activities so that you never miss an appointment. Follow this step by step tutorial to learn how to.
Step # 1 -- Click on 'New Appointment'
There are two ways in which you can set Appointments in Outlook. Let's start by clicking on the Calendar icon in the Navigation bar. Once the Calendar opens up, click on the "New Appointment" icon on top which opens a new Appointment window.
Step # 2 -- Enter details of Appointment
In the new window that opened, type the Subject, Location and set the Date and Time for the Appointment. Once you are done, click on the "Save and Close" button.
Step # 3 -- Alternate way to set Appointment
Outlook Calendar Appointments can also be set by double clicking on a particular date in the calendar. With that, the Appointment window will open up and you can fill in the details as mentioned before.
Step # 4 -- Select 'Categorize'
You can also categorize the appointments by moving over to the "Categorize" option by color coding your Appointments.
Step # 5 -- Set recurring appointment
You can schedule activities that are recurring in nature, for example if you are taking a class that will last for the next five weeks. To do that, double click on the day it is supposed to start. Once the new window opens up, enter the details and click on the "Recurrence" button. In this tutorial, we will select the weekly option and set the "End After" option to 5 occurrences. After you're done, click on the save and close button.
About this tutorial
Excel, Word and PowerPoint Tutorials from Howtech published this 1:22 video tutorial on October 29, 2013. It has been watched 10,994 times on YouTube.
- Category
- Howto & Style
- Duration
- 1:22
- Published
- October 29, 2013
- Views
- 10,994
- Likes
- 7
Tags
Share
This tutorial in other languages
- FRComment configurer rendez-vous dans Outlook
- ESCómo establecer citas en Outlook
- PTComo definir compromissos no Outlook
- ITCome impostare appuntamenti in Outlook
- DESo richten Sie Termine in Outlook
- NLHoe u Afspraken in Outlook
- RUКак установить назначения в Outlook,
- PLJak skonfigurować Nominacje w programie Outlook
- JAOutlookの予定を設定する方法
- ARكيفية تعيين تعيينات في Outlook
- HIकैसे Outlook में नियुक्ति सेट करने के लिए
- IDCara Mengatur Janji di Outlook