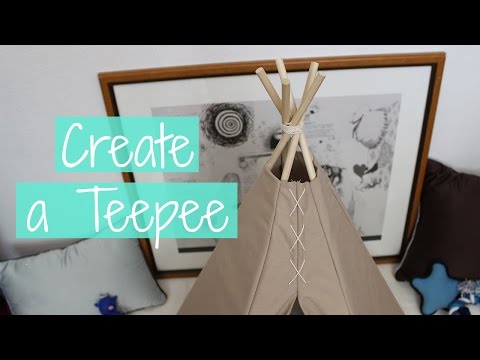
Playback starts YouTube’s embedded player (privacy-enhanced mode).
Teepee Tutorial
ChannelcreatewithjennDescription from the creator
Hi, thanks for watching this DIY teepee.
Hi, the teepee is about 2 ft wide and 3 ft tall.
1. Form an 18 x 33 in sheet and draw lines from 9 in center to the corners (forming a triangle).
2. Draw lines 4 inches from the top and bottom of the sheet.
3. Cut out the pieces and you’ll have 2 half triangles and 1 full triangle.
4. Cut the 4 in tips of each one.
5. Make a strip 1.75 x 29 in (maybe 31 in because it was a little short).
6. Fold the ends of the strip at 3 inches.
7. Trace the templates onto your fabric. Here’s the pattern: Half triangle (straight edge facing out), Strip, Triangle, Strip, Triangle, Strip, Triangle, Strip, Triangle, Strip, and Half triangle (straight edge facing out)
8. Trace along the 3 in fold of the strips. This is the line to follow when sewing.
9. Pin two layers of fabric together and sew leave 6 in opening.
10. Trim around the sewn edges and snip all inner corners (so the fabric won’t bunch).
11. Turn it inside out.
12. Fold, pin, draw a straight line along the strips, and sew.
13. Sew the opening and top ends of the teepee together. Sew 6 in from top.
14. You’ll need 5 dowels (3/8 x 36 in). Mark 3 in from the top of each dowel and drill a hole.
15. Add a design to your teepee.
16. Insert the poles (with the holes at the top end) into the strips.
17. String the dowels, wrap around it, and tie a knot.
Enjoy!
__________
instagram: @itscreatewithjenn
instagram.com/itscreatewithjenn
Hi, the teepee is about 2 ft wide and 3 ft tall.
1. Form an 18 x 33 in sheet and draw lines from 9 in center to the corners (forming a triangle).
2. Draw lines 4 inches from the top and bottom of the sheet.
3. Cut out the pieces and you’ll have 2 half triangles and 1 full triangle.
4. Cut the 4 in tips of each one.
5. Make a strip 1.75 x 29 in (maybe 31 in because it was a little short).
6. Fold the ends of the strip at 3 inches.
7. Trace the templates onto your fabric. Here’s the pattern: Half triangle (straight edge facing out), Strip, Triangle, Strip, Triangle, Strip, Triangle, Strip, Triangle, Strip, and Half triangle (straight edge facing out)
8. Trace along the 3 in fold of the strips. This is the line to follow when sewing.
9. Pin two layers of fabric together and sew leave 6 in opening.
10. Trim around the sewn edges and snip all inner corners (so the fabric won’t bunch).
11. Turn it inside out.
12. Fold, pin, draw a straight line along the strips, and sew.
13. Sew the opening and top ends of the teepee together. Sew 6 in from top.
14. You’ll need 5 dowels (3/8 x 36 in). Mark 3 in from the top of each dowel and drill a hole.
15. Add a design to your teepee.
16. Insert the poles (with the holes at the top end) into the strips.
17. String the dowels, wrap around it, and tie a knot.
Enjoy!
__________
instagram: @itscreatewithjenn
instagram.com/itscreatewithjenn
About this tutorial
createwithjenn published this 4:21 video tutorial on November 14, 2015. It has been watched 192,082 times on YouTube.
- Channel
- createwithjenn
- Category
- Howto & Style
- Duration
- 4:21
- Published
- November 14, 2015
- Views
- 192,082
- Likes
- 1,286