Playback starts YouTube’s embedded player (privacy-enhanced mode).
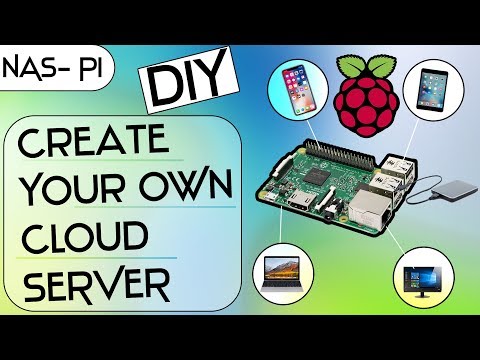
How To Create NAS (Network Attached Storage) Server With Raspberry Pi 3 ? || NAS With Pi
ChannelKsk RoyalDescription from the creator
Raspberry Pi is one of those computer tech which lets you do lots of things. The Special thing about the raspberry Pi is to use it for anything like physical Computing with GPIO Pins, You Can Also use it for creating Network Attached Storage or NAS for your Home to access the data across multiple computers wirelessly by creating NAS server with Pi.
What Does NAS Meant For You?
NAS stands for Network Attached Storage. NAS helps to share a files across heterogenous devices in a network. NAS uses a networking protocols like AFP, SMB which helps to create file sharing server.
By Default, NAS uses SMB server which is file sharing server helps others to access the files across multiple devices seamlessly in a network. If you have lots of computers its tedious to share a data across multiple devices through wires. So creating a NAS helps to access the files wirelessly across all of your computers which are connected to same network.
Ok Enough About the Theory :
Imagine if you have lots of devices connected to the same network. Its very tough to transfer the data from one device to another device wirelessly. So we will build a NAS Server so that all of the devices can talk to the server also they can see the files on the server with both read and write permissions. For Example if have an android device and I will copy all of my backup to the NAS Server so automatically other devices connected to the same network can have access to all the files.
Requirements :
1 x Raspberry Pi 3 (Recommended)
1 x Ethernet Cable
1 x Class 10 Micro SD
1 x External Hard Drive
1 x Dual Band WIFI Router
Command List:
To Update all the Repositories
sudo apt-get update
Samba Server Installation:
sudo apt-get install samba samba-common-bin
NTFS Package :
sudo apt-get install ntfs-3g
Creating a directory in root
sudo mount /External
Configuring samba
sudo nano /etc/samba/smb.conf
Add these lines at the bottom :
[RaspberryPi NAS]
comment = Pi Server
public = yes
writeable = yes
browsable = yes
path = /External
create mask = 0777
directory mask = 0777
Restating the Samba :
sudo /etc/init.d/samba restart
In this video I will be using a Raspbian Stretch lite which is command line based Debian - Linux Distribution which helps us to create NAS with Raspberry Pi. You Need an External Hard Drive For This so that you can access the hard drive wirelessly across your network to share/Backup/ Retrieve all the data across multiple computers.
~Follow Us On Social Media & Post Your Queries And Suggestions For any Future Videos at:
~facebook.com/kskroyal961
twitter.com/kskroyal961
~ Subscribe To Our Channel
~ Watch More Videos At:
YouTube.com/ksktech
Music used in the video :
Defqwop - Heart Afire (feat. Strix) [NCS Release]
NSC Release:youtube.com/watch?v=gJeh_dLjPN4
Blop Sound Effect : soundbible.com/2067-Blop.html
License: Attribution 3.0 | Recorded by Mark DiAngelo
What Does NAS Meant For You?
NAS stands for Network Attached Storage. NAS helps to share a files across heterogenous devices in a network. NAS uses a networking protocols like AFP, SMB which helps to create file sharing server.
By Default, NAS uses SMB server which is file sharing server helps others to access the files across multiple devices seamlessly in a network. If you have lots of computers its tedious to share a data across multiple devices through wires. So creating a NAS helps to access the files wirelessly across all of your computers which are connected to same network.
Ok Enough About the Theory :
Imagine if you have lots of devices connected to the same network. Its very tough to transfer the data from one device to another device wirelessly. So we will build a NAS Server so that all of the devices can talk to the server also they can see the files on the server with both read and write permissions. For Example if have an android device and I will copy all of my backup to the NAS Server so automatically other devices connected to the same network can have access to all the files.
Requirements :
1 x Raspberry Pi 3 (Recommended)
1 x Ethernet Cable
1 x Class 10 Micro SD
1 x External Hard Drive
1 x Dual Band WIFI Router
Command List:
To Update all the Repositories
sudo apt-get update
Samba Server Installation:
sudo apt-get install samba samba-common-bin
NTFS Package :
sudo apt-get install ntfs-3g
Creating a directory in root
sudo mount /External
Configuring samba
sudo nano /etc/samba/smb.conf
Add these lines at the bottom :
[RaspberryPi NAS]
comment = Pi Server
public = yes
writeable = yes
browsable = yes
path = /External
create mask = 0777
directory mask = 0777
Restating the Samba :
sudo /etc/init.d/samba restart
In this video I will be using a Raspbian Stretch lite which is command line based Debian - Linux Distribution which helps us to create NAS with Raspberry Pi. You Need an External Hard Drive For This so that you can access the hard drive wirelessly across your network to share/Backup/ Retrieve all the data across multiple computers.
~Follow Us On Social Media & Post Your Queries And Suggestions For any Future Videos at:
~facebook.com/kskroyal961
twitter.com/kskroyal961
~ Subscribe To Our Channel
~ Watch More Videos At:
YouTube.com/ksktech
Music used in the video :
Defqwop - Heart Afire (feat. Strix) [NCS Release]
NSC Release:youtube.com/watch?v=gJeh_dLjPN4
Blop Sound Effect : soundbible.com/2067-Blop.html
License: Attribution 3.0 | Recorded by Mark DiAngelo
About this tutorial
Ksk Royal published this 7:32 video tutorial on November 1, 2018. It has been watched 242,484 times on YouTube.
- Channel
- Ksk Royal
- Category
- Science & Technology
- Duration
- 7:32
- Published
- November 1, 2018
- Views
- 242,484
- Likes
- 4,026
Tags
Share
This tutorial in other languages
- FRComment créer NAS (Network Attached Storage) Serveur Avec Raspberry Pi 3? || NAS Avec Pi
- ESCómo crear (Network Attached Storage) del servidor NAS Con Frambuesa Pi 3? || NAS de pi
- PTComo criar NAS (Network Attached Storage) Server Com Raspberry Pi 3? || NAS com o Pi
- ITCome creare (Network Attached Storage) server NAS Con Raspberry Pi 3? || NAS Con Pi
- DESo erstellen NAS (Network Attached Storage) Server mit Raspberry Pi 3? || NAS mit Pi
- NLHow To NAS (Network Attached Storage) Server Maak met Raspberry Pi 3? || NAS met Pi
- RUКак создать NAS (Network Attached Storage) сервер с Raspberry Pi 3? || NAS с Pi
- PLJak stworzyć serwer NAS (Network Attached Storage) z Raspberry Pi 3? || NAS Z Pi
- JANAS(ネットワーク接続ストレージ)サーバにラズベリーパイ3を作成する方法? || PIでNAS
- ARكيفية إنشاء NAS (شبكة التخزين المرفقة) خادم مع التوت بي 3؟ || NAS مع بي
- HIकैसे रास्पबेरी पाई 3 के साथ NAS (नेटवर्क संलग्न भंडारण) सर्वर बनाने के लिए? || पाई के साथ NAS
- IDCara Membuat NAS (Network Attached Storage) Server Dengan Raspberry Pi 3? || NAS Dengan Pi