Playback starts YouTube’s embedded player (privacy-enhanced mode).
How to Get Pictures on Your iPod
ChannelHowcastDescription from the creator
Full Playlist: youtube.com/playlist?list=PLLALQuK1NDrjsCtybZK6…
-
-
Watch more How to Use an IPod videos: howcast.com/videos/410117-How-to-Get-Pictures-o…
Even if you don't have your camera or computer close by, you can still view all of your favorite photos while on the go.
Step 1: Connect iPod to computer
Connect your iPod to your computer with the USB cable.
Step 2: Open iTunes
Open iTunes from your desktop or Start menu.
Step 3: Open iPod in Devices
Select iPod under the Devices heading on the left-hand side of the iTunes window.
Step 4: Select Photos tab
Select the Photos tab at the top of the iTunes window.
Step 5: Select the file location
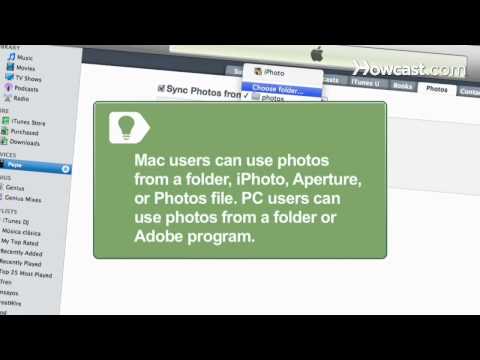
Check Sync Photos From. Then choose the program or file location of the photos you want on your iPod from the drop-down menu.
Tip
If you use a Mac, you will have the option to choose all photos, selected albums from a folder, or an iPhoto, Aperture, or Photos file. If you are a PC user, you can choose from a folder, My Pictures, or an Adobe program.
Step 6: Select image size
Select the box for full-resolution photos if you want the full-size versions on your iPod.
Tip
You will need to enable your iPod for disk use if you want full-size photos. You can find this option under the Summary tab of the iTunes window.
Step 7: Click Apply
Click Apply to sync your chosen photos to your iPod.
Step 8: Disconnect
Disconnect your iPod when the sync is complete by clicking the eject icon and removing the USB cable. You are now ready to show all of your favorite photos anywhere.
Did You Know?
In 2010, Apple debuted the iPhone 4, which featured a built-in camera on both the front and back of the phone.
-
-
Watch more How to Use an IPod videos: howcast.com/videos/410117-How-to-Get-Pictures-o…
Even if you don't have your camera or computer close by, you can still view all of your favorite photos while on the go.
Step 1: Connect iPod to computer
Connect your iPod to your computer with the USB cable.
Step 2: Open iTunes
Open iTunes from your desktop or Start menu.
Step 3: Open iPod in Devices
Select iPod under the Devices heading on the left-hand side of the iTunes window.
Step 4: Select Photos tab
Select the Photos tab at the top of the iTunes window.
Step 5: Select the file location
Check Sync Photos From. Then choose the program or file location of the photos you want on your iPod from the drop-down menu.
Tip
If you use a Mac, you will have the option to choose all photos, selected albums from a folder, or an iPhoto, Aperture, or Photos file. If you are a PC user, you can choose from a folder, My Pictures, or an Adobe program.
Step 6: Select image size
Select the box for full-resolution photos if you want the full-size versions on your iPod.
Tip
You will need to enable your iPod for disk use if you want full-size photos. You can find this option under the Summary tab of the iTunes window.
Step 7: Click Apply
Click Apply to sync your chosen photos to your iPod.
Step 8: Disconnect
Disconnect your iPod when the sync is complete by clicking the eject icon and removing the USB cable. You are now ready to show all of your favorite photos anywhere.
Did You Know?
In 2010, Apple debuted the iPhone 4, which featured a built-in camera on both the front and back of the phone.
About this tutorial
Howcast published this 1:43 video tutorial on November 4, 2010. It has been watched 18,495 times on YouTube.
- Channel
- Howcast
- Category
- Science & Technology
- Duration
- 1:43
- Published
- November 4, 2010
- Views
- 18,495
- Likes
- 54
Tags
Share
This tutorial in other languages
- FRComment obtenir des photos sur votre iPod
- ESCómo obtener imágenes en tu iPod
- PTComo obter imagens no seu iPod
- ITCome ottenere foto sul tuo iPod
- DEWie Bilder auf Ihrem iPod holen
- NLHoe u foto's op uw iPod
- RUКак получить фотографии на IPOD
- PLJak uzyskać zdjęcia na iPodzie
- JAiPodに写真を入手する方法
- ARكيفية الحصول على الصور على اي بود الخاص بك
- HIकैसे आपका आइपॉड पर चित्र प्राप्त करने के लिए
- IDBagaimana Mendapatkan Gambar pada iPod Anda