Playback starts YouTube’s embedded player (privacy-enhanced mode).
How to replace screen on Acer Chromebook 15. Installation step-by-step guide.
ChannelLaptopScreen.comDescription from the creator
LaptopScreen.com/
laptopscreen.com/English/brand/Acer/
This is an Acer Chromebook 15 screen replacement guide.
For the replacement process we’ll need the following tools:
- plastic pick
- small phillips screwdriver
To begin shut down the laptop. Press and hold the power button then disconnect the power cord.
Now we can remove the bezel. Unsnap the rear hinge tabs first. Close the laptop and turn it sideways.
Insert the plastic pick in the rear hinge slot and move it along the side unsnapping the tabs.
Open the laptop again and insert the plastic pick between the bezel and the back cover. Move it along
the top edge unsnapping the tabs one by one. Move the pick around the perimeter opening the bezel
from the sides. Start removing the bezel by pulling the inner edge off the glass. Go around the perimeter.
Proceed to the bottom side. Gently pull the plastic away from the screen. Put the bezel aside.
Using phillips screwdriver remove four screws holding the LCD panel. Two screws on the top
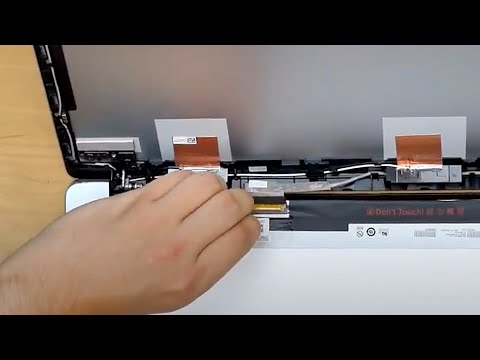
and two screws at the bottom. Place the LCD panel on the keyboard. The video cable might be glued
to the back cover. Gently separate it. Peel off the clear tape securing the video connector. Disconnect
the video cable. Discard the old panel.
Take the new LCD screen and place it on the keyboard. Reconnect the video cable and secure it
with clear tape.
CAUTION! It is very important not to force any connectors. As well you
must not twist or slant the connector when plugging it in.
Lift the screen up and align it with mounting holes. Replace the phillips screws. Two on top and
two at the bottom.
Replace the bezel. Press at the bottom corners then go around the perimeter snapping the tabs
back in place. Use one hand to support the back cover and press firmly along the hinge cover.
Close the laptop and turn it sideways and make sure that the hinge cover is fully closed.
Open the laptop. Reconnect the power cord and turn the laptop on. If the start up graphics appears
the LCD screen is installed correctly, and we are done!
laptopscreen.com/English/brand/Acer/
This is an Acer Chromebook 15 screen replacement guide.
For the replacement process we’ll need the following tools:
- plastic pick
- small phillips screwdriver
To begin shut down the laptop. Press and hold the power button then disconnect the power cord.
Now we can remove the bezel. Unsnap the rear hinge tabs first. Close the laptop and turn it sideways.
Insert the plastic pick in the rear hinge slot and move it along the side unsnapping the tabs.
Open the laptop again and insert the plastic pick between the bezel and the back cover. Move it along
the top edge unsnapping the tabs one by one. Move the pick around the perimeter opening the bezel
from the sides. Start removing the bezel by pulling the inner edge off the glass. Go around the perimeter.
Proceed to the bottom side. Gently pull the plastic away from the screen. Put the bezel aside.
Using phillips screwdriver remove four screws holding the LCD panel. Two screws on the top
and two screws at the bottom. Place the LCD panel on the keyboard. The video cable might be glued
to the back cover. Gently separate it. Peel off the clear tape securing the video connector. Disconnect
the video cable. Discard the old panel.
Take the new LCD screen and place it on the keyboard. Reconnect the video cable and secure it
with clear tape.
CAUTION! It is very important not to force any connectors. As well you
must not twist or slant the connector when plugging it in.
Lift the screen up and align it with mounting holes. Replace the phillips screws. Two on top and
two at the bottom.
Replace the bezel. Press at the bottom corners then go around the perimeter snapping the tabs
back in place. Use one hand to support the back cover and press firmly along the hinge cover.
Close the laptop and turn it sideways and make sure that the hinge cover is fully closed.
Open the laptop. Reconnect the power cord and turn the laptop on. If the start up graphics appears
the LCD screen is installed correctly, and we are done!
About this tutorial
LaptopScreen.com published this 1:54 video tutorial on October 25, 2018. It has been watched 38,144 times on YouTube.
- Channel
- LaptopScreen.com
- Category
- Science & Technology
- Duration
- 1:54
- Published
- October 25, 2018
- Views
- 38,144
- Likes
- 140
Tags
Share
Further reading
-
How to Replace the Screen on an Acer Chromebook C710
laptop-lcd-screen.co.uk
However, contrary to popular belief, laptop screen replacement requires very little technical expertise. In fact, some of our customers have managed to replace their broken screen in just half an hour! Below, you'll fin…
-
ACER CHROMEBOOK 15 MANUAL Pdf Download | ManualsLib
manualslib.com
Page 7: Your Acer Chromebook Tour Your Acer Chromebook tour Now that you are done setting it up, let us show you around your new Acer Chromebook. Front view Icon Item Description Web camera for video communication. Webc…
-
Acer Chromebook 15 Manuals | ManualsLib
manualslib.com
Acer Chromebook 15 Pdf User Manuals. View online or download Acer Chromebook 15 Manual
This tutorial in other languages
- FRComment remplacer l'écran sur Acer Chromebook 15. Installation étape par étape.
- ESCómo reemplazar la pantalla de Acer Chromebook 15. Instalación guía paso a paso.
- PTComo substituir a tela em Acer Chromebook guia 15. A instalação passo-a-passo.
- ITCome sostituire schermo sul Chromebook Acer guida 15. L'installazione step-by-step.
- DEWie Bildschirm Acer Chrome 15. Die Installation Schritt-für-Schritt-Anleitung ersetzen.
- NLHoe kan ik het scherm te vervangen op de Acer Chromebook 15. Installatie stap-voor-stap handleiding.
- RUКак заменить экран на Acer Chromebook 15. Установка шаг за шагом руководства.
- PLJak wymienić ekran na Acer Chromebook krok po kroku przewodnika 15. Instalacja.
- JAAcerのChromebookの15.インストールのステップバイステップガイドで画面を置換する方法。
- ARكيفية استبدال الشاشة على أيسر جهاز Chromebook 15. تركيب دليل خطوة بخطوة.
- HIकैसे Acer Chromebook 15. स्थापना चरण-दर-चरण मार्गदर्शिका पर स्क्रीन को बदलने के लिए।
- IDBagaimana cara mengganti layar pada Acer Chromebook 15. Instalasi panduan langkah-demi-langkah.