Playback starts YouTube’s embedded player (privacy-enhanced mode).
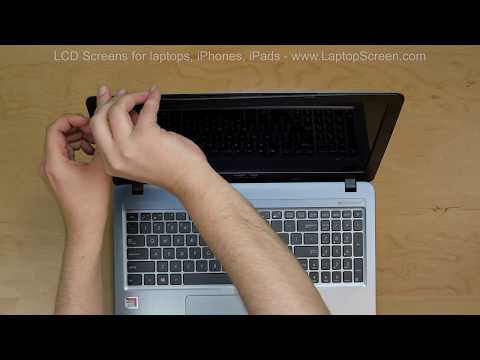
ASUS laptop screen replacement tutorial. ASUS X540B LCD installation step-by-step instructions.
ChannelLaptopScreen.comDescription from the creator
LaptopScreen.com/
laptopscreen.com/English/brand/ASUS/ - LCD screens for ASUS laptops from $34.99
This is a guide on replacing an LCD screen on the Asus X540B. To begin shut down the laptop. Disconnect the power cord.
First step is to remove the bezel that is held in place with two Phillips screws in the bottom corners.
The screws are covered with two plastic covers. Use a knife to remove the screw covers. 0:25
Remove the two Phillips screws holding the bezel. 0:28
Start removing the bezel. Carefully pull the plastic away from the screen by its inner edge unsnapping the plastic tabs underneath.
Start from the left side then go around the perimeter unsnapping the tabs underneath. Remove the bezel. 0:35
The LCD panel is held in place by four Phillips screws. Remove the two top screws. 0:49
The bottom screws are covered with a grounding tape. Peel off one side of the tape. Remove two bottom screws. 0:57
Place the LCD panel on the keyboard. The video cable is secured with a clear tape. Peel the tape off.
Gently slide the cable out. Remove the LCD panel. 1:10
Take the new LCD screen and place it on the keyboard. Align the video cable with the LCD's connector and using both hands gently slide the connector into the jack. Secure it with clear tape. 1:25
CAUTION! It is very important not to force any connectors. As well you must not twist or slant
the connector when plugging it in.
Lift the screen up and align it with mounting holes. Replace the two bottom screws, then two screws on the top. Use the grounding tape to cover two bottom screws. 1:44
Replace the bezel. Start at the bottom corners. Then go around the perimeter snapping the tabs underneath. 2:02
Replace the two Phillips screws at the bottom of the screen. 2:12
Replace the two plastic covers. Close the laptop and make sure that the bezel is snapped in at the bottom and near the hinges. 2:16
Reconnect the power cord. Press the power button. We are done! 2:28
laptopscreen.com/English/brand/ASUS/ - LCD screens for ASUS laptops from $34.99
This is a guide on replacing an LCD screen on the Asus X540B. To begin shut down the laptop. Disconnect the power cord.
First step is to remove the bezel that is held in place with two Phillips screws in the bottom corners.
The screws are covered with two plastic covers. Use a knife to remove the screw covers. 0:25
Remove the two Phillips screws holding the bezel. 0:28
Start removing the bezel. Carefully pull the plastic away from the screen by its inner edge unsnapping the plastic tabs underneath.
Start from the left side then go around the perimeter unsnapping the tabs underneath. Remove the bezel. 0:35
The LCD panel is held in place by four Phillips screws. Remove the two top screws. 0:49
The bottom screws are covered with a grounding tape. Peel off one side of the tape. Remove two bottom screws. 0:57
Place the LCD panel on the keyboard. The video cable is secured with a clear tape. Peel the tape off.
Gently slide the cable out. Remove the LCD panel. 1:10
Take the new LCD screen and place it on the keyboard. Align the video cable with the LCD's connector and using both hands gently slide the connector into the jack. Secure it with clear tape. 1:25
CAUTION! It is very important not to force any connectors. As well you must not twist or slant
the connector when plugging it in.
Lift the screen up and align it with mounting holes. Replace the two bottom screws, then two screws on the top. Use the grounding tape to cover two bottom screws. 1:44
Replace the bezel. Start at the bottom corners. Then go around the perimeter snapping the tabs underneath. 2:02
Replace the two Phillips screws at the bottom of the screen. 2:12
Replace the two plastic covers. Close the laptop and make sure that the bezel is snapped in at the bottom and near the hinges. 2:16
Reconnect the power cord. Press the power button. We are done! 2:28
About this tutorial
LaptopScreen.com published this 2:37 video tutorial on April 13, 2020. It has been watched 153,720 times on YouTube.
- Channel
- LaptopScreen.com
- Category
- Science & Technology
- Duration
- 2:37
- Published
- April 13, 2020
- Views
- 153,720
- Likes
- 777
Tags
Share
This tutorial in other languages
- FRordinateur portable ASUS tutoriel de remplacement de l'écran. ASUS X540B instructions étape par étape l'installation LCD.
- ESASUS portátil de reemplazo de pantalla de prácticas. ASUS X540B instalación LCD paso a paso las instrucciones.
- PTASUS laptop tutorial substituição da tela. instalação LCD passo-a-passo as instruções ASUS X540B.
- ITASUS computer portatile sostituzione dello schermo tutorial. ASUS X540B installazione LCD passo-passo le istruzioni.
- DEASUS Laptop-Bildschirm Ersatz-Tutorial. ASUS X540B LCD Installation Schritt-für-Schritt-Anleitung.
- NLASUS laptop scherm vervangen tutorial. ASUS X540B LCD installatie stap-voor-stap instructies.
- RUASUS ноутбук замена экрана учебник. ASUS X540B установка LCD шаг за шагом инструкции.
- PLASUS laptop poradnik wymiana ekranu. ASUS X540B instalacyjne LCD krok po kroku instrukcje.
- JAASUSノートパソコンの画面の交換のチュートリアル。 ASUS X540B LCDのインストール手順。
- ARASUS الكمبيوتر المحمول استبدال الشاشة البرنامج التعليمي. ASUS X540B تركيب LCD خطوة بخطوة تعليمات.
- HIASUS लैपटॉप स्क्रीन प्रतिस्थापन ट्यूटोरियल। ASUS X540B एलसीडी स्थापना कदम दर कदम निर्देश।
- IDASUS laptop pengganti layar tutorial. ASUS X540B instalasi LCD petunjuk langkah-demi-langkah.