Playback starts YouTube’s embedded player (privacy-enhanced mode).
How to Transfer DVDs to Your iPod
ChannelHowcastDescription from the creator
Full Playlist: youtube.com/playlist?list=PLLALQuK1NDrjsCtybZK6…
-
-
Watch more How to Use an IPod videos: howcast.com/videos/396561-How-to-Transfer-DVDs-…
Wish you could take your favorite movies and TV shows everywhere you take your music? You can, if you follow these steps to transfer DVDs to your iPod.
Step 1: Download Handbrake
Download a video transcoder for free. Install the program by following the software's prompts.
Tip
There are many available that are compatible with Mac OS X and Windows XP, Vista, or 7.
Step 2: Insert the DVD
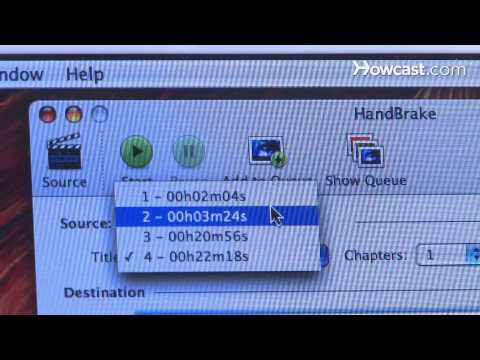
Insert your DVD and open the video transcoder program. Select your DVD from the Source menu.
Tip
If your computer's DVD player automatically starts, close the player, but leave the DVD in the computer.
Step 3: Select presets
Select a preset on the right of the screen. Transcoder programs provide presets for AppleTV, the iPod, QuickTime, and more. In addition, customize and save your created presets.
Step 4: Start ripping
Start ripping the DVD by pressing the start button. The speed of the copying will vary depending on your DVD drive's speed. Either way, a status bar will pop up to let you know the progress.
Step 5: Add the video to iTunes
Add the video to iTunes by opening iTunes and dragging the file into your library. Once the video is in your library, connect your iPod and drag the file to your iPod. Now you can carry your bulky DVDs in your pocket and watch them anywhere.
Did You Know?
The 5th Generation iPod, also known as the Video iPod, was the first to include video and boasted a 2.5-inch screen for viewing.
-
-
Watch more How to Use an IPod videos: howcast.com/videos/396561-How-to-Transfer-DVDs-…
Wish you could take your favorite movies and TV shows everywhere you take your music? You can, if you follow these steps to transfer DVDs to your iPod.
Step 1: Download Handbrake
Download a video transcoder for free. Install the program by following the software's prompts.
Tip
There are many available that are compatible with Mac OS X and Windows XP, Vista, or 7.
Step 2: Insert the DVD
Insert your DVD and open the video transcoder program. Select your DVD from the Source menu.
Tip
If your computer's DVD player automatically starts, close the player, but leave the DVD in the computer.
Step 3: Select presets
Select a preset on the right of the screen. Transcoder programs provide presets for AppleTV, the iPod, QuickTime, and more. In addition, customize and save your created presets.
Step 4: Start ripping
Start ripping the DVD by pressing the start button. The speed of the copying will vary depending on your DVD drive's speed. Either way, a status bar will pop up to let you know the progress.
Step 5: Add the video to iTunes
Add the video to iTunes by opening iTunes and dragging the file into your library. Once the video is in your library, connect your iPod and drag the file to your iPod. Now you can carry your bulky DVDs in your pocket and watch them anywhere.
Did You Know?
The 5th Generation iPod, also known as the Video iPod, was the first to include video and boasted a 2.5-inch screen for viewing.
About this tutorial
Howcast published this 1:47 video tutorial on November 2, 2010. It has been watched 17,128 times on YouTube.
- Channel
- Howcast
- Category
- Science & Technology
- Duration
- 1:47
- Published
- November 2, 2010
- Views
- 17,128
- Likes
- 107
Tags
Share
This tutorial in other languages
- FRComment transférer des DVD sur votre iPod
- ESCómo transferir DVD a su iPod
- PTComo transferir DVDs para seu iPod
- ITCome trasferire DVD per il vostro iPod
- DESo übertragen Sie DVDs auf Ihren iPod
- NLHoe om dvd's op uw iPod
- RUКак перенести DVD-диски на Ваш IPOD
- PLJak przenieść DVD do iPoda
- JAあなたのiPodにDVDを転送する方法
- ARكيفية نقل أقراص الفيديو الرقمية لأجهزة أي بود الخاص
- HIआपका आइपॉड के लिए डीवीडी स्थानांतरण कैसे
- IDCara Transfer DVD ke iPod Anda