Playback starts YouTube’s embedded player (privacy-enhanced mode).
How to Use Flickr
ChannelHowcastDescription from the creator
Great Amazon Must Haves for Digital Photographers:
Adobe Photoshop Lightroom 6: amzn.to/1XhdDsk
Professional Cleaning Set for DSLR Cameras: amzn.to/1L5NuU1
Think Tank DSLR Battery Holder: amzn.to/1IKmh7J
Joby GP8-BHEN GorillaPod Focus with Ballhead X bundle: amzn.to/1LV3RIK
Case Logic SLRC-206 SLR Camera Backpack: amzn.to/1fVAyHE
Transcend USB 3.0 Super Speed Multi-Card Reader: amzn.to/1EzCmSf
Watch more Digital Photography 101 videos: howcast.com/videos/2550-How-to-Use-Flickr
Want to share your photos faster than a speeding modem? Click on Flickr and let the "oohing" and "ahhhing" begin.
Step 1: Go to flickr.com
Go to www.flickr.com and click 'Create Your Account.'
Step 2: Make a Yahoo! ID
At the next page, sign up for a free a Yahoo! ID or sign in if you already have one.
Step 3: Create your Flickr account
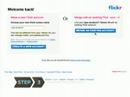
You’re now on an account creation page, with two options, either to merge this Yahoo! ID with an existing Flickr account or create a new account. Click create new account.
Tip
At this point, you can also change your username to differ from your Yahoo! ID, if you choose.
Step 4: View your main profile page
From your new main page, you can now upload your photos, change innumerable preferences, edit a profile, and much more.
Step 5: Choose some photos to upload
Choose some photos you wish to upload. Do this by clicking the 'Choose Photos' link, which will pop up a file browser to choose from. Select a photo.
Tip
If these are private photos for only those with a password to see, click the 'Private' radio button and follow the steps to protect your photos from viewing.
Step 6: Add as many photos as you want
Click 'Add More' if you wish to add more photos.
Step 7: Click upload photos when done
Click 'Upload Photos' when you are finished selecting all your photos.
Step 8: Title and describe your photos
Once the photos have been uploaded, click 'Describe Your Photos' to add a titles, descriptions, and tags. When you’re finished, click 'Save This Batch.'
Step 9: Repeat process
You have now stored photos online with Flickr. Repeat this process each time you wish to add photos to your collection.
Step 10: Share your photos
Share your photos by giving friends and family the link in the address bar from your homepage on Flickr.
Did You Know?
Flickr started as a tool for an online gaming site that let players share photos with each other—but it was so successful that the game itself was abandoned.
Adobe Photoshop Lightroom 6: amzn.to/1XhdDsk
Professional Cleaning Set for DSLR Cameras: amzn.to/1L5NuU1
Think Tank DSLR Battery Holder: amzn.to/1IKmh7J
Joby GP8-BHEN GorillaPod Focus with Ballhead X bundle: amzn.to/1LV3RIK
Case Logic SLRC-206 SLR Camera Backpack: amzn.to/1fVAyHE
Transcend USB 3.0 Super Speed Multi-Card Reader: amzn.to/1EzCmSf
Watch more Digital Photography 101 videos: howcast.com/videos/2550-How-to-Use-Flickr
Want to share your photos faster than a speeding modem? Click on Flickr and let the "oohing" and "ahhhing" begin.
Step 1: Go to flickr.com
Go to www.flickr.com and click 'Create Your Account.'
Step 2: Make a Yahoo! ID
At the next page, sign up for a free a Yahoo! ID or sign in if you already have one.
Step 3: Create your Flickr account
You’re now on an account creation page, with two options, either to merge this Yahoo! ID with an existing Flickr account or create a new account. Click create new account.
Tip
At this point, you can also change your username to differ from your Yahoo! ID, if you choose.
Step 4: View your main profile page
From your new main page, you can now upload your photos, change innumerable preferences, edit a profile, and much more.
Step 5: Choose some photos to upload
Choose some photos you wish to upload. Do this by clicking the 'Choose Photos' link, which will pop up a file browser to choose from. Select a photo.
Tip
If these are private photos for only those with a password to see, click the 'Private' radio button and follow the steps to protect your photos from viewing.
Step 6: Add as many photos as you want
Click 'Add More' if you wish to add more photos.
Step 7: Click upload photos when done
Click 'Upload Photos' when you are finished selecting all your photos.
Step 8: Title and describe your photos
Once the photos have been uploaded, click 'Describe Your Photos' to add a titles, descriptions, and tags. When you’re finished, click 'Save This Batch.'
Step 9: Repeat process
You have now stored photos online with Flickr. Repeat this process each time you wish to add photos to your collection.
Step 10: Share your photos
Share your photos by giving friends and family the link in the address bar from your homepage on Flickr.
Did You Know?
Flickr started as a tool for an online gaming site that let players share photos with each other—but it was so successful that the game itself was abandoned.
About this tutorial
Howcast published this 2:05 video tutorial on November 6, 2008. It has been watched 90,221 times on YouTube.
- Channel
- Howcast
- Category
- Science & Technology
- Duration
- 2:05
- Published
- November 6, 2008
- Views
- 90,221
- Likes
- 141