Playback starts YouTube’s embedded player (privacy-enhanced mode).
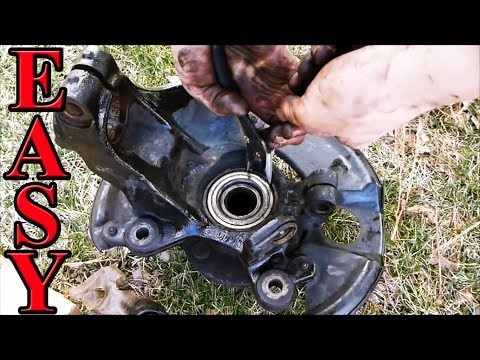
How to Change a Wheel Bearing (short and fast version)
ChannelChrisFixIn brief
This quick guide shows how to replace a pressed wheel bearing on a Ford Windstar, with steps adaptable to similar vehicles. You’ll remove key components, press out the old bearing, install a new one, and reassemble—saving hundreds on shop labor. Best for hands-on DIYers with basic tools.
Key steps
- Loosen the axle nut and remove the tire, brake caliper, and rotor
- Detach bolts from the lower control arm, tie rod, and strut
- Remove the steering knuckle and press out the old bearing/hub assembly
- Press in the new bearing and hub/spindle assembly
- Reinstall the knuckle, brake components, and torque the axle nut
Questions & answers
Is this method for front or rear wheel drive?
The video focuses on a rear-wheel-drive Ford Windstar, but notes front-wheel-drive steps are linked.
Chapters
Description from the creator
Learn to replace a pressed wheel bearing in a Ford, specifically a 95 Ford Windstar, but this method will be similar for all pressed bearing vehicles.
The main steps are to take off the spindle nut, tire, brake caliper, and rotor. Then remove the bolts from the lower control arm ball joint, tie rod, and strut. Remove the steering knuckle, then press out the bearing and hub/spindle. Then press in your new bearing and hub/spindle. This job is a little more complex but can still be easily done by any amateur mechanic. You will save $400-1000 depending on your vehicle.
Here is how to Replace a Hub Bearing Assembly (rear wheel drive): youtube.com/watch?v=04AyCYIUEWQ
Here is how to Replace a Hub Bearing Assembly (front wheel drive): youtube.com/watch?v=fe_WtKIKlYA
Bearing Press Tool: amzn.to/41RLuiF
**If the video was helpful, remember to give it a "thumbs up" and consider subscribing. New videos every Thursday**
0:00 Intro
0:16 Axle nut loosening
0:42 Brake system removal
2:20 Axle removal
3:35 Knuckle removal
5:02 Pressing out the old bearing and hub
6:23 New bearing install
7:46 New hub install
8:57 Knuckle reinstall
10:44 Brake reinstall
11:18 Axle nut torque
-As an Amazon Associate I earn from qualifying purchases.
-Website: ChrisFixed.com
-Facebook: facebook.com/chrisfix8
-Twitter: twitter.com/ChrisFixed
-Instagram: instagram.com/chrisfixit
-Subscribe Here: youtube.com/subscription_center?add_user=paintb…
-YouTube Channel: youtube.com/ChrisFix
Disclaimer:
Due to factors beyond the control of ChrisFix, I cannot guarantee against improper use or unauthorized modifications of this information. ChrisFix assumes no liability for property damage or injury incurred as a result of any of the information contained in this video. Use this information at your own risk. ChrisFix recommends safe practices when working on vehicles and or with tools seen or implied in this video. Due to factors beyond the control of ChrisFix, no information contained in this video shall create any expressed or implied warranty or guarantee of any particular result. Any injury, damage, or loss that may result from improper use of these tools, equipment, or from the information contained in this video is the sole responsibility of the user and not ChrisFix.
The main steps are to take off the spindle nut, tire, brake caliper, and rotor. Then remove the bolts from the lower control arm ball joint, tie rod, and strut. Remove the steering knuckle, then press out the bearing and hub/spindle. Then press in your new bearing and hub/spindle. This job is a little more complex but can still be easily done by any amateur mechanic. You will save $400-1000 depending on your vehicle.
Here is how to Replace a Hub Bearing Assembly (rear wheel drive): youtube.com/watch?v=04AyCYIUEWQ
Here is how to Replace a Hub Bearing Assembly (front wheel drive): youtube.com/watch?v=fe_WtKIKlYA
Bearing Press Tool: amzn.to/41RLuiF
**If the video was helpful, remember to give it a "thumbs up" and consider subscribing. New videos every Thursday**
0:00 Intro
0:16 Axle nut loosening
0:42 Brake system removal
2:20 Axle removal
3:35 Knuckle removal
5:02 Pressing out the old bearing and hub
6:23 New bearing install
7:46 New hub install
8:57 Knuckle reinstall
10:44 Brake reinstall
11:18 Axle nut torque
-As an Amazon Associate I earn from qualifying purchases.
-Website: ChrisFixed.com
-Facebook: facebook.com/chrisfix8
-Twitter: twitter.com/ChrisFixed
-Instagram: instagram.com/chrisfixit
-Subscribe Here: youtube.com/subscription_center?add_user=paintb…
-YouTube Channel: youtube.com/ChrisFix
Disclaimer:
Due to factors beyond the control of ChrisFix, I cannot guarantee against improper use or unauthorized modifications of this information. ChrisFix assumes no liability for property damage or injury incurred as a result of any of the information contained in this video. Use this information at your own risk. ChrisFix recommends safe practices when working on vehicles and or with tools seen or implied in this video. Due to factors beyond the control of ChrisFix, no information contained in this video shall create any expressed or implied warranty or guarantee of any particular result. Any injury, damage, or loss that may result from improper use of these tools, equipment, or from the information contained in this video is the sole responsibility of the user and not ChrisFix.
About this tutorial
ChrisFix published this 12:14 video tutorial on November 10, 2013. It has been watched 3,437,447 times on YouTube.
- Channel
- ChrisFix
- Category
- Autos & Vehicles
- Duration
- 12:14
- Published
- November 10, 2013
- Views
- 3,437,447
- Likes
- 30,857
Tags
Share
This tutorial in other languages
- FRComment changer un roulement de roue (version courte et rapide)
- ESCómo cambiar un cojinete de rueda (versión corta y rápida)
- PTComo alterar um rolamento de roda (versão curta e rápida)
- ITCome modificare un cuscinetto ruota (versione corta e veloce)
- DEWie Ändern eines Radlagers (kurze und schnelle Version)
- NLHoe maak je een Wiellager (korte en snelle versie)
- RUКак изменить подшипник колеса (короткая и быстрая версия)
- PLJak zmienić łożyska koła (wersja krótka i szybka)
- JAホイールベアリング(短期および高速バージョン)を変更する方法
- ARكيفية تغيير عجلة تحمل (مقطعة وسريع)
- HIकैसे एक पहिया असर (लघु और तेजी संस्करण) को परिवर्तित करने के लिए
- IDCara Mengubah Bantalan roda (versi pendek dan cepat)